3. Creating Subcollections
When
a collection has one or more subcollections associated with it, any
actions (such as advertisements) performed on the collection can also
be performed on the subcollection. However, each subcollection is still
its own collection and as such is governed by its own membership rules.
Placing them as subcollections within a new collection provides a way
to link different collections rather than a method of nesting
collections.
Suppose a particular business
unit can be further subdivided into smaller units. Management
Information Services (MIS), for example, might be divided into various
support areas—say, PC Support, Network Support, and Server Support.
Let’s say that you create a collection for each of these groups—MIS, PC
Support, Network Support, and Server Support. The last three
collections could become subcollections of the MIS collection. This
reclassification enables you to advertise packages to the MIS
collection, which includes the members of the three subcollections. If
you don’t need to hit all the collections, you can opt not to when you
create the advertisement. And you still have the ability to advertise
to each collection directly.
To link one collection to another, thus creating a subcollection, follow these steps:
1. | Navigate to the Collections folder in the SMS Administrator Console and expand it.
|
2. | Right-click
the collection that you want to associate with a subcollection, choose
New from the Context menu, and then choose Link To Collection to
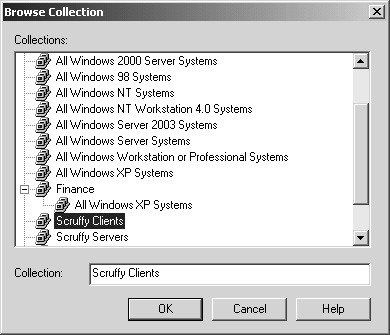
display the Browse Collection dialog box, shown in Figure 13.

|
3. | The
Browse Collection dialog box contains a list of all the available
collections. Select the collection you want to add as a subcollection
and then click OK.
|
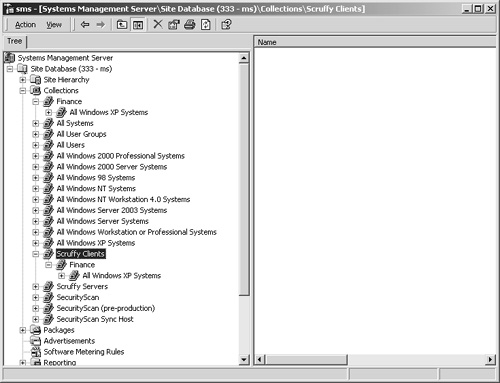
You
can easily view which collections have subcollections and what those
subcollections are by expanding the collection entries in the SMS
Administrator Console, shown in Figure 14.
In this example, the Scruffy Clients collection has a subcollection
named Finance that itself has a subcollection named All Windows XP
Systems, which is one of the default collections.

Tip
You can view subcollections of a collection by clicking the plus sign (+) preceding the collection name. |
4. Unlinking Subcollections
If you need to “unlink” a subcollection to reorganize your collection structure, follow these steps:
1. | Navigate to the Collections folder, expand it, and select the subcollection you want to delete.
|
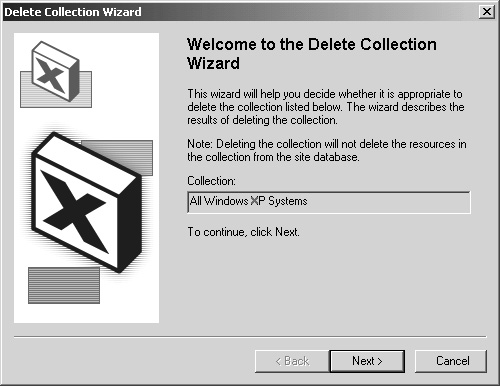
2. | Right-click
the subcollection and then choose Delete from the context menu to
initiate the Delete Collection Wizard, as shown in Figure 15.

|
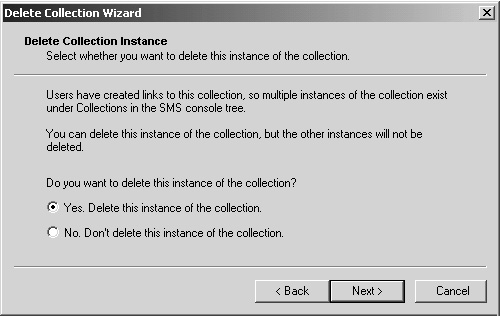
3. | Verify the subcollection name and then click Next to display the Delete Collection Instance page, as shown in Figure 16.

|
4. | Select
Yes to delete this instance of the collection. Note that you’ll be
deleting only this instance of the collection. You won’t delete any
other instance of the same collection that appears elsewhere in the
Collections folder.
|
5. | Click
Next and then click Finish. The Collections folder will be refreshed,
and the subcollection will no longer be displayed or linked.
|
Now
that we’ve created and deleted collections and subcollections, let’s
take a look at how we can keep them up-to-date through SMS.