If drawing basic shapes is like making a coloring
book, then changing fill and stroke is the fun part. You get to color in
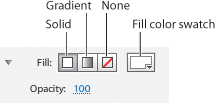
the pictures. Flash Catalyst lets you choose between no fill
(transparent), solid fill, and gradients that fade between one or more
colors at various angles. Even the stroke (outline) can be a gradient if
it has enough weight. Weight refers to the width or thickness of the
stroke. All of these changes are made in the Common section of the
Properties panel.
Change the fill color
When you first start Flash
Catalyst, new shapes are created with a solid white fill. But as soon as
you change the fill color of a shape, any new shape that you draw takes
on the most recent fill color that you’ve applied.
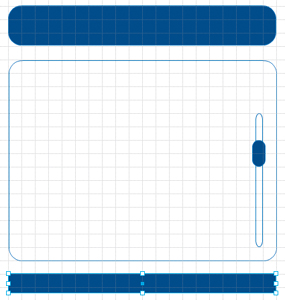
1. | Using the Select tool (dark arrow), click the Panel Background rectangle (the largest rectangle) to select it.
The properties for the selected shape appear in the Properties panel. The fill color is solid white.
|
2. | Select the Panel Header rectangle.
|
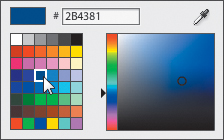
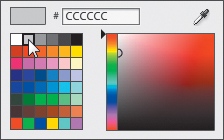
3. | In the Properties panel, click the Fill color swatch to open the Color Picker.
In the Color Picker, you can select a color in the palette or enter a
hexadecimal color value. For additional colors, drag the slider
(right-pointing arrow) up or down to select a new color range and then
drag in the color field to select a new color. You can also sample a
color in the application by using the Eyedropper tool.
|
4. | In the color palette, select blue #2B4381.
|
5. | Select the Header Overlay and Thumb rectangles.
Tip
Shift-click to select
multiple objects in the artboard, or contiguous rows in the Layers
panel. But Ctrl/Command-click to select noncontiguous rows in the Layers
panel.
|
6. | In the Properties panel, click the Fill color swatch to open the Color Picker, and select the Eyedropper tool.
|
7. | With the Eyedropper tool selected, move the pointer over the blue Panel Header rectangle and click to sample its color.
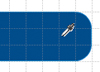
The Color Picker disappears and the blue color you sampled is applied to the Header Overlay and Thumb shapes.
|
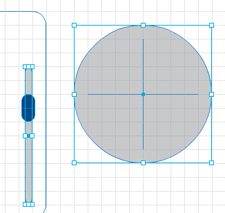
8. | Select the Track rectangle and the Ellipse.
|
9. | In the Properties panel, click the Fill color swatch and select light gray #CCCCCC.
The scroll bar track and the Ellipse are light gray.
|
The
colors you see on your computer monitor are produced using various
combinations of red, green, and blue (RGB). You may have noticed the
numbers in the Color Picker. These are referred to as hexadecimal color
codes. Hexadecimal color codes define the amounts of red, green, and
blue used to create a color. The levels of red, green, and blue are
measured using a numbering system that runs from 0 to 255. For example,
the color black is created by mixing 0 red, 0 green, and 0 blue. White
is represented by 255 red, 255 green, and 255 blue. Yellow is 255 each
of red and green, and 0 blue.
While RGB color values are
based on the decimal system (base 10), hexadecimal color values are
represented by a hexadecimal numbering system (base 16).
In the decimal system, when
you write 43 it means 4 tens and 3 ones. When you write 43 in
hexadecimal it means 4 sixteens and 3 ones. 43 in hexadecimal is (4x16) +
3 = 67.
In hexadecimal, A = 10, B = 11, C
= 12, and so on to F, which is 15. The highest possible two-digit
number in hexadecimal is FF. It means 15 sixteens and 15 ones, which is
255 (the most amount of any color).
Hexadecimal color codes always consist of a number sign (#) followed by a combination of six characters.
The first two digits determine how much red is in the color.
The middle two digits determine how much green is in the color.
The last two digits determine how much blue is in the color.
The code for black is #000000.
Colors containing RGB values
of FF contain the most amount of a color (255 or 100%). For example, the
hexadecimal value for white is #FFFFFF, which means it contains the
most amount of red, green and blue.
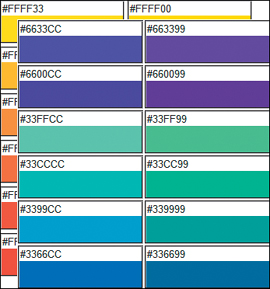
When specifying colors in a web
application, you can use hexadecimal values instead of RGB values. An
advantage of using hexadecimal codes to choose colors is that you can
limit your design’s color palette to colors that are considered safe for
viewing on the web. Web-safe colors consist of any three of the pairs
00, 33, 66, 99, CC, or FF in the hexadecimal range. For example, #FF9900
is a web-safe color, whereas #39C6C5 does not appear in the web-safe
color palette.
The importance of these
safe colors has been reduced dramatically over the years as display
monitors have become more capable of displaying many colors.