To allow for recoverability
of Lync Server and to ensure that information such as CDR records and IM
archives are available for long periods of time, regularly back up the
SQL databases associated with those functions.
There are many ways to back up SQL, including native
Windows Server 2008 backup, SQL-based jobs that output the DB into a
flat file, and third-party backup solutions that support SQL 2008 R2.
Backing Up SQL through Windows Server 2008
Windows Server 2008 and Windows Server 2008 R2
contain a native backup application called Windows Server Backup.
Because Windows Server Backup is not installed by default, it is
necessary to add this feature by performing the following steps:
1. | Click the Server Manager icon.
|
2. | In the left pane, click Features.
|
3. | In the right pane, click Add Features.
|
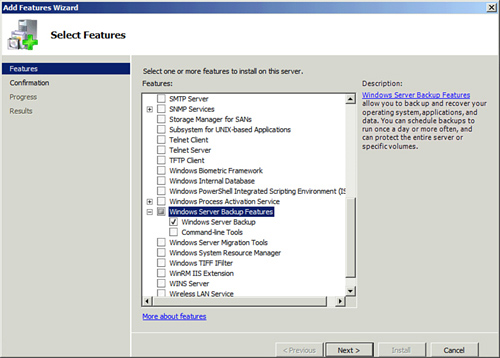
4. | Scroll down to Windows Server Backup Features, and select the check box to its left as shown in Figure 1. Click Next.
|
5. | Click Install.
|
6. | When the installation is completed successfully, click Close.
|
7. | Close Server Manager.
|
Now that the Windows Server Backup feature is installed, it can be used to back up SQL:
1. | Click Start, Administrative Tools, and Windows Server Backup.
|
2. | In the Action pane at the far right, click Backup Once.
|
3. | In the Backup Options Wizard, choose either Scheduled backup options to repeat previous settings or choose Different options to make a backup with different options. Click Next.
Note
If this is the first time Windows Server Backup is used, the Scheduled backup options choice is not available.
|
4. | When
prompted, choose either a Full Server or Custom backup. If you choose
Custom, be sure to include the drive containing SQL. Click Next.
|
5. | Choose the destination type, either local drives or a remote share. Click Next.
|
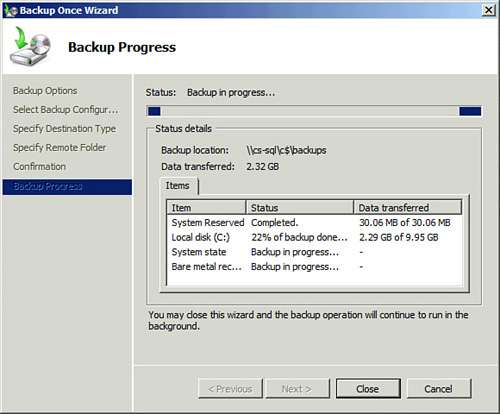
6. | Specify the remote location and click Backup, which will start a backup as shown in Figure 2.
Note
If you do not have rights to the target location, click Next and then you will be prompted for credentials. Enter them and click OK. Then click Backup.
|
7. | When the backup is completed, click Close.
|
Backing Up SQL through SQL Server Management Studio
Another
way to back up SQL is by using the native functions of SQL 2008 R2 to
create a flat file backup that can be picked up by another backup
application. This is especially useful if an environment already has a
centralized backup infrastructure that doesn’t support SQL natively.
To back up SQL through the SQL Server Management Studio, perform the following steps:
1. | Click Start, All Programs, Microsoft SQL Server 2008 R2, SQL Server Management Studio.
|
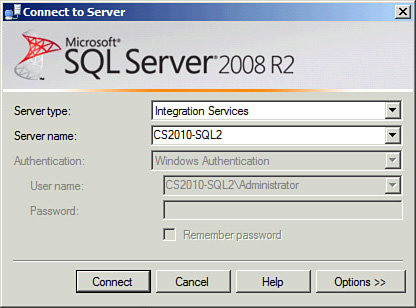
2. | Connect
to the appropriate instance of the Microsoft SQL Server Database Engine
and provide the necessary credentials, as shown in Figure 3.
|
3. | Expand Databases in the left pane.
|
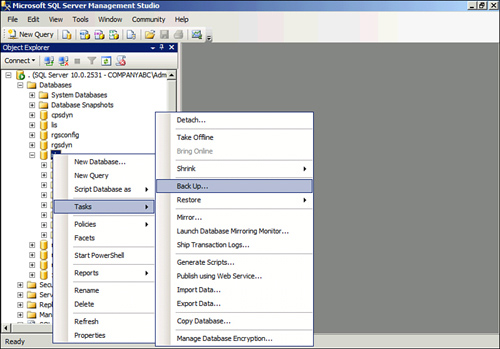
4. | Right-click the database you want to back up, choose Tasks, and click Back Up as shown in Figure 4.
|
5. | Verify the name of the database you selected and choose a backup type.
Tip
In step 5, define a backup destination and optionally
set an expiration for the backup set. You can alter the name of the
backup set if desired. Also enter a meaningful description of the
backup.
|
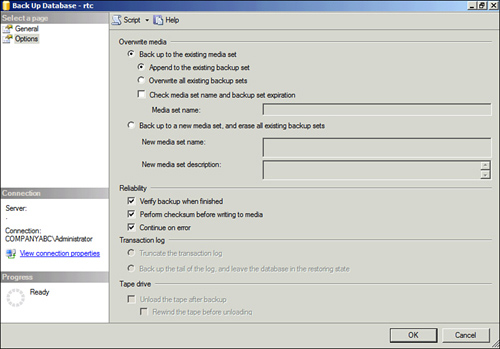
6. | Click Options in the left pane to view additional options. Set these as desired as shown in Figure 5 and click OK.
Note
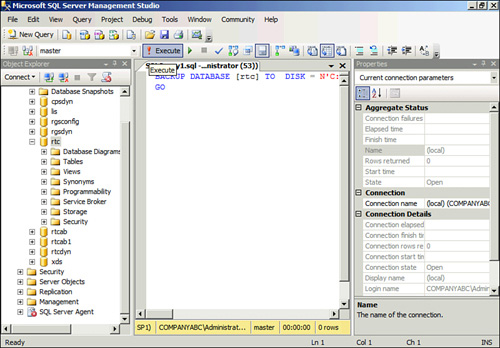
SQL
administrators have the option to click Script on the Backup Wizard
after the job is configured to have the system create a backup script
that can be called again in the future. This script can be executed
through SQL Server Management Studio, as shown in Figure 6.
|
7. | When the backup completes, click OK.
|
The following is a sample backup script created with the Management Studio:
BACKUP DATABASE [rtc] TO DISK = N'C:\Program Files\Microsoft SQL
Server\MSSQL10.MSSQLSERVER\MSSQL\Backup\rtc.bak' WITH DIFFERENTIAL ,
NOFORMAT, NOINIT, NAME = N'rtc-Differential Database Backup', SKIP,
NOREWIND, NOUNLOAD, STATS = 10
GO