IT tutorials
 
Applications Server
 

Sharepoint 2013 : Customizing a SharePoint Site - Modify the Top or Left Navigation Bar (part 3) - Use Structural Navigation to Add a Link to the Top or Left Navigation Bar

12/3/2013 2:41:28 AM
- Free product key for windows 10
- Free Product Key for Microsoft office 365
- Malwarebytes Premium 3.7.1 Serial Keys (LifeTime) 2019

Use Structural Navigation to Add a Link to the Top or Left Navigation Bar

To add a link to either navigation bar, after selecting to use Structural Navigation, scroll down and locate the Structural Navigation: Editing and Sorting section of the page, and click the Global Navigation node (for the top navigation bar) or Current Navigation node (for the left navigation bar) in the Navigation Editing and Sorting box. Click the Add Link option in the menu. This selection opens a dialog where you can specify the link to be added (see Figure 5).

Image

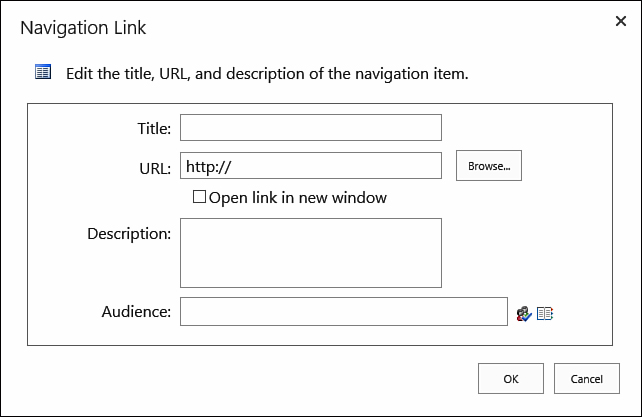
FIGURE 5 Adding a link to a navigation bar.

In the Title box, you can specify what text the link displays to the user. Also, you can either type in a link or browse to a page in the site by using the Browse button. You can also specify whether the link is opened in a new window when clicked. In sites where it is enabled, you can choose an audience for the link, specifying who should see the link.

Add a Heading to the Top or Left Navigation Bar

In a publishing site, you can add headings to both the top and left navigation bars. A heading in a publishing site can be a link or just text that can have other links under it.


Note

In a publishing site the heading doesn’t have to be a link. Instead, a heading can just be a container for links, without allowing users to click it in the navigation bar.


To add a heading, simply click the Global Navigation node (for the top navigation bar) or Current Navigation node in the Navigation Editing and Sorting box, and then click the Add Heading button in the menu. The dialog that pops up is the same as the one for adding a link (refer to Figure 5), but unlike with adding a link, in this case you can keep the URL setting empty if you don’t want the heading to be a link.

Edit a Link or a Heading in the Top or Left Navigation Bar

To edit a link or heading from either navigation bar, click the link or heading in the Navigation Editing and Sorting box, and then click the Edit button on the toolbar. The dialog for the link’s setting opens, allowing you to specify how this link should behave (refer to Figure 5).

Remove a Link from the Top or Left Navigation Bar

To remove a link from either navigation bar, click the link in the Navigation Editing and Sorting box, and then click the Delete button on the toolbar.

Change Which Heading a Link Is Under

To select the heading for a link in a publishing site, move the link up or down in the Navigation Editing and Sorting box until it is under the heading you want. Select the link, and then use the Move Up and Move Down buttons to move the link in or out of headings.


Note

You can have a link exist in the root (not under a heading). Simply move the link to be under either Current Navigation or Global Navigation.


Others
 
- Sharepoint 2013 : Customizing a SharePoint Site - Modify the Top or Left Navigation Bar (part 2) - Modify the Top or Left Navigation Bar in a Publishing Site
- Sharepoint 2013 : Customizing a SharePoint Site - Modify the Top or Left Navigation Bar (part 1) - Modify the Top or Left Navigation Bar in a Non-Publishing Site
- Sharepoint 2013 : Customizing a SharePoint Site - Change the Home Page of a Site
- Sharepoint 2013 : Customizing a SharePoint Site - Change the Look of a Site
- Sharepoint 2013 : Customizing a SharePoint Site - Change the Name, Description, Icon, or URL of a Site
- Sharepoint 2013 : Customizing a SharePoint Site - Open the Site Settings Page
- Windows Small Business Server 2011 : Managing Group Policies (part 2) - Order of Inheritance, Order of Implementation
- Windows Small Business Server 2011 : Managing Group Policies (part 1)
- Exchange Server 2013 : The Exchange Management Shell - EMS basics (part 7) - Execution policies, Profiles
- Exchange Server 2013 : The Exchange Management Shell - EMS basics (part 6) - Bulk updates, Calling scripts
 
 
Top 10
 
- Microsoft Visio 2013 : Adding Structure to Your Diagrams - Finding containers and lists in Visio (part 2) - Wireframes,Legends
- Microsoft Visio 2013 : Adding Structure to Your Diagrams - Finding containers and lists in Visio (part 1) - Swimlanes
- Microsoft Visio 2013 : Adding Structure to Your Diagrams - Formatting and sizing lists
- Microsoft Visio 2013 : Adding Structure to Your Diagrams - Adding shapes to lists
- Microsoft Visio 2013 : Adding Structure to Your Diagrams - Sizing containers
- Microsoft Access 2010 : Control Properties and Why to Use Them (part 3) - The Other Properties of a Control
- Microsoft Access 2010 : Control Properties and Why to Use Them (part 2) - The Data Properties of a Control
- Microsoft Access 2010 : Control Properties and Why to Use Them (part 1) - The Format Properties of a Control
- Microsoft Access 2010 : Form Properties and Why Should You Use Them - Working with the Properties Window
- Microsoft Visio 2013 : Using the Organization Chart Wizard with new data
Technology FAQ
- Is possible to just to use a wireless router to extend wireless access to wireless access points?
- Ruby - Insert Struct to MySql
- how to find my Symantec pcAnywhere serial number
- About direct X / Open GL issue
- How to determine eclipse version?
- What SAN cert Exchange 2010 for UM, OA?
- How do I populate a SQL Express table from Excel file?
- code for express check out with Paypal.
- Problem with Templated User Control
- ShellExecute SW_HIDE
programming4us programming4us