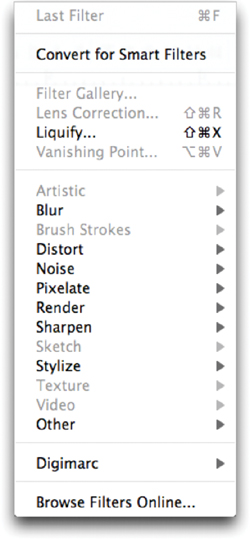
Filters
are among Photoshop’s most popular features. These specialized add-ons
can be used to boost productivity or add special effects. Photoshop
ships with over 100 built-in filters, and there is a rich array of
others available from third-party developers. Filters are so popular
that you’ll find more tutorials online than you could ever make it
through in a lifetime.
Photoshop almost did not ship
with filters, because many at Adobe thought they were too “gimmicky.”
However, John Knoll, co-creator of Photoshop, managed to “sneak” them
in. Those early execs were partially right, though: When used improperly
(or too often), filters can be gimmicky. Think of filters like spices:
When used properly, they can add to a meal, but if they’re overused,
they can ruin it—and no one can live on spices alone.
Both
built-in and third-party filters were run on this image. You would not
normally run as many filters on a single image, but you can see just how
diverse filters can be.

Filters Defined
The proper use of filters
can significantly extend Photoshop’s capabilities. There are filters
that perform important image-enhancement tasks for removing grain or
damage. Additionally, filters can be used for tasks like blurring and
sharpening image details.
Filters allow you to
achieve more quickly what otherwise would be time-consuming results;
they can even unlock options that could not be done with built-in tools.
Filters can often create stylized looks as well as enhance the lighting
of a photo.
By
definition, a filter must reside in Photoshop’s Plug-ins folder.
Besides the bundled filters that are installed with Photoshop, you’ll
find a few specialty filters on the Photoshop installer DVD or in the
Support area of Adobe’s Web site.
Preparing to Use Filters
Filters can save time and
in fact can even be fun to use. Before you rush in and try out every
filter in Photoshop, you need to make sure the image is ready to be
processed. Many filters are render intensive, so there’s no reason to
spend extra time on pixels you will be throwing away.
Fix Major Errors
Filtering mistakes only
draws further attention to them. Most important, make sure the image is
properly exposed. This can easily be accomplished using a Levels
adjustment (Image > Adjustments > Levels). .”
Set Your View
Filtering an image is
easiest when you can see all your pixels (otherwise, resampling occurs).
For best results, zoom in 100% or choose View > Actual Pixels. You
can also double-click on the magnifying glass in the Tools panel or
press Command+Option+0 (Ctrl+Alt+0). The Navigator panel is useful to
get a global overview and to move quickly around an image that is zoomed
in.
|
The wealth of third-party
Photoshop plug-ins is an important aspect of Photoshop’s customization.
These filters range in price from free to several hundred dollars. When
you’re looking for filters, a great starting place comes to mind: Photoshop User
magazine frequently reviews plug-ins. Members of the National
Association of Photoshop Professionals (NAPP) often get discounts as
well. Go to its site at www.photoshopuser.com and click the Magazine link to find out more.
|
Check the Color Mode
You’ll want to be sure that you
are working in RGB mode whenever possible (Image > Mode > RGB).
This will ensure that you have the most filters available. Very few
filters work in CMYK mode because CMYK conversion is supposed to be the
last step in processing an image. Only those filters that are meant for
print work have been optimized to work in CMYK mode.
If you have a CMYK image and
you need to convert it back to RGB mode for filtering, go ahead. You do
not have to worry about color shift when converting from CMYK to RGB.
Because CMYK has fewer colors than RGB, no information will be lost.
Check the Bit Depth
It’s
also important to keep an eye on bit depth when working with filters,
or your filter options will be limited. The vast majority of filters
only run on images in the 8-bit mode. In fact, as of Photoshop CS5, only
37 of the built-in Photoshop filters will work in 16-bit mode and only
20 of them work in 32-bit mode.
The filters designed to work at
higher bit depths are designed primarily for image enhancement (as
opposed to stylization). These filters are targeted for use with digital
photography applications. While a 16-bit image can be processed more
without showing banding or posterization, you may need to work in 8-bit
mode. If you can work in 16-bit mode, do so, but be prepared to lose
some functionality with filters and image adjustments. If a filter is
grayed out, it doesn’t work in the selected bit depth.
Note: Color-correct Before Filtering
An image should be color corrected properly before filtering. Remember: GIGO (garbage in = garbage out).