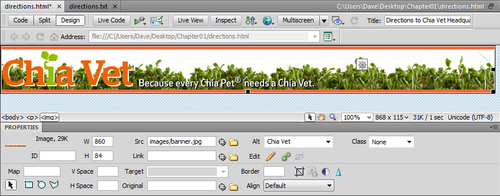
4. Phase 4: Adding Images and TextNow you’ll add the real meat of your web page: words and pictures. On the Insert bar’s Common tab, from the Image menu, select Image (see Figure 8). Alternatively, choose Insert→Image. Either way, the Select Image Source dialog box opens. (If you didn’t choose the Classic view from the Workspace Switcher—step 5 on Section 1—then the Insert bar is really the Insert panel and it appears in the right-hand group of panels.) 
Browse to the “images” folder in the Chapter01 folder, and then double-click the banner.jpg graphics file. The Image
Tag Accessibility window appears. Fresh out of the box and onto your
computer, Dreamweaver automatically turns on several accessibility
preferences. They’re designed to make your web pages more accessible to
people who use alternative devices for viewing websites—for example,
people with viewing disabilities who require special web browser
software, such as a screen reader, which literally reads the contents of
a web page out loud. Of course, images aren’t words, so they can’t be
spoken. But you can identify an image by adding what’s called an alt property. This is a text description of the graphic (an alternative to seeing the image) that’s useful not only for screen-reading software, but for people who deliberately turn off pictures in their web browsers so web pages load faster. (Search engines also look at alt properties when they index a page, so an accurate description can help your site’s search-engine rankings.)
Note: If
you don’t see the Image Tag Accessibility window, press Ctrl+U (⌘-U) to
open the Preferences panel, select the Accessibility category, turn on
the Images checkbox, and then click OK.
In the Alternate Text box, type Chia Vet. Click OK to add the image to the page. The banner picture appears at the top of the page, as shown in Figure 9.
A thin border appears around the image, indicating that you have it
selected. Note that the Property inspector changes to reflect the
properties of the selected item, the image in this case.
Note: You can also add or edit the alt text in the Property inspector.
Deselect the image by clicking anywhere else in the document window, or by pressing the right arrow key. Keep your keyboard’s arrow keys in mind—they’re a great way to deselect a page element and move your cursor into place to add text or more images. Press Enter to create a new paragraph. Type Directions to Chia Vet Headquarters. Notice
that the text is a dark color and uses the Tahoma (or, if you don’t
have Tahoma installed, the Geneva) font; you set these options earlier,
in the Page Properties dialog box. The Property inspector now displays text-formatting options.
Note: The
key called Enter on a Windows keyboard is named Return on most
Macintosh keyboards, and Enter on the others. So on the Mac, you press
either Return or Enter.
In the Property inspector, click the HTML button, and then, from the Format menu, choose Heading 1 (see Figure 10). The
text you just typed becomes big and bold—the default style for Heading
1. The Format menu offers a number of different paragraph types. Right
now, the text doesn’t stand out enough, so you’ll change its color next. 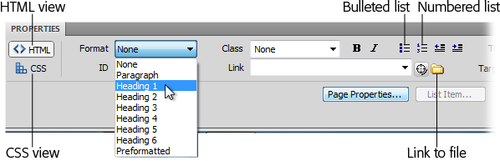
Select the text you just typed. You
can do so either by dragging carefully across the entire line or by
triple-clicking anywhere inside the line. (Unlike the Format menu, which
affects an entire paragraph at a time, many options in the Property inspector—like the one you’ll use next—apply only to text you’ve selected.) In
the Property inspector, click the CSS button to switch to CSS
properties. From the “Targeted rule” menu, choose New CSS Rule. In the
Color field of the Property inspector, replace the value that’s listed
with #EC6206 (or select a color using the color box, if you prefer), and then hit Enter (Return). The New CSS Rule window opens. This window lets you create new CSS styles. In this case, you’ll create a type of style, called a tag style, that Dreamweaver applies to any Heading 1 (or <h1> tag) on a page. From the top menu, select “Tag (redefines an HTML element).” Notice
that the field below that menu changes to display “h1.” This is called a
selector—and once you define its characteristics, it tells a web
browser how to display any text that is a level-1 heading (in other words, any text that has an <h1> tag applied to it). Don’t worry about any of the other settings in this window; you’ll learn the details soon. Click OK. Dreamweaver has just created a new CSS style. Now, wasn’t that easy? Next, you’ll add more text. Click to the right of the heading text to deselect it. Press Enter to create a new paragraph below the headline. Although
you may type a headline now and again, you’ll probably get most of your
text from word processing documents or emails from your clients, boss,
or coworkers. To get that text into Dreamweaver, you simply copy it from
the document and paste it into your web page. In the Files panel, double-click the file directions.txt to open it. This file is just plain text. No formatting, just words. To get it into your document, you’ll copy and paste it. Click anywhere inside the text, and then choose Edit→Select All, followed by Edit→Copy. Click the directions.html tab to return to your web page and, finally, choose Edit→Paste. You should see a few gold shields sprinkled among the text (circled in Figure 11). If you don’t, make sure you complete step 3 on Section 1.
These shields represent line breaks—spots where text drops to the next
line without creating a new paragraph. You’ll often see these in pasted
text. In this case, you need to remove them, and then create separate
paragraphs. 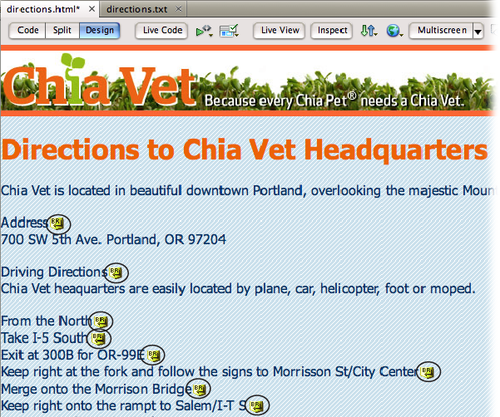
Click one of the gold shields, and then press Enter (Return). Repeat this for all the other gold shields in the document window. This
deletes the line break in the document (it actually deletes the HTML
tag <br>) and creates two paragraphs out of one. At this point,
the pasted text is just a series of paragraphs. To give it some
structure, you’ll add headings and two numbered lists. Click
in the paragraph with the text line “Address.” In the Property
inspector, click the HTML button, and then choose Heading 2 from the
Format menu. This step changes the paragraph to a headline—making it bigger and bolder. Repeat the last step for the lines of text “Driving Directions” and “For Geocachers” (near the end of the page). You
now have one Heading 1 and three Heading 2 headlines. To further
structure the contents of this page, you’ll add one last level of
headlines. Click
in the paragraph with the text line “From the North,” and then choose
Heading 3 in the Format menu. Repeat this step for the text “From the
South.” To add a bit more style to this page, you’ll format the Heading 3 headlines next. Triple-click
the headline “From the South” to select it. In the Property inspector,
click the CSS button. In the field next to the color box, replace the
color currently there with #779A00 and then hit Enter (Return). The New CSS Rule window appears again. Now you’ll create a style for formatting <h3> tags. From the top menu, select “Tag (redefines an HTML element).” You should see h3 in the middle field. Click OK. Notice
that the text changes to green. You’ll see that the headline “From the
North” is also green. The style you just created applies to all
<h3> tags. Triple-click one of the green headlines. In the Property inspector, click the I (for italic) button. This
italicizes the text and updates the h3 style you created earlier—that’s
why the other Heading 3 headline is now italicized, too. Select
the seven paragraphs under the neadline “From the North;” drag from the
start of the first paragraph down to the end of the seventh paragraph. You
can also drag up starting from the end of the last paragraph. Either
way, you’ve selected all seven paragraphs listing driving directions to
Chia Vet headquarters. O\In the Property inspector, click the HTML button, and then click the Ordered List button (see Figure 1-26). The paragraphs turn into a single, step-by-step, numbered list. You’ll do the same for the other set of directions. Repeat steps 22 and 23 for the six paragraphs below the headline “From the South.” Now
you see two numbered lists (called “ordered lists” in HTML-speak).
Finally, you’ll highlight the company name where it appears in the text. Near the top of the page, select “Chia Vet” at the beginning of the sentence that starts with “Chia Vet is located in….” You’ll make the name bold. Make sure you have the HTML button pressed in the Property inspector, and then click the B button. The
text changes appearance but the New CSS Rule window doesn’t appear.
Even though you find the B (for bold) button on both the HTML and CSS
views of the Property inspector, they do different things. When you
select the B button in HTML mode, Dreamweaver inserts the HTML <strong>
tag—used to “strongly” emphasize text. But when you press the B button
in CSS mode, Dreamweaver adds CSS code to the page to make the text look
bold. In this case, you want to use the HTML <strong> tag to emphasize your company’s name. Repeat step 26 for both the “Chia Vet” text that appears about halfway down the page and the text “Chia-Vet.com” at the very bottom of the page. Save the page. You’ll add a few more design touches to the page, but first you should see how the page looks in a real web browser.
When
I select a paragraph, an image…heck, anything at all, in Design View, a
weird icon appears. It looks like a ship’s steering wheel. What is it
and how do I get rid of it? You click this steering-wheel icon to open the Code Navigator window. That window lists the CSS styles related to whatever page element you selected.
It’s useful for people who like to skip Dreamweaver’s user-friendly CSS
Styles panel to create and edit CSS, and who prefer to hand-edit their
CSS code. If you’re new to CSS, this isn’t a useful tool and that goofy
icon, which looks like something Ahab’s ghost misplaced, gets in the
way. To hide it, click the icon to open the Code Navigator and check the
Disable box in the bottom right of the Code
Navigator window. If you ever want to turn it back on, choose View→Code
Navigator to open the Code Navigator window and uncheck the Disable
box.
|