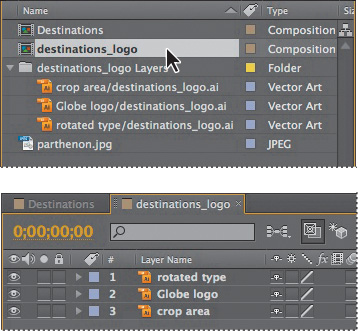
The destinations_logo graphic was created in
Illustrator; your job in After Effects is to add text and animate it. To
work with the layers of the Illustrator file independently of the
background footage, you’ll open the destinations_logo composition in its
own Timeline and Composition panels.
1. | Double-click
the destinations_logo composition in the Project panel. The composition
opens in its own Timeline and Composition panels.

|
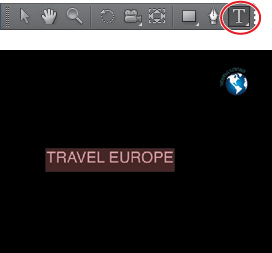
2. | Select the Horizontal Type tool ( ) in the Tools panel, and click in the center of the Composition panel. ) in the Tools panel, and click in the center of the Composition panel.
|
3. | Type TRAVEL EUROPE, all capital letters, and then select all of the text you just entered.

Note
If the Character panel isn’t open, choose Window > Character.
|
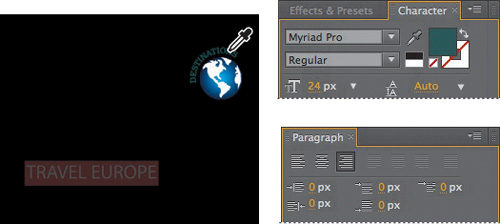
4. | In the Character panel, select a sans serif typeface such as Myriad Pro, and change the font size to 24
pixels. Click the eyedropper in the Character panel, and click on the
rotated “Destinations” text on the logo to select the green color. After
Effects applies it to the text you typed. Leave all other options in
the Character panel at their defaults.
Note
If the Paragraph panel isn’t open, choose Window > Paragraph.
|
5. | In the Paragraph panel, click the Right Align Text button ( ). Leave all other options in the Paragraph panel at their defaults. ). Leave all other options in the Paragraph panel at their defaults.

Tip
Choose View > Show Grid to
make the nonprinting grid visible to help you position objects. Choose
View > Show Grid again to hide the grid later.
|
6. | Select the Selection tool ( ),
and then drag the text in the Composition panel to position it as it
appears in the following figure. Notice that when you switch to the
Selection tool, the generic Text 1 layer name in the Timeline panel
changes to TRAVEL EUROPE, the text you typed. ),
and then drag the text in the Composition panel to position it as it
appears in the following figure. Notice that when you switch to the
Selection tool, the generic Text 1 layer name in the Timeline panel
changes to TRAVEL EUROPE, the text you typed.
 |
You
can apply or remove an effect at any time. Once you’ve applied effects
to a layer, you can temporarily turn off one or all of the effects in
the layer to concentrate on another aspect of your composition. Effects
that are turned off do not appear in the Composition panel, and
typically aren’t included when the layer is previewed or rendered.
By default, when you apply
an effect to a layer, the effect is active for the duration of the
layer. However, you can make an effect start and stop at specific times,
or make the effect more or less intense over time.
You can apply and edit
effects on adjustment layers just as you do with other layers. However,
when you apply an effect to an adjustment layer, the effect is applied
to all layers below it in the Timeline panel.
Effects can also be saved, browsed, and applied as animation presets.