|
Fantastic! You’ve followed the recommended
best practices. Now your design document is ready to go from static art
to a living application—complete with motion graphics, animated
transitions, and interactive controls.
There are four ways to get your artwork into Flash Catalyst.
Import a layered design document created in
Adobe Photoshop, Adobe Illustrator, or Adobe Fireworks. This is the
preferred method for beginning a new project in Flash Catalyst. Import images using the File > Import > Image command in Flash Catalyst. Copy and paste graphics into the Flash Catalyst artboard. Import a Flash Catalyst library package. You will learn how to create a library package later in this course.
Import a design document
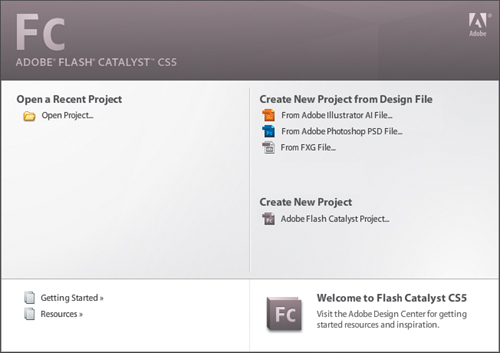
You can import a design document from the Flash Catalyst Welcome screen.
Note
Flash Catalyst imports design documents that are less than 40MB.
1. | Start Flash Catalyst.
The Welcome screen includes three options for importing a design file:
From Adobe Illustrator AI File, From Adobe Photoshop PSD File, and From
FXG File. For this task, you will import an Adobe Illustrator file.
Note
When you import an FXG file exported from a
multilayered Fireworks document, all objects import as a group. You can
break these objects into multiple layers in Flash Catalyst by ungrouping
them.
| 2. | In the Create New Project from Design File section of the Welcome screen, choose From Adobe Illustrator AI File.
The Import dialog box appears.
| 3. | Browse to the Lesson02 folder on your hard drive. Select the Banner_artwork.ai file and click Open.
Note
Objects placed outside the Illustrator artboard or
Photoshop canvas are clipped. Before importing, make sure that all
artwork appears inside the artboard or canvas. You can reposition these
items after importing them into Flash Catalyst.
Tip
When creating symbols in Illustrator (that you plan
to import into Flash Catalyst) select the Align To Pixel Grid option in
the Adobe Illustrator Symbol Options dialog box. 9-slice Scaling is not
currently supported in Flash Catalyst, so leave that option deselected.
| 4. | Click OK.
Tip
Illustrator symbols import as Optimized Graphics. If
your Illustrator file includes multiple instances of the same symbol,
then your Flash Catalyst document will include multiple instances of the
same optimized graphic. In Flash Catalyst, it is a best practice to use
one instance of an object and then share that object to other states.
You can remove all but one instance of the optimized graphic, share the
same instance to other states, and then apply different properties in
each state.
After the document imports, you should save the file.
| 5. | Choose File > Save. Enter a name for the project in the File Name field (or accept the suggested name). Click Save.
The project is saved. Flash Catalyst project files have the .fxp
filename extension. In the next task, you will import an image that was
missing in the design document. You will then place that image in the
artboard.
|
|
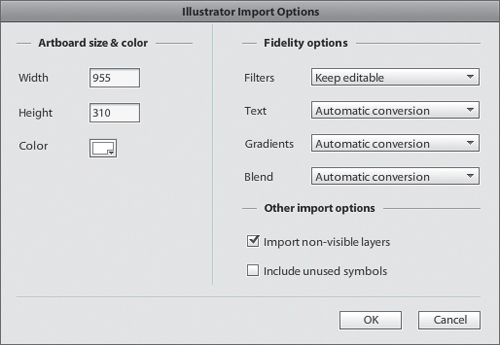
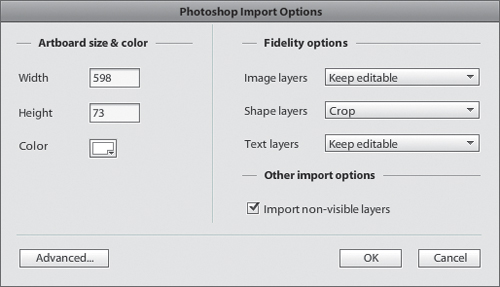
The
Illustrator import fidelity options control how Flash Catalyst handles
filters, gradients, text, and blends. The Photoshop import fidelity
options control how Flash Catalyst imports image, shape, and text
layers.
NoteNote
When you import an FXG file, there are no import options.
In the Fidelity Options section of the dialog box,
you can open the pop-up menus and choose import fidelity options. The
options in the menus are similar for Photoshop and Illustrator. They
include:
Keep editable (AI & PSD):
Keeps the item in an editable form, even if it might lose fidelity
(lose some quality or look different from the original). For example, if
you choose “Keep editable” for text, then the text will import as an
actual text item in Flash Catalyst. Editable text may not look exactly
the same in Flash Catalyst as it did in Photoshop or Illustrator.
Expand (AI only):
Converts an object with a filter into a set of vectors or bitmaps that
approximate the original appearance in Illustrator. For example,
expanding a drop shadow filter on a rectangle might create an image of
the drop shadow behind the original rectangle.
Flatten (AI & PSD): Converts objects into a single bitmap (raster) image.
Vector outlines (AI & PSD): Converts text into a vector path that approximates the rendered appearance of the text.
Crop (PSD Shape layers only):
The vector mask that defines a shape in Photoshop Shape layers is
imported as a mask into Flash Catalyst. However, instead of applying
that mask to a bitmap that inherits the same dimensions as the original
Photoshop file, this option crops the resulting bitmap to the boundary
of the mask.
Automatic conversion (AI only):
Flash Catalyst chooses whether to keep a given item editable, rasterize
it, or convert it to vectors. The result is based on various heuristics
such as the complexity of the item. For example, a simple blend might
be expanded to vectors, whereas a complex blend (that would produce a
lot of paths) would be rasterized.
Advanced (PSD only):
Click the Advanced button in the Photoshop Import Options dialog box to
specify exactly which layers to import. You can select and deselect
layers to import, regardless of their visibility in Photoshop. You can
also choose to import specific Photoshop Layer Comps, if they exist in
the document. The selected layers import to the current page state in
Flash Catalyst.
|
Note
In Photoshop, you can also use the advanced import options to set import fidelity options for each layer separately.
Import additional images
You’ve
spent days, maybe even weeks, getting your design perfect and you’ve
finally imported your design document into Flash Catalyst. You’ve
started separating artwork into meaningful pages and component states,
only to realize that you’re missing key images that won’t be available
for another week. No problem. Just leave a placeholder and import those
images separately. Flash Catalyst accepts bitmap images with the
filename extensions: PNG, GIF, JPG, JPEG, and JPE.
Tip
You’re not limited to importing a single design
document. You can import other layered Photoshop, Illustrator, or FXG
files into an existing Flash Catalyst project by choosing File >
Import, and then choosing the type of document you want to import.
Your Flash Catalyst project should still be open from the previous task.
1. | In the Flash Catalyst Layers panel, select the page1:Feature layer.
The layer highlights in light blue, indicating that it’s the target layer for new content.
| 2. | Choose File > Import > Image.
Note
If you import a large image, a message appears reminding you to reduce the size of the image before importing.
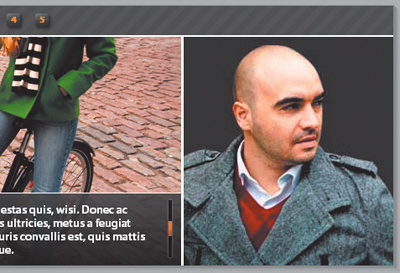
| 3. | Browse to the Lesson02 folder on your hard drive. Select man.jpg and click Open.
Tip
You can also copy artwork in Illustrator or Fireworks and paste it directly into the Flash Catalyst artboard.
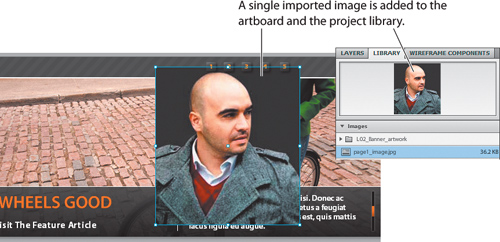 | 4. | In the Layers panel, click the small triangle to expand the page1:Feature layer.
The image was added as a new object in the target layer.

|
Position images in the artboard
When
you import objects to the artboard, they’re placed in the artboard of
the target layer. You can position objects by dragging, nudging (using
the Arrow keys), or by choosing alignment commands in the Modify menu.
1. | Make sure the Select tool ( ) is selected in the Tools panel.
| 2. | Drag
the image you imported to the blank white space on the right side of
the artboard. The positioning doesn’t need to be perfect. You’ll fix
that next.
For more precise positioning, you can use the arrow keys on your keyboard to nudge the image up, down, left, or right.
This image is supposed to be aligned in the bottom-right corner of the
artboard. To do this, you can use the Align commands in the Modify menu.
| 3. | Make sure the image is still selected. Choose Modify > Align > Right. Then, choose Modify > Align > Bottom.
The image is now perfectly aligned in the bottom-right corner of the artboard.
|
|