1. Resizing Objects
When
an object is too big or small for its location, you can resize the
object to fit. When you select one or more objects with the Selection
tool, square resizing handles appears on the corner and midpoint, which
you can drag to change the size of the object. If you’re working with
multiple objects, you no longer have to group objects before you resize,
scale, or rotate them with the Selection tool (New!);
a bounding box appears with resizing handles, which you can use to
resize them all together. You can also use Live Distribute (New!)
to resize the space between objects proportionally. Resizing an object
is different than scaling an object. Resizing an object changes the
width and height, but the scaling remains the same. Scaling an object
changes the width and height by a percentage. If you need to resize an
object to an exact size, you can select the object, and then enter
specific values in the Control panel.
Resize Objects
- 1. Select the Selection tool on the Tools panel.
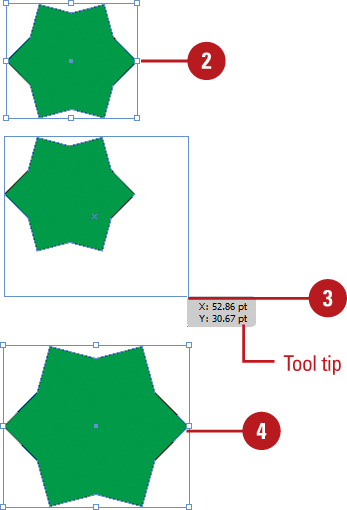
- 2. Select one or more objects that you want to resize (New!).
- 3. Drag a resizing handle to adjust the size of the objects using the tool tip width and height:
- Drag a corner handle to resize both width and height. You can also use one or more of the following keys as you drag:
- Resize from Center. Press the Alt (Win) or Option (Mac) key.
- Resize Proportionally. Press the Shift key.
- Scale. Press the Ctrl (Win) or
 (Mac) key.
- Resize Space Between Selected Objects. Press the Spacebar to resize the space between objects proportionally using Live Distribute (New!).
- Drag a side handle to resize only the width or height.
- 4. Release the mouse to resize the object to the size you want.
2. Moving Objects
Moving
an object or group of objects is very easy. The simplest way is to drag
the edge or fill (if present) of an object. If you want to constrain
the movement of the object in multiples of 45 degrees, then use the
Shift key as you drag. When you drag an object with Smart Guides
enabled, Smart Guides appear automatically to make it easier for you to
align objects with other objects.
Move an Object
- 1. Select the Selection tool on the Tools panel.
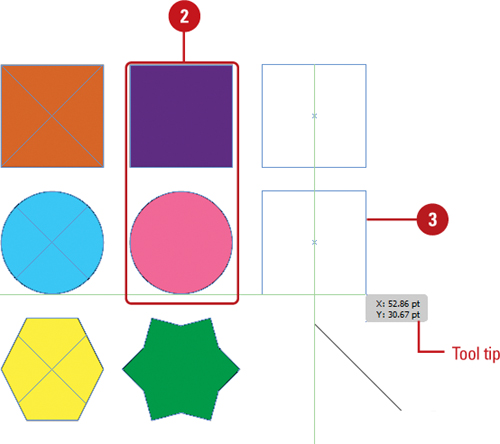
- 2. Select one or more objects that you want to move.
- 3. Drag the edge or fill (if present) of an object using the tool tip X and Y coordinates.
- To constrain the movement of the object to multiples of 45 degrees, hold down the Shift key as you drag.
- If you drag one of several overlapping objects, the selected object remains selected (New!). To select a different object, click a portion of that different object.
Did You Know?
You can enable Smart Guides.
Click the View menu, point to Grids & Guides, and then click Smart
Guides to select it (a check mark indicates the item is selected).