Whenever a new document is created, CorelDRAW
automatically creates the names, such as “Page 1,” “Page 2,” and so on.
These page names are only for your reference as you navigate your
multi-page document. However, you can customize your page names by using
several different methods.
When creating web page documents—where each document page is a separate
web page—adding a unique name to the page creates a title for the
exported page. When your document is printed, page names can also be
printed in the margins, can indicate the contents of the page, and can
provide other page-specific information.
Tip
To
quickly display the previous or next page in your document, you can
press PAGE UP (previous page) or PAGE DOWN (following page).
Using the Rename Page Command
Use
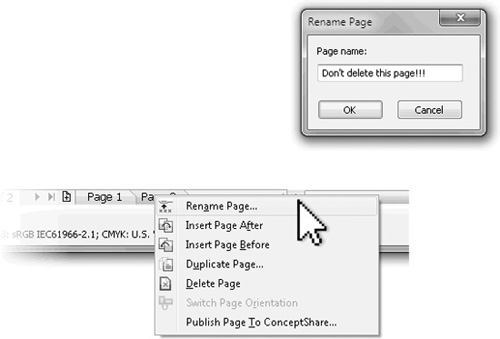
the Rename Page command to assign a unique name to pages. Either choose
Layout | Rename Page, or (more quickly) right-click the page tab at the
lower left of your document window, and then choose Rename Page from
the pop-up menu to access the command. The Rename Page dialog, shown
here, can rename a page with a name of up to 32 characters, including
spaces.

Save Details with Your File
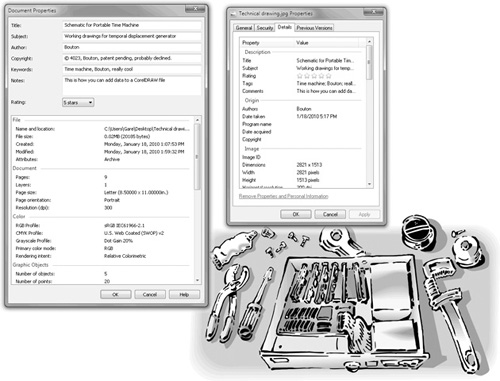
Document Properties is a
CorelDRAW feature that provides details about a document you save
without having to type in the margins. To access Document Properties—to
both enter and view information—right-click on a blank part of the page.
In addition to letting you type yourself little reminders, Document
Properties is also a very convenient method to tag designs you export to
JPEG and other bitmap file formats. As you can see in Figure 1,
the same information you type in Document Properties is available to
Windows users when they right-click your image in a file folder and
choose Details.

Note
Users
who don’t own CorelDRAW cannot access Document Properties info you’ve
embedded in a native CDR file by right-clicking. The solution to this
problem is to make them buy CorelDRAW.
Navigating a Multi-Page Document
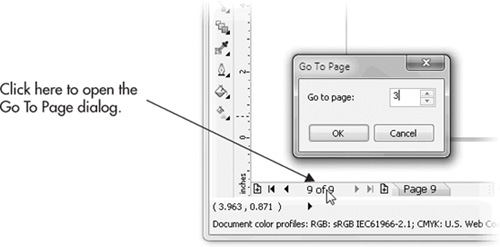
To go to different pages in a
document, click a page icon at the lower left of the document window. If
the page isn’t in view, you can scroll to locate it, or (for lengthy
documents) open the Go To Page dialog, shown next, by clicking between
the Next Page and Previous Page buttons at the lower left of your document window. This dialog enables you to move quickly to a specific page in your document.

Using the Object Manager
The
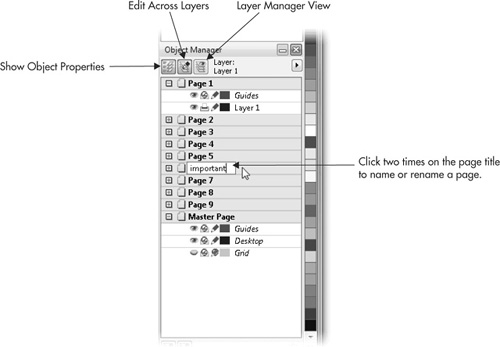
Object Manager docker offers the advantage of mass-editing page names
from within a single docker. To open the Object Manager, choose Tools |
Object Manager. Once the docker is open, click to ensure that the docker
is set to Show Object Properties by deselecting the Layer Manager View
button state, shown here:

In this view, all page and
object names are displayed. To rename any page (or any object), click
once directly on the page title to select the page you want to name or
rename, click a second time to highlight the page name text, then type a
name, and finally press ENTER.
Page names appear in the page tabs at the lower left of your document
window, accompanied by a numeral indicating the page’s order in your
document:

Tip
To
see more (or less) of the pages of your document in the page tab area
of your document window, click-drag on the vertical divider between the
page tabs and the horizontal scroll bar.
