|
|
|
iOS SDK : Basic SQLite Database Manipulation (part 3) - SQLite Binding, Inserting, Updating, and Deleting
|
|
|
11/12/2011 4:16:02 PM
|
|
|
|
|
|
|
|
SQLite Binding, Inserting, Updating, and Deleting
SQL allows limiting data to
only the data needed via the where clause. For instance, the following
statement only selects records whose age column is greater than 30.
select * from mytable where age > 30
When placing SQL
statements like this into a SQLite statement, you can parameterize the
where clause’s value. For instance, to parameterize age’s value, write
the following code.
select * from mytable where age > ?
You then bind your program’s value to the SQL statement’s parameter.
Binding
You bind one of your program’s values to a SQL statement’s parameter using a bind method (Listing 12). Different data types have different bind methods.
Listing 12. SQLite bind methods (from the SQLite online documentation)
int sqlite3_bind_blob(sqlite3_stmt*, int, const void*, int n,
void(*)(void*));
int sqlite3_bind_double(sqlite3_stmt*, int, double);
int sqlite3_bind_int(sqlite3_stmt*, int, int);
int sqlite3_bind_int64(sqlite3_stmt*, int, sqlite3_int64);
int sqlite3_bind_null(sqlite3_stmt*, int);
int sqlite3_bind_text(sqlite3_stmt*, int, const char*, int n,
       void(*)(void*));
int sqlite3_bind_text16(sqlite3_stmt*, int, const void*, int,
       void(*)(void*));
int sqlite3_bind_value(sqlite3_stmt*, int, const sqlite3_value*);
int sqlite3_bind_zeroblob(sqlite3_stmt*, int, int n);
|
Note
Bindings start with 1 rather than 0.
For instance, the following code snippet shows a SQL statement and its subsequent binding (without the error checking shown).
const char * select = "Select * from photos where name = ?";
sqlite3_stmt *select_statement;
sqlite3_prepare_v2(database, select, -1, &select_statement, NULL);
sqlite3_bind_text(&select_statement, 1, [photo.name UTF8String], -1,
SQLITE_TRANSIENT);
The first argument is a
pointer to the prepared statement. The second argument is the SQL
statement’s parameter number. The third argument is the value that
should be bound to the SQL statement’s parameter. The fourth argument is
the number of bytes in the value—if negative, the length is
automatically determined from the C string.
Insert, Update, and Delete
There is little
difference between the steps for inserting, updating, or deleting
records using the SQLite C library. The primary difference is you only
call the sqlite3_step method once. Usually, you use insert, update, or
delete with bindings. For instance,
insert into customers (name, age, company, location) values (?, ?, ?, ?);
or
update customers set location = ? where company = ?;
or
delete customers where company = ?;
In the following task, you insert, update, and delete a record.
Open the MyDBProject project in Xcode. Add a class method named moveDatabase to PhotosDAO. Remember, a class method uses a plus rather than a minus. Implement the method in PhotosDAO.m as in Listing 13. Listing 13. The moveDatabase and getAllPhotos methods
+ (void) moveDatabase {
  NSFileManager *fileManager = [NSFileManager defaultManager];
  NSString *theDBPath = [[[NSBundle mainBundle] resourcePath]
          stringByAppendingPathComponent:@"myDatabase.sqlite"];
  NSError *error;
  BOOL success;
  NSArray * paths =
         NSSearchPathForDirectoriesInDomains(NSDocumentDirectory,
                           NSUserDomainMask, YES);
  NSString * docsDir = [paths objectAtIndex:0];
  NSString * newPath =
          [docsDir stringByAppendingPathComponent:@"myDatabase.sqlite"];
  [fileManager removeItemAtPath:newPath error: &error];
  success = [fileManager copyItemAtPath:theDBPath
                       toPath:newPath error: &error];
  if (!success) {
    NSLog(@"Failed to copy database...error handling here %@.",
                    [error localizedDescription]);
  }
}

- (NSMutableArray *) getAllPhotos {
  NSMutableArray * photosArray = [[NSMutableArray alloc] init];
  @try {
     NSFileManager *fileManager = [NSFileManager defaultManager];
    NSArray * paths = NSSearchPathForDirectoriesInDomains
     (NSDocumentDirectory, NSUserDomainMask, YES);
     NSString * docsDir = [paths objectAtIndex:0];
    NSString * theDBPath = [docsDir stringByAppendingPathComponent:
                            @"myDatabase.sqlite"];
    BOOL success = [fileManager fileExistsAtPath:theDBPath];
    if (!success) {
      NSLog(@"Failed to find database file '%@'.");
    }
     if (!(sqlite3_open([theDBPath UTF8String], &database) ==
                                      SQLITE_OK)) {
      NSLog(@"An error opening database, handle error here.");
     }
     const char *sql = "SELECT id,name,photo FROM photos";
    sqlite3_stmt *statement;
    if (sqlite3_prepare_v2(database, sql, -1, &statement, NULL) !=
                                      SQLITE_OK) {
      NSLog(@"Error, failed to prepare statement, handle error here.");
     }
    while (sqlite3_step(statement) == SQLITE_ROW) {
       PhotoDAO * aPhoto = [[PhotoDAO alloc] init];
      aPhoto.photoID = sqlite3_column_int(statement, 0);
      aPhoto.name = [NSString stringWithUTF8String:(char *)
                                      sqlite3_column_text(statement, 1)];
       const char * rawData = sqlite3_column_blob(statement, 2);
       int rawDataLength = sqlite3_column_bytes(statement, 2);
      NSData *data = [NSData dataWithBytes:rawData length:
                     rawDataLength];
       aPhoto.photo = [[UIImage alloc] initWithData:data];
      [photosArray addObject:aPhoto];
     }
     if(sqlite3_finalize(statement) != SQLITE_OK){
       NSLog(@"Failed to finalize data statement, error handling here.");
     }
    if (sqlite3_close(database) != SQLITE_OK) {
       NSLog(@"Failed to close database, error handling here.");
     }
  } @catch (NSException *e) {
    NSLog(@"An exception occurred: %@", [e reason]);
    return nil;
  }
  return photosArray;
}
|
Modify the getAllPhotos method in PhotosDAO to obtain the records from the documents directory (Listing 13). Open MYDBProjectViewController.m and add a call to the moveDatabase method to the first line of viewDidLoad (Listing 14).
Listing 14. The viewDidLoad method
- (void)viewDidLoad {
  [PhotosDAO moveDatabase];
  PhotosDAO * myPhotos = [[PhotosDAO alloc] init];
  self.photos = [myPhotos getAllPhotos];
  [self.theImageView setImage:((PhotoDAO *)[self.photos
objectAtIndex:0]).photo];
  [self.theLabel setText:((PhotoDAO *)
        [self.photos objectAtIndex:0]).name];
  [myPhotos release];
  [super viewDidLoad];
}
|
|
The
first thing you did was make the database writable. The Resources
folder is read-only. Saving changes requires the database to be
writable, so you copied the database to your documents directory. You
also modified the getAllPhotos method so that it obtained the database
from the application’s document directory rather than the resources
directory.
Add
any photo from your computer to the project’s Resources group and
remember the photo’s name so that you can use it later in the
addThirdPhoto method. Add a new method to PhotosDAO called addPhoto. Implement the method (Listing 15). Listing 15. The addPhoto method
- (void) addPhoto : (PhotoDAO *) photo {
  const char * sql = "insert into photos (name, photo) values (?, ?)";
  sqlite3_stmt *insert_statement = nil;
  NSArray * paths = NSSearchPathForDirectoriesInDomains
       (NSDocumentDirectory, NSUserDomainMask, YES);
  NSString * docsDir = [paths objectAtIndex:0];
  NSString * thePath = [docsDir stringByAppendingPathComponent:
        @"myDatabase.sqlite"];
  sqlite3_open([thePath UTF8String], &database);
  sqlite3_prepare_v2(database, sql, -1, &insert_statement, NULL);
  sqlite3_bind_text(insert_statement, 1, [photo.name UTF8String], -1,
         SQLITE_TRANSIENT);
  NSData * binData = UIImagePNGRepresentation(photo.photo);
  sqlite3_bind_blob(insert_statement, 2, [binData bytes],
         [binData length], SQLITE_TRANSIENT);
  sqlite3_step(insert_statement);
  sqlite3_finalize(insert_statement);
  sqlite3_close(database);
 }
|
Create a new IBAction in MyDBProjectViewController called addThirdPhoto (Listing 16). Listing 16. The addThirdPhoto IBAction
- (IBAction) addThirdPhoto: (id) sender {
  static BOOL wasAdded;
    if (!wasAdded) {
    PhotosDAO * myPhotos = [[PhotosDAO alloc] init];
    PhotoDAO * aPhoto = [[PhotoDAO alloc] init];
    // Use the name of your photo in the next line
    NSString * imgPath = [[[NSBundle mainBundle] resourcePath]
           stringByAppendingPathComponent:@"photo3.png"];
    aPhoto.name = @"Another Photo";
    aPhoto.photo = [[UIImage alloc] initWithContentsOfFile:imgPath];
    [myPhotos addPhoto:aPhoto];
    [self.photos release];
    self.photos = [myPhotos getAllPhotos];
    [myPhotos release];
     wasAdded = YES;
  }
}
|
Save
your changes and open MyDBProjectViewController.xib and add a new Bar
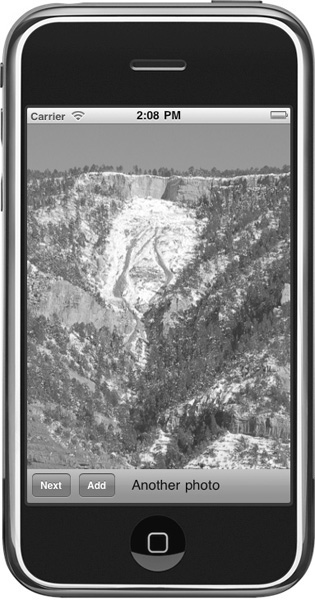
Button item to the toolbar. Change the bar button’s title to Add. Connect the addThirdPhoto action to the Add button. Save your changes and click Run to view the application in the iPhone Simulator (Figure 4).
|
The addPhoto method (Listing 15)
allows new photos to be inserted. To keep this example simple, the add
button invokes the addThirdPhoto method that merely gets the photo from
your resources group. The addPhoto method first creates a SQL string
with parameters. The method then replaces the question marks by binding
them to the appropriate value. For instance, the name column is text, so
addPhoto binds it to a C string. The UIImage is binary, so it is bound
to a blob. After binding, addPhoto then inserts the record by calling
the sqlite3_step method. This method is called only once, as no data is
returned from the insert statement. Notice, for brevity, an examination
of the return code is omitted, as is other error handling from Listing 6 forward.
Return to the Xcode project. Add another photo to your Resources folder and remember its name to use in the changePhotosImage method added in Step 5. Add
a new NSInteger called currentID to MyDBProjectViewController.m. Change
the changeImage method to update this new variable with the current
photo’s id from the database (Listing 17). Listing 17. The currentID variable, and modified changeImage
NSInteger currentID = 0;
- (IBAction) changeImage: (id) sender {
  static NSInteger currentElement = 0;
  if(++currentElement == [self.photos count])
    currentElement = 0;
  PhotoDAO * aPhoto = (PhotoDAO *)
          [self.photos objectAtIndex: currentElement];
  currentID = aPhoto.photoID;
  [self.theLabel setText:aPhoto.name];
  [self.theImageView setImage:aPhoto.photo];
}
|
Add a new method called changeAPhotoImage to PhotosDAO (Listing 18). Listing 18. The changeAPhotoImage method
- (void) changeAPhotoImage: (UIImage *) image theID: (NSInteger) photoID {
  const char * sql = "update photos set photo = ? where id = ?";
  sqlite3_stmt *update_statement = nil;
  NSArray * paths = NSSearchPathForDirectoriesInDomains(NSDocumentDirectory,
                       NSUserDomainMask, YES);
  NSString * docsDir = [paths objectAtIndex:0];
  NSString * thePath =
      [docsDir stringByAppendingPathComponent:@"myDatabase.sqlite"];
  sqlite3_open([thePath UTF8String], &database);
  sqlite3_prepare_v2(database, sql, -1, &update_statement, NULL);
  NSData * binData = UIImagePNGRepresentation(image);
  sqlite3_bind_blob(update_statement, 1, [binData bytes],
         [binData length],SQLITE_TRANSIENT);
  sqlite3_bind_int(update_statement, 2, photoID);
  sqlite3_step(update_statement);
  sqlite3_finalize(update_statement);
  sqlite3_close(database);
}
|
Add a new IBAction called changePhotosImage to MyDBProjectViewController (Listing 19). Save your changes. Listing 19. The changePhotosImage method
-(IBAction) changePhotosImage: (id) sender {
  PhotosDAO * myPhotos = [[PhotosDAO alloc] init];
  NSString * imgPath = [[[NSBundle mainBundle] resourcePath]
        stringByAppendingPathComponent:@"photo4.png"];
  [myPhotos changeAPhotoImage:[[UIImage alloc] initWithContentsOfFile:
        imgPath] theID: currentID];
  [self.photos release];
  self.photos = [myPhotos getAllPhotos];
  [myPhotos release];
}
|
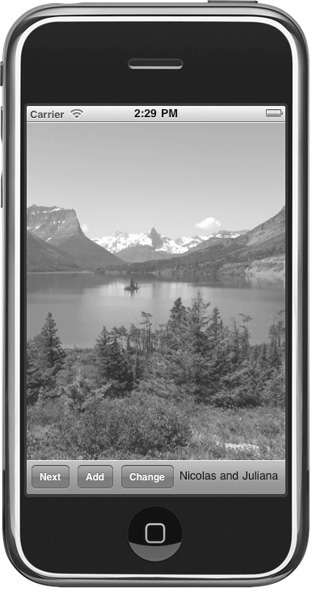
Open MyDBProjectViewController.xib and add another bar button to the toolbar. Change the button’s title to Change. Connect the changePhotosImage action to the Change button. Save and exit Interface Builder. Click Build And Go to run the application in the iPhone Simulator (Figure 5).
|
Updating
a record is as straightforward as inserting it. The changeAPhotoImage
first creates a SQL string with parameters. It then binds a file’s
binary data to photo and an integer to id. After binding, it then calls
the step function once, finalizes the statement, and closes the
database. Notice that updating requires the record’s id, as SQLite uses
the id to update the correct record. To accommodate this requirement,
you added a currentID variable and changed the changeImage method to set
the currentID with the currently selected photo record.
Quit the application and return to Xcode. Add a new method called deletePhoto to PhotosDAO (Listing 20). Listing 20. The deletePhoto method in PhotosDAO
- (void) deletePhoto: (NSInteger) photoID {
  const char * sql = "delete from photos where id = ?";
  sqlite3_stmt *delete_statement = nil;
  NSArray * paths = NSSearchPathForDirectoriesInDomains(NSDocumentDirectory,
        NSUserDomainMask, YES);
  NSString * docsDir = [paths objectAtIndex:0];

  NSString * thePath = [docsDir stringByAppendingPathComponent:
        @"myDatabase.sqlite"];
  sqlite3_open([thePath UTF8String], &database);
  sqlite3_prepare_v2(database, sql, -1, &delete_statement, NULL);
  sqlite3_bind_int(delete_statement, 1, photoID);
  sqlite3_step(delete_statement);
  sqlite3_finalize(delete_statement);
  sqlite3_close(database);
}
|
Create a new IBAction called deletePhoto to MyDBProjectViewController (Listing 21). Listing 21. The deletePhoto IBAction in MyDBProjectViewController
- (IBAction) deletePhoto : (id) sender {
  PhotosDAO * myPhotos = [[PhotosDAO alloc] init];
  [myPhotos deletePhoto:currentID];
  [self.photos release];
  self.photos = [myPhotos getAllPhotos];
  currentElement = 0;
  [myPhotos release];
}
|
Move the static NSInteger currentElement from the changeImage method in Listing 16-11 to just below the currentID variable (Listing 22). Remove the static qualifier. Listing 22. Placing currentElement at the class’s top so it’s shared in the class
@implementation MyDBProjectViewController
@synthesize photos;
@synthesize theImageView;
@synthesize theLabel;
NSInteger currentID = 0;
NSInteger currentElement = 0;
|
Save your changes and open MyDBProjectViewController.xib. Add another button to the toolbar and change its title to Delete. Resize the image and move the label to above the toolbar, as you are running out of space on the toolbar (Figure 6).
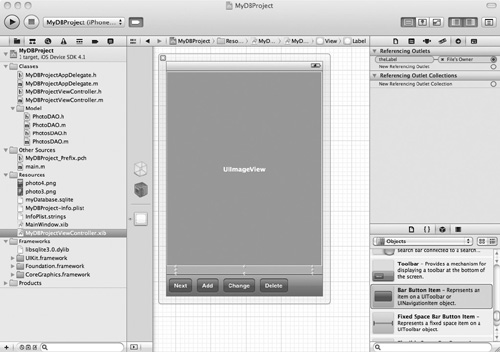
Connect the button to the deletePhoto action. Click Run and try deleting a photo. The delete statement follows the same pattern as insert and update. The only real difference is the SQL string. const char * sql = "delete from photos where id = ?";
|
|
|
|
|
|
|
|
|
|
|
|
|
|
|
|
|
|