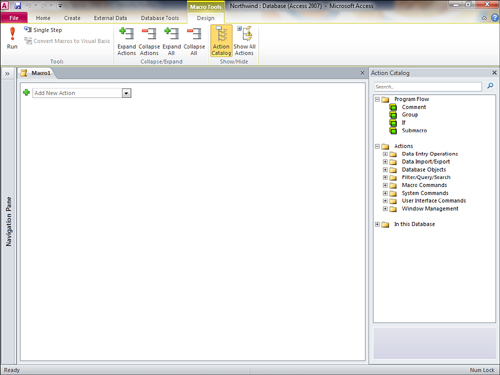
To create a macro, click to select the Create tab.
Then select Macro from the Macros & Code group. The Macro Design
window shown in Figure 1 appears. In this window, you can build a program by adding macro actions, arguments, and program flow items to the macro.
Macro actions
are like programming commands or functions. They instruct Access to
take a specific action (for example, to open a form). Macro arguments
are like parameters to a command or function; they give Access
specifics on the selected action. For example, if the macro action
instructs Access to open a form, the arguments for that action tell
Access which form should be opened and how it should be opened (Form,
Design, or Datasheet view, or Print Preview). Program flow items allow
you to determine when a specific macro action will execute. For example,
you might want one form to open in one situation and a second form to
open in another situation.
Working with Macro Actions
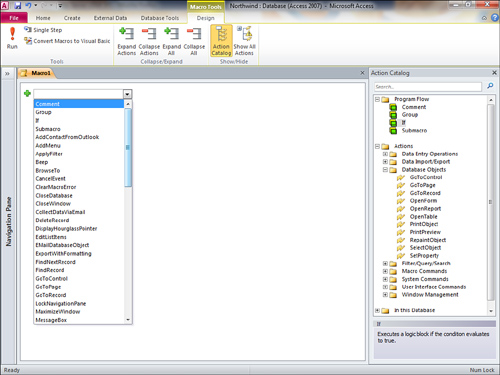
As mentioned, macro
actions instruct Access to perform a task. You can add a macro action to
the Macro Design window in several ways. One way is to click in the macro item and then click to open the drop-down list. A list of all the macro actions appears, as in Figure 2.
Select the one you want from the list, and it’s instantly added to the
macro. Use this method of selecting a macro action if you aren’t sure of
the macro action’s name and want to browse the available actions.
After you have been
working with macros for a while, you will know which actions you want to
select. Instead of opening the drop-down list and scrolling through the
entire list of actions, you can click a cell in the Action column and
then start typing the name of the macro action you want to add. Access
will find the first macro action beginning with the characters you type.
Drag and Drop Objects into Macros
The OpenTable, OpenQuery, OpenForm, OpenReport, and OpenModule
actions are used to open a table, query, form, report, or module,
respectively. These actions and associated arguments can all be filled
in quite easily with a drag-and-drop technique:
1. | Scroll through the Navigation Pane until you see the object that you want to add to the macro.
|
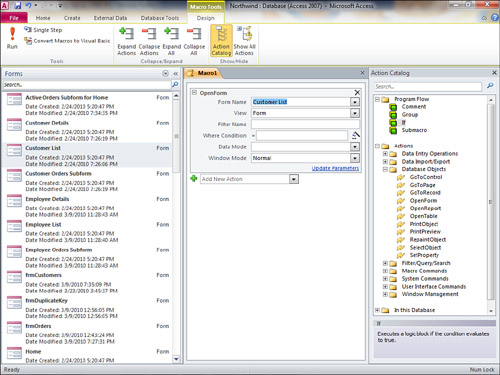
2. | Click
and drag the object you want to open over to the Macro Design window.
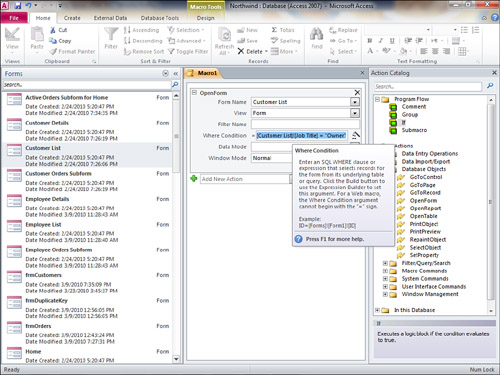
The appropriate action and arguments are automatically filled in. Figure 3
shows the effects of dragging and dropping the Customer List form onto the Macro Design window.
|
Dragging and dropping a
table, query, form, report, or module onto the Macro Design window saves
you time because all the macro action arguments are automatically
filled in for you. Notice in Figure 10.3 that six action arguments are associated with the OpenForm action: Form Name, View, Filter Name, Where Condition, Data Mode, and Window Mode. Three of the arguments for the OpenForm
action have been filled in: the name of the form (Customer List), the
view (Form), and the window mode (Normal). Macro action arguments are
covered more thoroughly in the next section.
Working with Action Arguments
As mentioned, macro action
arguments are like command or function parameters; they give Access
specific instructions on how to execute the selected macro action. The
available arguments differ depending on what macro action has been
selected. Some macro action arguments force you to select from a
drop-down list of appropriate choices; others allow you to enter a valid
Access expression. Macro action arguments are automatically filled in
when you click and drag a Table, Query, Form, Report, or Module object
to the Macro Design window. In all other situations, you must supply
Access with the arguments required to properly execute a macro action.
To specify a macro action argument, follow these five steps:
1. | Select a macro action.
|
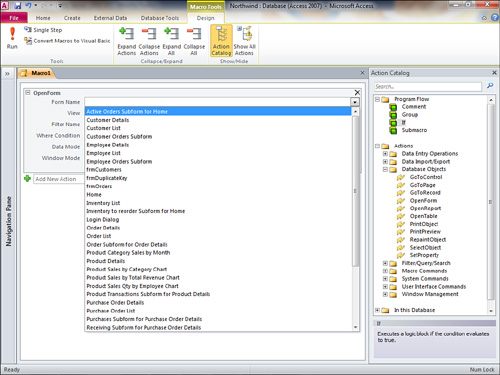
2. | If the macro action argument requires selecting from a list of valid
choices, click to open the drop-down list of available choices for the
first macro action argument associated with the selected macro action. Figure 4 shows all the available choices for the Form Name argument associated with the OpenForm action. Because the selected argument is Form Name, the names of all the forms included in the database are displayed in the drop-down list.
|
3. | If
the macro action argument requires entering a valid expression, you can
type the argument into the appropriate text box or get help from the
Expression Builder. Take a look at the Where Condition argument of the OpenForm
action, for example. After you click in the Where Condition text box,
an ellipsis appears. If you click the ellipsis, the Expression Builder
dialog box is invoked, as shown in Figure 5.
|
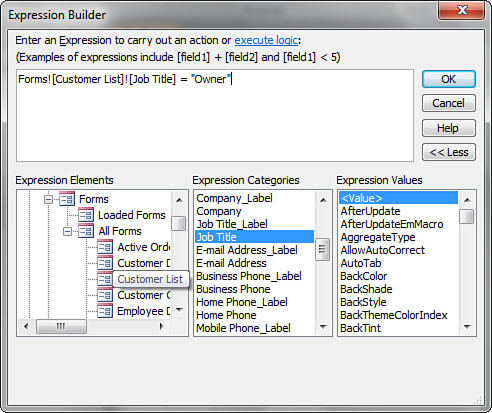
4. | To
build an appropriate expression, select a database object from the list
box on the left, and then select a specific element from the center and
right list boxes. Click OK to accept the element into the text box. In Figure 10.5,
the currently selected Expression Element is the Customer List form,
Expression Category is Job Title, and <value> has been
double-clicked to add the expression to the top half of the window. The
value of Owner is entered in quotes indicating that the Job Title of
each record displayed on the form must be Owner. Click OK to close the
Expression Builder. The completed expression appears as shown in Figure 6.
|
Remember
that each macro action has different macro action arguments. Some of
the arguments associated with a particular macro action are required,
and others are optional. If you need help on a particular macro action
argument, click in the argument and Access provides a tooltip with a
short description of that argument. If you need more help, press F1 to
see Help for the macro action and all its arguments.