One-page documents using
built-in templates generally print just fine on typical office printers.
Visio’s built-in templates are configured to match standard office
paper: the U.S. Units templates for letter-sized paper and the Metric
Units templates for A4.
Printing from the Backstage Area
To start printing, the first place to go is the Backstage area. Let’s look at the basic options behind File, Print.
Exploring Basic Print Options
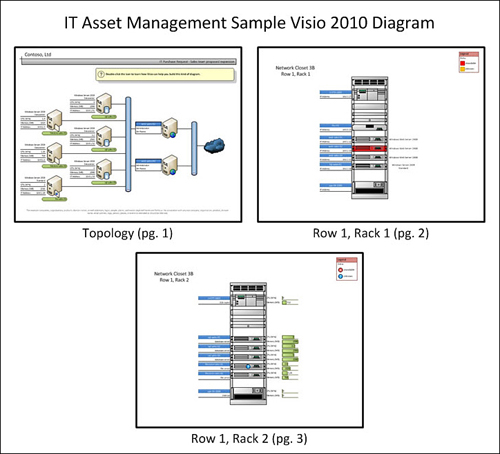
1. | Start
a new drawing from Sample Diagrams. Choose the IT Asset Management
sample. This drawing has three pages; a logical network diagram, and two
physical rack layouts, which are scaled drawings. Figure 1 shows an overview of all three pages.
|
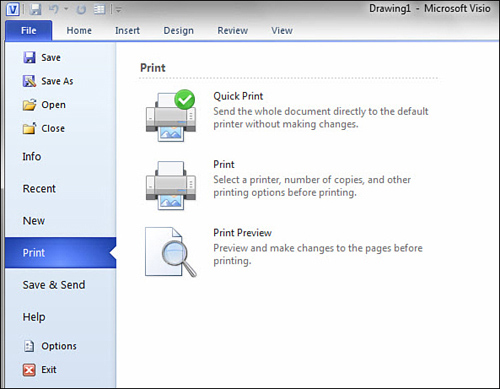
2. | To
explore the print options for this document, click File, Print. You see
the Backstage Print screen with three options—Quick Print, Print, and
Print Preview—as shown in Figure 2.
|
3. | The
top button, Quick Print, prints to your default printer without asking
questions. No dialogs, no choices, just print. If you want to test
printing from Visio, go ahead and click it. If you’re a paper-saver,
skip this step.
I rarely use this button because I like to review what I’m about to
print. I’ve had too many experiences of sending what I thought was a
small print job to the printer, only to end up with a whole stack of
wasted paper.
Another caveat: The Quick Print caption says that it sends the whole
document to the default printer, but my experience is that it sends only
the current page to the printer.
|
4. | Click the Print button to open a standard Print dialog, as shown in Figure 3. It contains options for choosing a printer, along with which pages and how many copies to print.
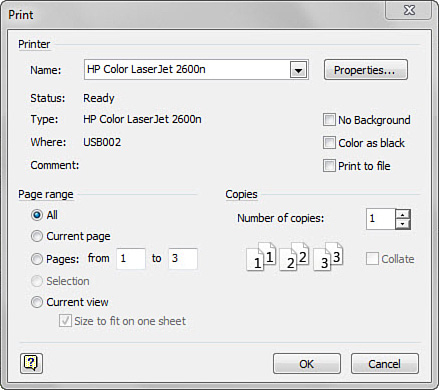
Note that you can choose Current View under Page Range to print exactly
what is shown in the current drawing window. This is a Visio user
favorite, which was missing from earlier versions of Visio. Just zoom in
on a detail that you want to print and use this option. No more Print
Screen key!
|
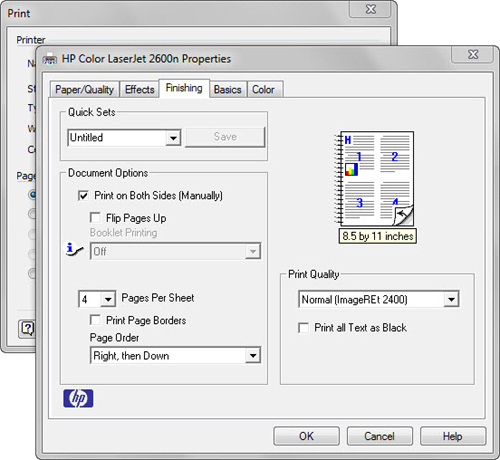
5. | Click
the Properties button in the Print dialog. You see options for your
printer. The dialog that appears varies from printer to printer and
contains printer-specific features and options.
I frequently visit Printer Properties to print multiple pages on a sheet
of paper and to specify duplex printing. Because most of the printing I
do is “rough draft” printing, I like to save paper. Figure 4 shows the settings for my HP printer.
|
6. | Return
to File, Print by cancelling the dialogs, and click Print Preview. You
see the Print Preview view of your document, as shown in Figure 5.
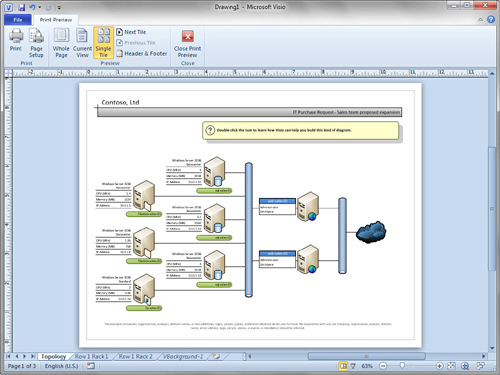
Print Preview looks like a normal drawing window, but there are some key differences:
The Ribbon has only one tab: Print Preview. You can access all pages via tabs, but you can’t make edits or select shapes. The mouse cursor is a magnifying glass that enables you to toggle between fit-to-page and 100% zoom levels by clicking. Stencils and other task panes are hidden. The grid is hidden (unless you’ve chosen to print the grid via Page Setup, Print Setup, Print gridlines).
|
7. | Save this drawing as Ch09 Printing IT Assets.vsd so that you can use it in future exercises. |