3. Creating Entities Using SPMetal
Now that we’ve created a basic data structure, let’s
make use of SPMetal to generate some entity classes. At the time of
writing, SPMetal is implemented as a command line only tool. It’s
installed by default at %SPROOT%\Bin\SPMetal.exe and can be called
using the command line arguments in Table 1.
Table 1. SPMetal Command Line Arguments
| Option | Value Definition | Example |
|---|
| web | The complete, absolute URL of the web site whose data is modeled by the entity classes | /web:http://localhost/Chapter14 |
| code | The relative or absolute path and filename of the output file | /code:Chapter14.cs |
| language | The programming language of the generated code | /language:csharp |
| namespace | The namespace that contains the entity class declarations | /namespace:Chapter14.HireSample |
| useremoteapi | No value | /useremoteapi |
| user | The user in whose context SPMetal executes | /user:mydomain\bob |
| password | The password for the user specified in the user option | /password:Pa$$w0rd |
| serialization | Specifies whether objects that instantiate the generated classes are serializable; if this option is not used, “none” is assumed | /serialization:unidirectional |
| parameters | Identifies the path and name of an XML file that contains overrides of SPMetal default settings | /parameters:ParameterFile.xml |
The tool will produce a .cs or .vb file containing
class definitions for each entity available within the site referenced
by the /web: argument. Additionally, it will also create a strongly typed DataContext object with properties for each list and document library within the data structure.
3.1 Create a Windows Forms Sample Application
First things first: if we’re going to make use of
LINQ, we’ll need a Visual Studio 2010 project. Create a new Windows
Forms Application project. It’s important to make sure that the project
is set to use .NET Framework 3.5 and not version 4.0. For ease of
narrative, save the project in C:\Code\Chapter14 and call it
LinqSampleApplication.
Once the project has been created, we need to take a
few steps to make it compatible with SharePoint 2010. First, we need to
set the build type to be 64-bit. SharePoint 2010 is 64-bit only, and by
default Windows Forms Application projects are configured for 32-bit
builds.
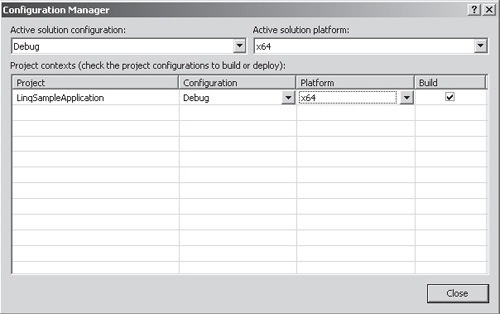
From the Build menu, select Configuration Manager.

Under Platform, select <New...>.
In the New Project Platform dialog, select x64 from the New Platform drop-down list. Click OK to save the changes.
Next, we need to add references to the SharePoint object model:
In the Solution Explorer pane, right-click References and then select Add Reference.
In the dialog that appears, select Microsoft.SharePoint and Microsoft.SharePoint.Linq.
Click OK to add the references.