Scenario/Problem: You want to create a site only accessible to people in your company.
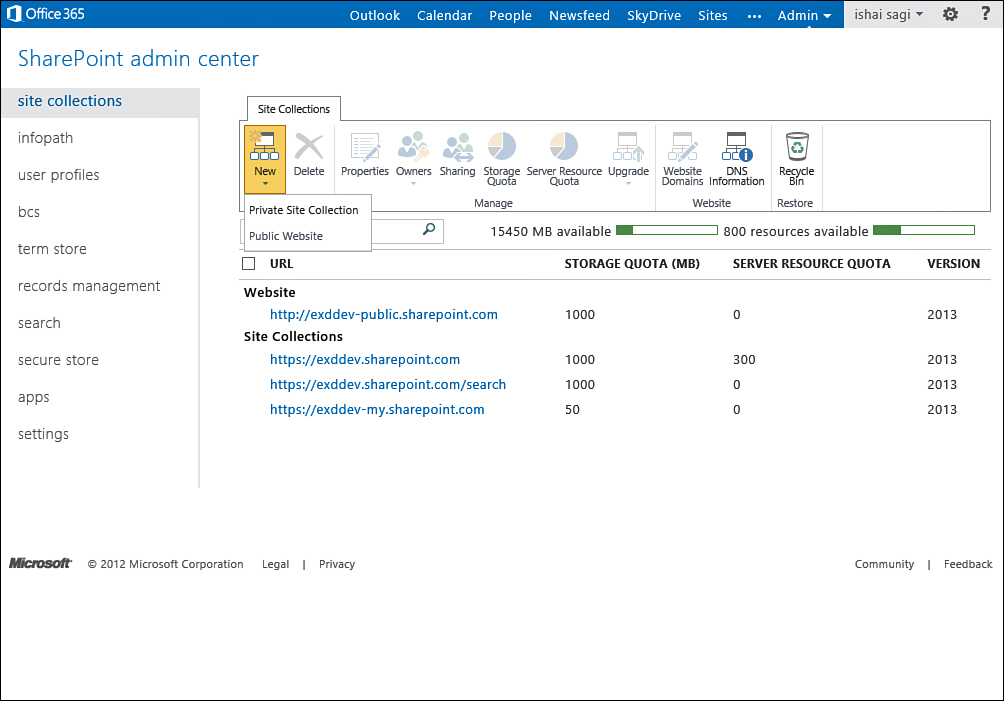
Solution: To create a private site, navigate to the SharePoint Admin Center page and click the New button in the ribbon to open the drop-down menu shown in Figure 1. In this menu, choose Private Site Collection.

FIGURE 1 The New button drop-down menu with Private Site Collection and Public Site options.
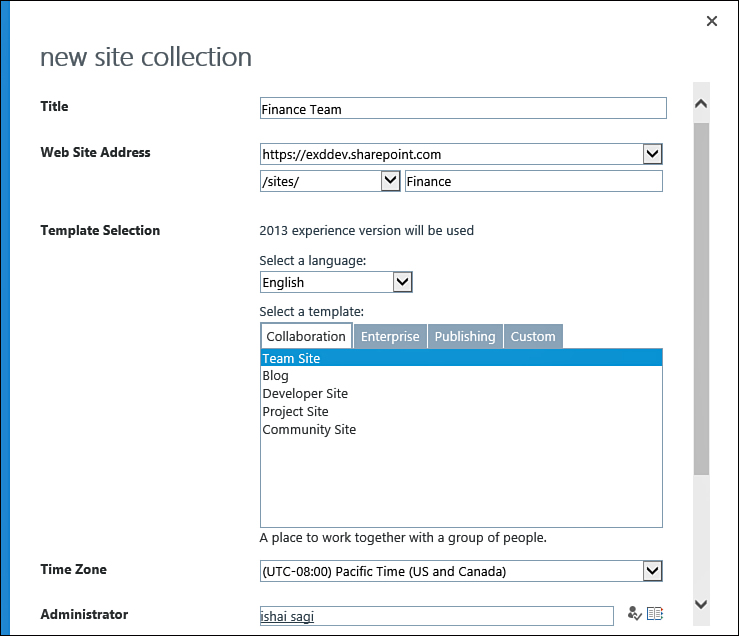
This opens the New Site Collection dialog, which is similar to the new subsite dialog .
You have to specify the site’s title (which can be changed later), the
website address, and the template for the site. However, when creating
a site collection you also have to specify an administrator for that
site collection (this person will have full access to everything in the
site) and storage quota—restricting how much space the site can take in
the system, as well as the amount of documents users can upload to the
site or its subsites.
Tip
You should consider the quota carefully, as
in Office 365 you will have to pay extra if you go over the limit of
what your contract offers. Consider the amount of information people
will need from any particular site, and spread the quotas across the
different sites as you see fit.
Additionally, in Office 365, you might have several domains for site collections, and so,
this dialog allows you to first choose which domain the site will be
under. If you only have one domain, only that domain will be shown in
the drop-down list under Web Site Address. Finally, because Office 365
is a global solution, and you might be sharing the site with people
from different time zones, you have to specify the default time zone
for the site, as shown in Figure 2.

FIGURE 2 Creating a new site collection, and specifying an administrator, a time zone, and a domain.
Note
A site administrator (also known as site
collection administrator) can do everything and see everything in the
entire site collection (the site, and all the sites under it).
Restricting access from the person you specify in this option within
the site (for example, not allowing them to read a document or edit a
list) is not possible.
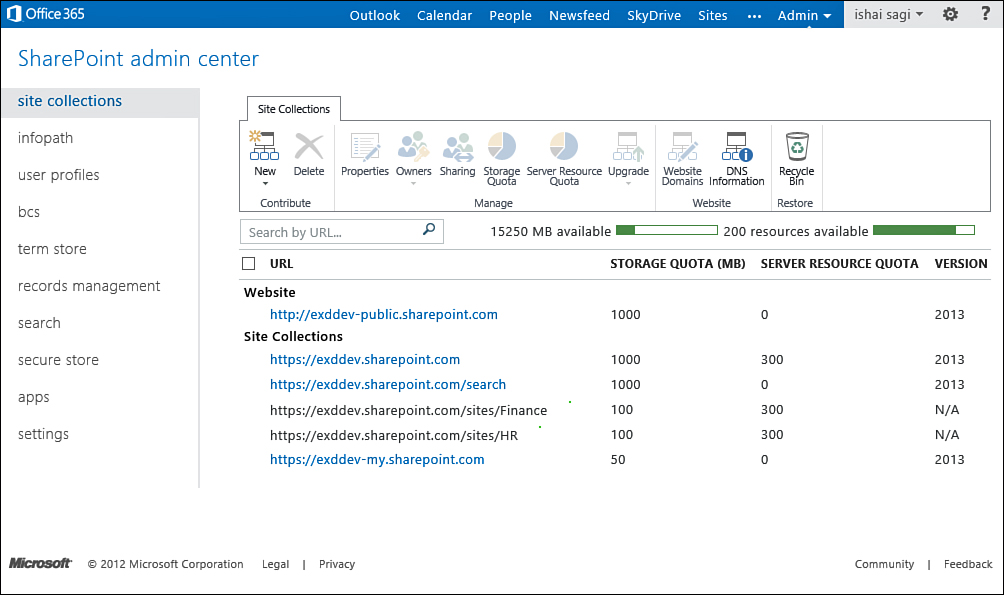
To create the site collection, click OK. This
takes you back to the SharePoint Admin Center page, and shows the site
with a process animation next to it while the site is still being
created, as shown in Figure 3.
Wait for the site collection to finish provisioning. When the process
is done, the animation disappears and the link to the site becomes
available for you to click on.

FIGURE 3 The site collection list with two sites in the process of provisioning.
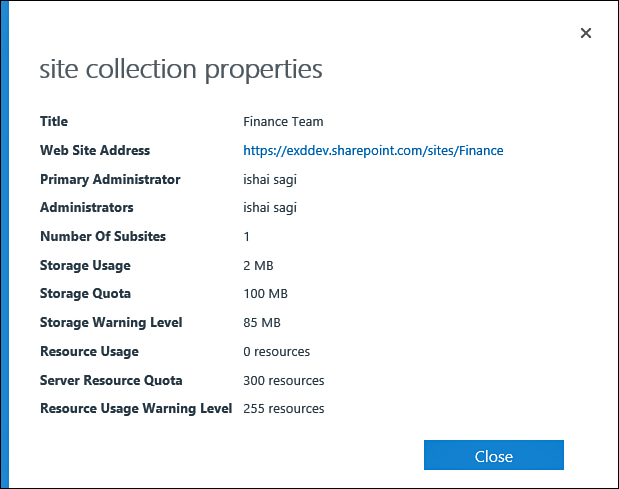
When you click on the link for a site
collection, a dialog appears with the properties of the site collection
and a link that will open the actual site in a new window, as shown in Figure 4.

FIGURE 4 The Site Collection Properties dialog.