Zooming the Page Display
Much like in other Microsoft
Office programs, you can increase or decrease (zoom) the magnification
of a page to either get a closer look at a part of your notes or to see
more of the entire page layout all at once. Zooming in and out lets you
change the size of your notes text and any other objects on the page
without changing the formatting of the content itself. You can return to
the 100% view setting again at any time to restore the normal
appearance of the page.
To zoom in or out of your notes, do the following:
1. | Open the page you want to zoom.
|
2. | Click the View tab.
|
3. | In the Zoom group, do any of the following:
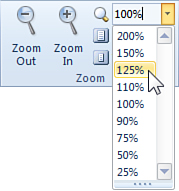
Click Zoom In (either once or repeatedly) to increase the level of magnification of the current page. Click Zoom Out (either once or repeatedly) to decrease the level of magnification of the current page. Click the 75% button to decrease magnification by 25%. Click the 100% button to restore the current page view to its normal appearance. Click the Zoom box drop-down arrow to select a specific level of magnification (see Figure 5).

|
|
You’re
not limited to the choices you see on the Zoom drop-down menu. Click to
activate the cursor in the Zoom field (see where the cursor is shown in
Figure 5), replace the percentage shown there by typing over it with your own preferred value and then press Enter.
|
Opening Additional OneNote Windows
Typically, working in a
single OneNote window will suffice. However, if you frequently need to
switch between different pages without losing your place (for example,
when comparing notes in different locations on the page or in different
locations in a notebook), you can open any number of additional OneNote
windows and navigate to a different place in your notes in each of them.
To open additional OneNote windows, do the following:
1. | On
the View tab, in the Window group, click New Window. OneNote opens a
duplicate of your current OneNote program window. To open additional
windows, click the New Window button again.
|
2. | In any new window, navigate to any page you want—either in the same notebook or in a different one.
|
3. | Use the Windows Alt+Tab shortcut to switch between all of your open OneNote windows.
|
|
You can use the
window management commands in Windows 7 to arrange all of your open
OneNote windows on the desktop. Start by minimizing all open windows so
you see only your desktop. Next restore the OneNote windows you opened.
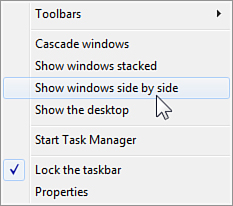
Now, right-click in a blank area of the Windows taskbar and then click
Show Windows Side by Side on the shortcut menu (see Figure 6).
|
When you no longer need any of the additional OneNote windows you’ve opened, simply close them.

Displaying a New Docked Window
Because we’ve already covered
the Dock to Desktop command in the Views group on the ribbon, the
command called New Docked Window in the Window group might seem
redundant.
The difference is that while
the Dock to Desktop command docks the current OneNote window to the
right side of the Windows desktop, the New Docked Window command opens
an additional OneNote window, which it docks to the desktop while
leaving your original OneNote window the same.
This is mainly useful if you
want to take notes about another notes page—either elsewhere in the same
notebook or in another notebook, such as a SkyDrive-based notebook.
To display a new docked window, do the following:
1. | Click the View tab.
|
2. | In
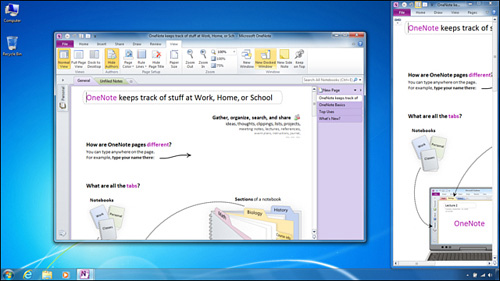
the Window group, click the New Docked Window button. OneNote doesn’t
change your current OneNote window but instead opens a second OneNote
window, which it then docks to the Windows desktop (see Figure 7).

|
By
default, any new docked OneNote window you create will automatically
start in Linked Notes mode .
If you don’t want this to happen, you can turn this behavior off. To
turn off automatic Linked Notes mode when entering the Dock to Desktop
view.