Optimizing images for the Web
The more images you place
on a Web page and the larger their file sizes, the longer it will take
the page to load in a person's browser. And although 56K and faster
modems are the standard, some people still access the Internet with
older, slower modems. As a result, it's important to balance image
quality and size when preparing graphics for the Web. To handle this,
CorelDraw 10 provides the Web Image Optimizer.
To optimize an image for the Web:
1. |
Open the image file in CorelDraw.
|
2. |
Choose File > Publish To The Web > Web Image Optimizer.
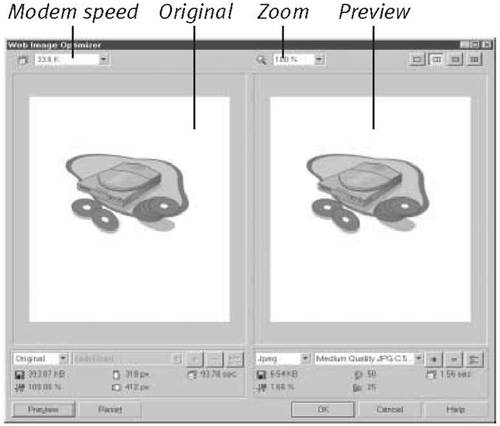
The Web Image Optimizer dialog box appears (Figure 7).
|
3. |
Click a button in the upper-right corner to display two windows:
one for the original and one for a preview of the revised image.
|
4. |
In the first window, select the image's current file type from
the pull-down list. (If the file is still in native CorelDraw format,
choose Original.)
|
5. |
In the second window, select the image's destination file type from the pull-down list.
|
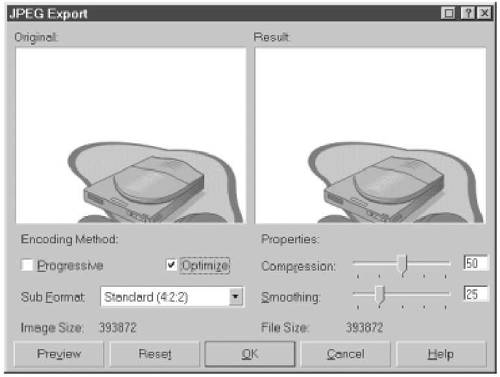
6. |
To set compression and other options for the chosen destination
file type, click the right-most button beneath the second window.
A dialog box specific to that file type appears (Figure 8).
|
7. |
Set options as desired and click OK.
|
8. |
Select a compression setting from the second drop-down list beneath the second window.
|
9. |
Select the modem speed for which you want to optimize from the drop-down list in the upper-left corner of the dialog box.
|
10. |
Click the Preview button to calculate the file's new size and its
approximate transmission time, as well as to preview it in the second
window.
|
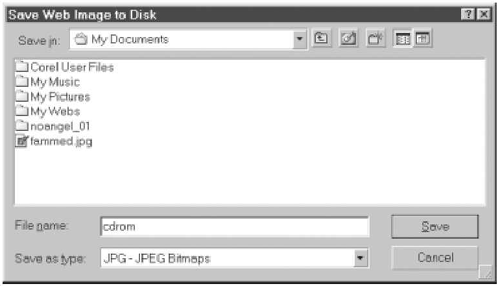
11. |
To view results for other file types, repeat Steps 5–10. Otherwise, click OK.
A standard Save dialog box appears (Figure 9).
|
12. |
Name the file, choose a location on disk in which to save it, and click Save.
The file is saved in the specified format.
|