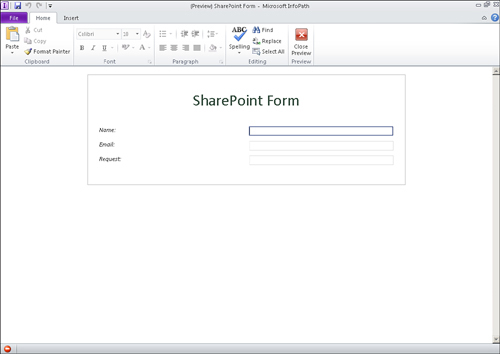
Preview Your Form
With your form open and saved, there are three ways to preview the contents:
Your form will render in the InfoPath Filler version of the application, and you can view how it works there, as shown in Figure 1.
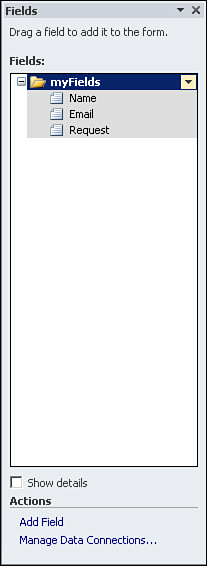
Name Your Data Fields
Change
the name of the each field by either right-clicking each control or
right-clicking the fields in the Fields pane and selecting Properties.
Enter a new name for the field name. Figure 2 provides an example.
To be consistent, naming
conventions should be established. Developers may use camel case (for
example, lastName, firstName), whereas business analysts might use
Pascal case (for example, LastName, FirstName). There is no wrong answer
as long as everyone follows the same standards.
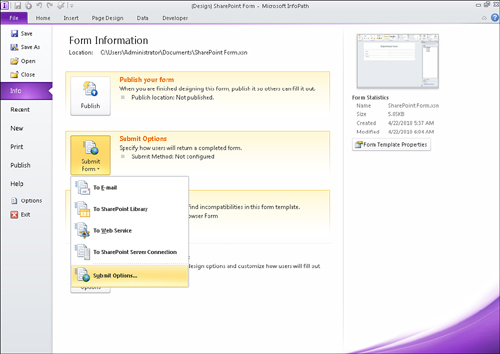
Add Submit Options
From the File menu, select Info. On the Info page, click the Submit Form button.
Several options appear (as shown in Figure 3):
To Email: Submitting this form will send the contents in an email to a specified address.
To SharePoint Library: Submitting this form will send the contents as a saved instance of the form in a SharePoint form library.
To Web Service: Submitting this form will send the form as XML to a web service.
To SharePoint Server Connection: Submitting this form will use a specified data connection stored in SharePoint to submit the data.
Submit Options:
If you are familiar with InfoPath 2007 or just want to take control of
the submit options, use this item menu to just get down to business.
For this scenario,
let’s just select To SharePoint Library. The Data Connection Wizard
appears. For the form to be submitted to that form library, you need to
have a data connection to the SharePoint library in the form.
Tip
You must specify a form
library in SharePoint to submit the form; therefore, you might need to
go to your SharePoint site and create a new form library first. Enter
the location of the form library in the Document Library text entry.
(Create a form library named SharePoint Form for this example.)
You can create the form library right from InfoPath, as explained in a later section.
Now that some of the grunt work
has been done, we come to the most important part of the submission to a
document library: the filename. If you notice, by default, the filename
is Form. That’s great. If you leave it like that, only one person can
submit the form, it will be called Form.xsn in the form library, and no
one ever can submit the form again. Let’s go home!
You need to specify
something dynamic or unique about the form instance the user is
submitting. This can be tricky. You must define a formula to implement
this correctly, and although we haven’t stepped through formulas yet, we
are forced to do at least one here.
The main ingredients for
specifying the filename correctly deal with either entries in the form
or entries in the form combined with a system function such as the date.
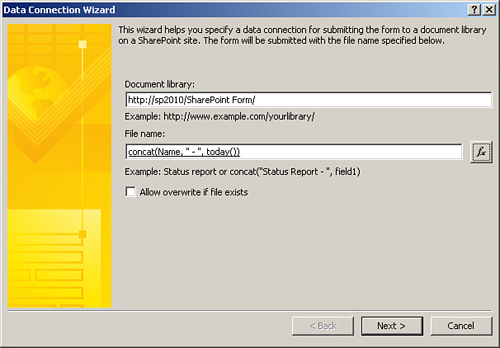
For this example, we will use the name the user entered in the form along with a date function. To do so, follow these steps:
1. | Click the Function button to the right of the File Name text box. The Insert Formula dialog appears.
|
2. | Click the Insert Function button and select the concat function. Click OK. The function inserts three spots for you to modify.
|
3. | Double-click the first entry and select the Name field from the field dialog that appears and click OK.
|
4. | Only select the next entry (don’t double-click) and replace it with “ - “, including the quotes.
|
5. | Select the last entry and click the Insert Function button. Select Today from the Date category.
|
6. | Click OK.
|
7. | Remove the Double-Click to Insert Field text if it still appears. Click OK. Your formula should now look similar to Figure 4.
|
8. | Click Next. If you are prompted for credentials, enter them accordingly.
|
9. | Click Finish to save the connection in the form.
|
Tip
If you use the now date
function, the time component will be used in the filename, and even if
you select to overwrite existing files, the filename will never be the
same. Avoid this, if possible, because every update will generate a new
file.