Importing images
A very quick way to add existing images to a design is to import
them onto the canvas. You will add your new background image this way.
Importing gives you the ability to scale the image proportionately when
you add it to the canvas.
1. | Zoom out to 66% using either the Zoom tool in the Tools panel or the Zoom Level menu in the Application bar.
|
2. | Choose File > Import.
|
3. | Browse to the Lesson03 folder, and locate the promo_backdrop.jpg file.
|
4. | Click Open.
Back on the canvas, you’ll notice that the cursor has changed to an inverted L shape (
 ). This is the import cursor. If you click and drag the mouse, you will
begin to draw a marquee. If you release the mouse button, your image
will be imported at the dimensions you’ve created via the marquee, based
on the height-to-width (aspect) ratio of the original image. If you
simply click the mouse button without dragging, the image will be
imported at its full height and width, with its top-left corner where
you clicked.
). This is the import cursor. If you click and drag the mouse, you will
begin to draw a marquee. If you release the mouse button, your image
will be imported at the dimensions you’ve created via the marquee, based
on the height-to-width (aspect) ratio of the original image. If you
simply click the mouse button without dragging, the image will be
imported at its full height and width, with its top-left corner where
you clicked.
Tip
When importing, if you
simply click the mouse button without dragging, the image will be
imported at its full height and width, with its top-left corner
positioned at the import cursor’s location.
|
5. | Place the cursor in the upper-left corner of the canvas, and then click and drag toward the lower-right side of the canvas.
You will notice from the marquee guideline that in order to get the
image to cover the full width of the canvas, it’s actually going to be
too tall. This will result in a portion of the image being cut off. For
the purpose of this exercise, you will want the entire image to fit
within the height of your canvas, regardless of its width.
|
6. | Drag
the cursor up so that the height of the image fits within the canvas
area. The cursor should snap to the bottom guide when you get within
five pixels of it. When you release the mouse, the image will appear (a
foggy alleyway), but, as noted earlier, it doesn’t cover the full width
of the canvas.
|
7. | Check
the Properties panel to ensure that the x and y positions of the image
you imported are both at 0, and press Ctrl+S (Windows) or Command+S
(Mac) to save your changes.

|
Distortion-free bitmap scaling
Scaling
objects in one direction—whether they are bitmap images or vector
shapes—can cause unwanted distortion. Take, for example, the image you
just imported. Traditional scaling will distort the entire image, giving
you an undesirable result. But Fireworks has a great feature called
9-slice scaling that eliminates distortion. You could use the Scale
tool, but in the first exercise, you’ll see its limitations.
Scaling the “old” way
You’ll use the Scale tool to scale the backdrop image.
1. | Make
sure the backdrop image is still active—look for the blue control
handles at the four corners of the shape. If you don’t see them, use the
Pointer tool to select the image on the canvas.
|
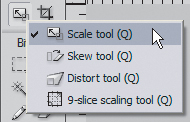
2. | Select the Scale tool (
 ) from the Tools panel.
Control handles appear around the rectangle.
|
3. | Drag the right-middle control handle straight out to the right side of the canvas.
|
4. | Release the mouse button, and note how the image is stretched and somewhat distorted. It can definitely be better!

|
5. | Press the Escape key to cancel the transformation.
|
Avoiding distortion with the 9-slice Scaling tool
If
a bitmap image contains an area that doesn’t have a lot of detail (a
very important point to note), you can use the 9-slice Scaling tool to
make the image fit with no noticeable damage.
1. | Make sure the backdrop image is still selected.
|
2. | Select the 9-slice Scaling tool from the Tools panel (
 ). The scaling handles appear again, but the image is now divided with
special 9-slice guides. These guides can be positioned prior to scaling,
and anything that is outside the guides will remain unchanged during a
scaling operation.
). The scaling handles appear again, but the image is now divided with
special 9-slice guides. These guides can be positioned prior to scaling,
and anything that is outside the guides will remain unchanged during a
scaling operation.
|
3. | Move the cursor over the vertical 9-slice guide on the left.
|
4. | When the cursor changes to a double-headed arrow, drag the guide in the image to the area of fog that has no noticeable detail.
|
5. | Position
the right-side 9-slice guide in the fog as well, similar to what you
see here. Watch out for those puddles in the foreground of the photo!
The position of the horizontal guides is not important for this example.

|
6. | Drag
the right-middle control handle out to 500 pixels. Tooltips do not
display when using the 9-slice guides, so watch the top ruler to make
sure you have reached the 500-pixel distance.
|
7. | Release
the mouse button. Only the areas enclosed by the 9-slice guides (areas
with no real detail) were scaled (stretched). The sides of the image,
where the puddles and garbage gave the image detail and definition, were
not stretched.
You now have an image that actually fits the canvas! Press Enter to accept the transformation.
|
8. | If
the watch and investigator images are hidden by the new background,
drag them up in the stacking order in the Layers panel (or choose Modify
> Arrange > Send To Back to move the alley scene to the bottom of
the pile of images).
|
9. | Press Ctrl+S (Windows) or Command+S (Mac) to save your work. |