The simple template, with
its combination of locked and editable regions, truly reflects the
reality of many Web pages where the overall structure is constant and
the details of the content vary. Often, however, a single locked area is
too rigid to really be useful in a complex site. Suppose for a moment
you're working on a site for a magazine publisher with multiple brands.
The client wants a general look and feel for the entire site with
separate navigation and content for each magazine. One way to achieve
this effect is to use multiple templates — one set for each magazine,
all incorporating the parent-company style. The problem here is that to
affect changes on the highest level, all the templates need to be
changed. Another way — a better way — is to use nested templates.
Nested templates allow
template-based documents to have numerous tiers of locked regions. With
nested templates, the magazine publisher in our example could make a
change to just the master template and the modifications would ripple
through all the other magazine-specific templates and on down to their
related pages. Best of all, there's no real limit on nesting templates:
Your template-based files can be as deeply nested as you need them to
be.
Here's an overview of how nested templates work:
A new page based on the master template is created and saved as a template; this new document is the nested template.
Within
the editable areas originally set up in the master template, new
editable areas are placed. All areas not designated as editable in the
nested template are locked.
A new document is created, based on the nested template. The only editable areas are those inserted in the nested template.
When
modifications are made to the nested template, the changes are
reflected in the pages based on that template. When modifications are
made to the master template, the changes are applied to both the nested
template and to documents based on the nested template.
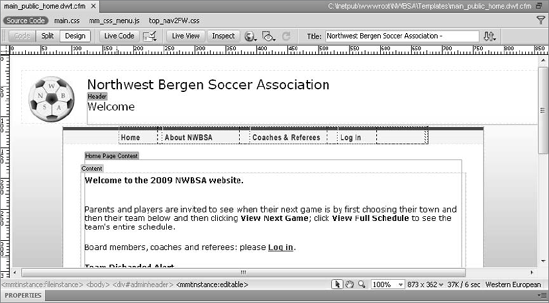
Dreamweaver employs a
color-coding system to help you differentiate editable regions inserted
in the master template from those added in the nested template. Although
you can't tell it in this black-and-white screenshot, the master
template editable regions are shown in orange, whereas nested template
editable regions are shown in blue (see Figure 1).
To create a nested template, follow these steps:
Create a master root-level template by choosing File =>
Save As Template for an existing page or selecting New Template from
the Template category of the Assets panel for new documents. The master
template contains all the elements — navigation, logos, footers, and so
on — common to all template-based pages in the site.
Insert editable regions wherever variable content is desired in the master template and save the template when you're ready.
Create a new document based on the master template by following these steps:
Choose File  New to open the New Document dialog box.
Select the Templates category.
Make sure the current site is selected in the Templates For list.
Select the desired master template from the Template list.

Save
the newly created document as a template. By saving a template-derived
document as a template, a nested template is created.
In
the nested template, make any changes needed within the editable
regions. These changes are locked in any document based on the nested
template.
Add
any desired template regions (editable, repeating, or optional) within
the existing editable regions from the master template. When the first
editable region is inserted in the nested template, the editable regions
from the master template turn orange to differentiate them from the new
regions.
After you've finished adding the desired template regions to the nested template, save the file.
Now, when creating
documents based on the nested template, you are still able to modify
content within an editable region — but only those editable regions
added in the nested template.