If all text animations involved just two short words, such as Road Trip,
life would be easy. But in the real world, you may often have to work
with longer blocks of text, and they can be tedious to enter manually.
Fortunately, After Effects lets you import text from Photoshop or
Illustrator. You can preserve text layers, edit them, and animate them
in After Effects.
Importing text
Some of the remaining text for this composition is in a layered Photoshop file, which you’ll import now.
1. | Double-click an empty area in the Project panel to open the Import File dialog box.
|
2. | Select
the credits.psd file in the AECS5_CIB/Lessons/Lesson03/Assets folder.
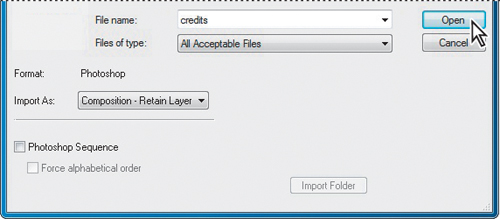
Choose Composition – Retain Layer Sizes from the Import As menu, and
then click Open.
 |
3. | In the Credits.psd dialog box, select Editable Layer Styles, and click OK.
|
After Effects can import Photoshop layer styles,
retaining the appearance of the layers you’re importing. The imported
file is added as a composition to the Project panel; its layers are
added in a separate folder.
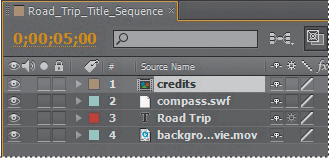
4. | Drag the credits composition from the Project panel into the Timeline panel, placing it at the top of the layer stack.

|
Because you imported the credits.psd file as a
composition with layers intact, you can work on it in its own Timeline
panel, editing and animating its layers independently.
Editing imported text
The text you imported isn’t currently editable in
After Effects. You’ll change that so that you can control the type and
apply animations. And if you have a sharp eye, you’ve noticed some typos
in the imported text. So, first you’ll clean up the type.
1. | Double-click the credits composition in the Project panel to open it in its own Timeline panel.
 |
2. | Shift-click
to select both layers in the Credits Timeline panel, and choose Layer
> Convert To Editable Text. (Click OK if you see a warning about
missing fonts.) Now the text layers can be edited, and you can fix the
typos.
|
3. | Deselect
both layers, and then double-click layer 2 in the Timeline panel to
select the text and automatically switch to the Horizontal Type tool ( ). ).
Note
The layer name does not change in the Timeline panel
when you correct the spelling in the layer. This is because the original
layer name was created in Photoshop. To change a layer’s name, select
it in the Timeline panel, press Enter or Return, type the new name, and
press Enter or Return again.
|
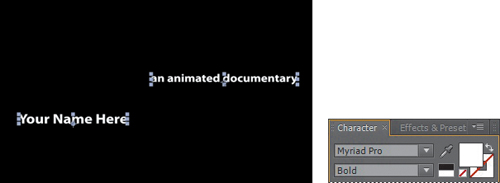
4. | Type an e between the t and d in the word animated. Then change the k to a c in documentary.
 |
5. | Switch to the Selection tool ( ) to exit text-editing mode. ) to exit text-editing mode.
|
6. | Shift-click to select both layers in the Timeline panel.
|
7. | If the Character panel isn’t open, choose Window > Character to open it.
|
8. | Choose the same typeface you used for the words Road Trip. (We used Myriad Pro.) Leave all other settings as they are.
 |
9. | Click an empty area of the Timeline panel to deselect both layers. Then select layer 2 again.
|
10. | In
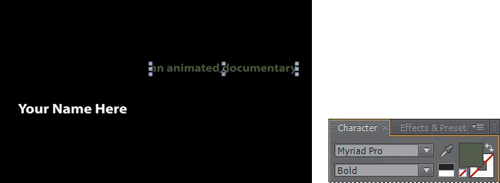
the Character panel, click the Fill Color box. Then, in the Text Color
dialog box, select a green color. We used R=66, G=82, B=42.
 |
Animating the subtitle
You want the letters of the subtitle—an animated documentary—to fade onscreen from left to right under the movie title. The easiest way to do this is to use another text animation preset.
1. | Go to 5:00 in the timeline. At that point, the title and the compass have finished scaling to their final size.
|
2. | Select the subtitle layer (layer 2) in the Timeline panel.
|
3. | Press Ctrl+Alt+Shift+O (Windows) or Command+Option+Shift+O (Mac OS) to jump to Adobe Bridge.
|
4. | Navigate to the Presets/Text/Animate In folder.
|
5. | Select
the Fade Up Characters animation preset, and watch it in the Preview
panel. This effect works well to reveal the text gradually.
|
6. | Double-click the Fade Up Characters preset to apply it to the subtitle layer in After Effects.
|
7. | With
the subtitle layer selected in the Timeline panel, press UU to see the
properties modified by the animation preset. You should see two
keyframes for Range Selector 1 Start: one at 5:00, and one at 7:00.
|
You still have a lot of animation to do in this composition, so you will speed up the effect by 1 second.
8. | Go to 6:00, and then drag the second Range Selector 1 Start keyframe to 6:00.
|
9. | Drag the current-time indicator across the time ruler between 5:00 and 6:00 to see the letters fade in.
|
10. | When
you’re done, select the subtitle layer, and press U to hide the
modified properties. Then choose File > Save to save your work. |