Group shots are always a challenge because, without a
doubt, somebody in the group will be totally hammered .
Okay, the real problem is that in group photos there’s always one or
more people who blinked at just the wrong time, or forgot to smile, or
weren’t looking at the camera, etc. Of course, you could just take their
expression from another frame and combine it with this one, but that
takes a lot of work. Well, at least it did before the Auto Blend
feature. This thing rocks!
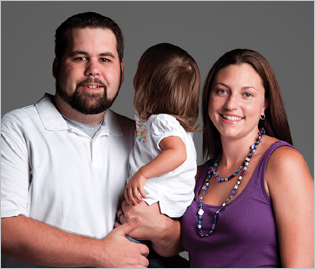
Step One. | Here’s a photo of a cute family. The problem here is the dad isn’t looking very happy and the baby has her head turned.
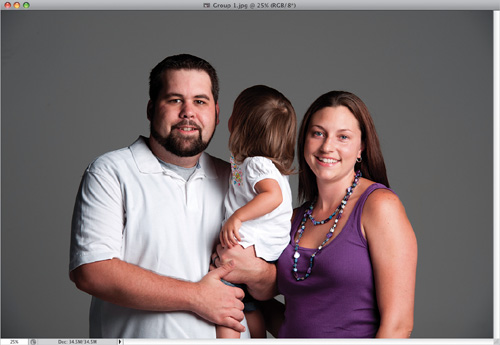 | Step Two. | Of
course, with group shots you take as many shots as the group will
endure, and luckily in the very next frame there was a great shot of the
dad smiling, and the baby looking at the camera, but now the mom has
her eyes closed. So, the idea is to take the dad and baby from this
shot, and combine them with the previous photo, where the mom has her
eyes open.
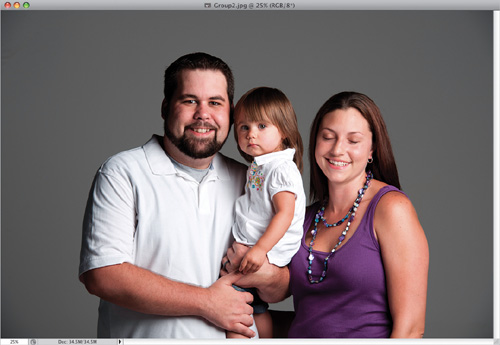 | Step Three. | Start by dragging the two photos into the same document: get the Move tool (V),
press-and-hold the Shift key, and click-and-drag one photo over onto
the other (it will appear as its own layer in the other document, as you
can see in the Layers panel shown here). Now, you’ll need to convert
the Background layer into a regular layer, so go to the Layers panel and
double-click directly on the Background layer. This brings up the New
Layer dialog (shown here), which by default renames your Background
layer as Layer 0. Just click OK and it’s now a regular ol’ Photoshop
layer.
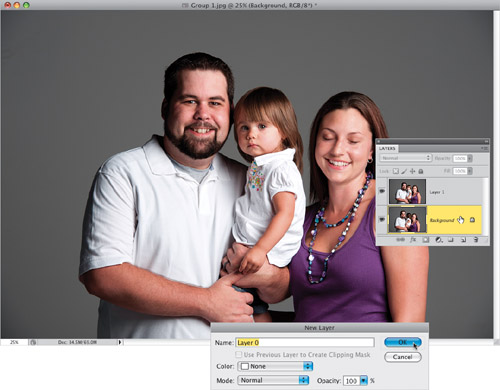 | Step Four. | Usually,
the photos line up pretty well if the shots were taken on a tripod, but
if you handheld them, or your subjects move a bit, you’ll want to
select both layers and choose Auto-Align Layers
from the Edit menu first to have Photoshop align the two layers for
you. In this case, Auto-Align Layers seemed to squash the top photo a
little, so I pressed Command-T (PC: Ctrl-T) to bring up Free Transform and just dragged the bottom-center point down to match the bottom layer.
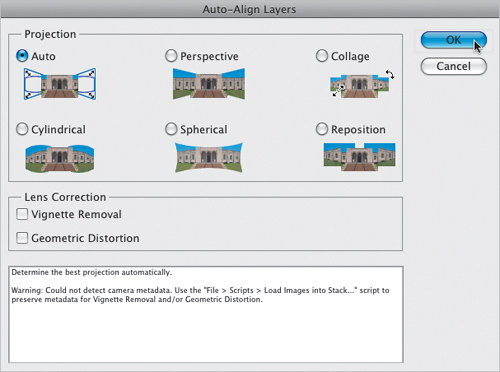 | Step Five. | The
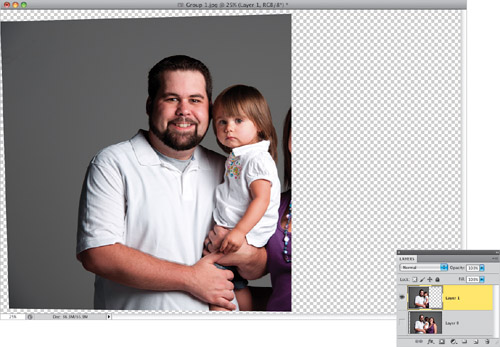
next two steps couldn’t be easier: First, in the Layers panel, hide
Layer 0 from view by clicking on the little Eye icon to the left of the
layer. Then click on Layer 1. Now, get the Rectangular Marquee tool (M)
and draw a rectangular selection over the parts of this layer that
don’t look good (in other words, you’re going to delete everything you
don’t want to keep—so put a selection around the mom on the right) and
hit the Delete (PC: Backspace) key. This leaves you with just the part
of this layer you want to keep. Now, Deselect by pressing Command-D (PC: Ctrl-D).
 | Step Six. | Hide
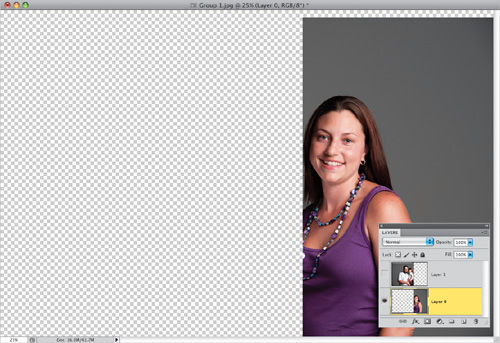
that top layer from view, and make Layer 0 visible again by clicking
once in the first column where the little Eye icon used to be. Click on
Layer 0, then do the same thing—erase what you don’t want (in this case,
you’re putting a Rectangular Marquee selection around the dad and
baby), then press the Delete (PC: Backspace) key, so you have the image
you see here. Now you can Deselect. The key thing to remember here is
this: make sure these two layers overlap, because Photoshop needs some
overlapping area to do its blending (in other words, don’t erase so much
that there’s any gap between the two layers—it’s got to overlap. I’d
shoot for a 20% overlap if you can, although I didn’t have that much
here, because the baby shifted position, moving her head closer to the
dad).
 | Step Seven. | Go
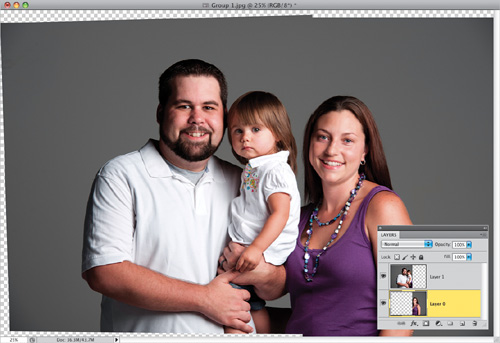
to the Layers panel and make both layers visible (as seen here). Now,
you have the right poses together, but you also have a very harsh seam
moving right through the mom’s face and shirt. It looks “pieced
together” big time. Of course, you could add layer masks and try
blending the edges yourself with the Brush tool, but that’s what makes
this technique so sweet: CS5 will do a brilliant job of all that for
you—in just seconds.
 | Step Eight. | Here’s
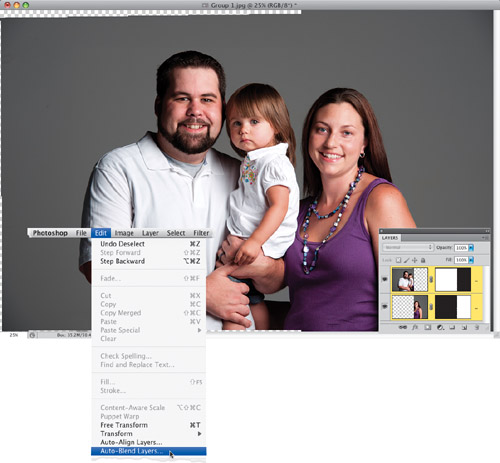
the last step: select both layers in the Layers panel (click on one
layer, press-and-hold the Command [PC: Ctrl] key, then click on the
other layer to select it as well), then once both layers are selected,
go under the Edit menu, choose Auto-Blend Layers, and click OK in the
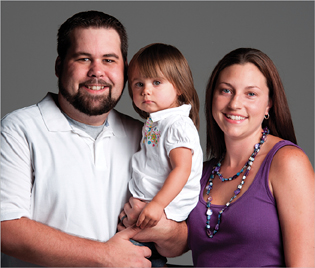
resulting dialog. That’s it—in just seconds you have a perfectly smooth,
seamless blend of the two photos, and Photoshop did all the hard work.
Now, you can just grab the Crop tool (C)
and crop away any transparent areas left by the alignment. You can see
the before/after on the next page. It does leave the layer masks that
Auto-Blend Layers creates in place, just in case you want to tweak them,
but I haven’t come up with an instance where I needed to yet. Just
choose Flatten Image from the Layers panel’s flyout menu, and you’re
done.
 |
Before (the dad and baby on the left are in bad poses—one has her head turned, one’s not smiling)
After
(the first photo is seamlessly blended with the second photo, replacing
the dad and baby on the left with their better poses from a different
frame)
|