4. Saving and Sending Messages
At regular intervals while
you're composing a message, Outlook saves a copy of the message in the
Drafts folder. This is intended to protect you from losing messages that
are in progress.
If
you close a message composition window before sending the message,
Outlook prompts you to save a draft or to save or discard the existing
draft.

You can save a message draft at any time by clicking the Save button on the Quick Access Toolbar in the message window.
To resume working on a message that's been saved as a draft and closed, display the Mail module, click the Drafts folder in the Navigation Pane, and then double-click the message you want to work on.
After you finish composing a message, you can send it by clicking the Send
button located in the message header or by pressing Ctrl+Enter. The
first time you press this key combination, Outlook asks you to confirm
that you want to designate this as the keyboard shortcut for sending messages.
When you send the message, Outlook deletes the message draft, if one exists, and stores a copy of the sent message in the Sent Items folder.
Tip:
Each account you access from Outlook has its own Drafts folder and its own Sent Items folder. Outlook automatically
saves draft messages and sent messages in the folder affiliated with
the e-mail account in which you compose or send the message.
You can change the location
in which Outlook saves message drafts and sent messages from the
Advanced E-mail Options dialog box.
In this exercise, you'll compose an e-mail message, save an interim message draft, and then send the message.
Note:
SET UP You don't need any practice files to complete this exercise. Display your Inbox, and then follow the steps.
 On the Home tab, in the New group, click the New E-mail button.
A new message window opens.
Tip:
By clicking the New Items
button, you can choose to create any type of Outlook item such as an
appointment, contact, fax, message, note, or task, or an organizational
item such as a contact group or data file, without leaving the module
you're working in.
In the To box, type your own e-mail address.
In the Subject box, type SBS Tradeshow Schedule.
Note:
The subject of this message begins with SBS (for Step by Step) so that you can easily differentiate it from other messages in your Inbox and Sent Items folders and can delete it later.
 At the right end of the message window title bar, click the Close button.
Outlook prompts you to save a message draft.
You can save a message that's in progress and return to it later.

Note:
Troubleshooting
The appearance of buttons and groups on the ribbon changes depending on
the width of the program window or item window.
In the Microsoft Outlook message box, click Yes.
The message window closes. In the Navigation Pane, the number in the unread message counter to the right of the Drafts folder increases.
In the Navigation Pane, click the Drafts folder.
Your message and its current content are in this folder.
A
bold folder name indicates that the folder contains unread messages;
the number of unread messages appears in parentheses to the right of the
folder name.

In the Mail pane, double-click the message to open it for editing.
In the content pane, type The following people will be working at the tradeshow: and press the Enter key twice. Then type Amanda, Barry, Cory, and Doyle, pressing Enter once after each of the first three names, and twice after the fourth one.
The list of names is currently unformatted.
You enter text in a message the same way you do in a document.

 Select the list of names. Then on the Message tab, in the Basic Text group, click the Bullets button (not its arrow).
Tip:
The Bullets button and other paragraph-formatting commands are also available in the Paragraph group on the Format Text tab.
Outlook converts the list of names to a simple bulleted list.
 With the bulleted list still selected, in the Basic Text group, click the Bullets arrow.
The Bullets gallery opens.
The Bullets gallery.
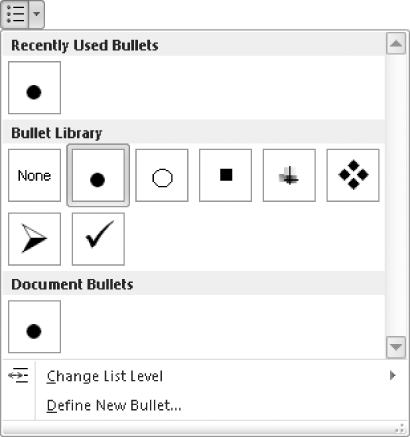
Notice the
types of bullets available in the Bullet Library section of the gallery.
You can change the list to use any of these bullets by clicking the
bullet you want.
In the Bullets gallery, point to Change List Level.
A menu illustrating bullets used by a multilevel list opens.
The menu illustrates the appearance of a multilevel bulleted list with the current settings.

You can demote (or promote) a list item to any of nine levels, differentiated by the bullet character and indent level.
Press Esc twice to close the Bullets gallery without making changes.
Press Ctrl+End to move the cursor to the end of the message. Type Giveaways are: and then press Enter twice.
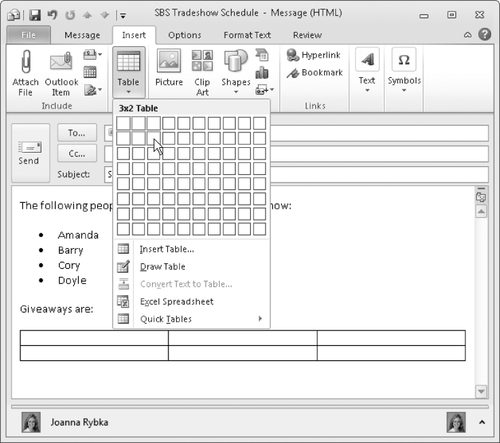
 On the Insert tab, in the Tables group, click the Table button.
The Table gallery opens.
In the Table gallery, point to the third cell in the second row.
A live preview of a three-column by two-row table appears at the cursor location in the message window.
Outlook displays a preview of the effect of inserting a table with the current settings.
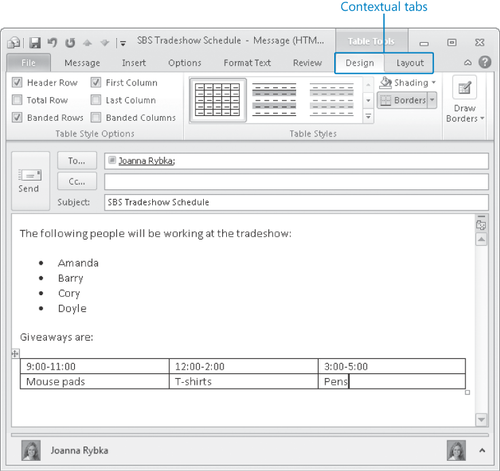
Click the selected cell to insert a three-column by two-row table in the message.
The Table Tools contextual tabs, Design and Layout, appear on the Ribbon.
Enter the following information in the table, pressing Tab to move between table cells:
| 9:00-11:00 | 12:00-2:00 | 3:00-5:00 |
| Mouse pads | T-shirts | Pens |
The table and table content are currently unformatted.
The current message content.
 With the cursor still active in the lower-right table cell, click the More button in the Table Styles gallery on the Design contextual tab.
The Table Styles gallery opens. A box around the Plain Tables thumbnail indicates the formatting of the active table.
The Table Styles gallery.

In the Built-In section of the Table Styles gallery, point to the third thumbnail in the second row (the table with a red header row, identified by the ScreenTip Light List – Accent 2), and then click it.
Outlook displays a preview when you point to the thumbnail, and then applies the selected table style.
Applying a built-in table style.
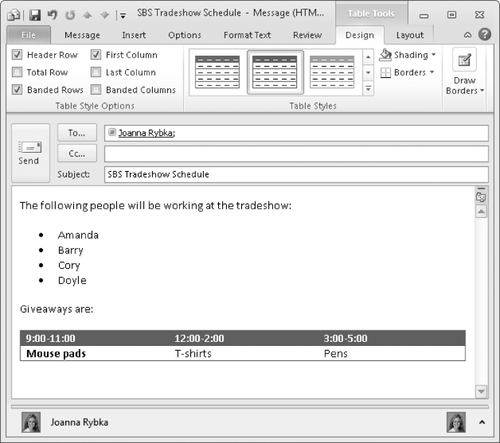
Notice that the default table style formats the first column as bold.
On the Design tab, in the Table Style Options group, clear the First Column check box.
The content in the first row of the table is now bold, and the content of the second row is not.
 In the message header, click the Send button.
Note:
Keyboard Shortcut Press Ctrl+Enter to send a message.
Outlook closes the message window and sends the message. The message draft disappears from the Drafts folder.
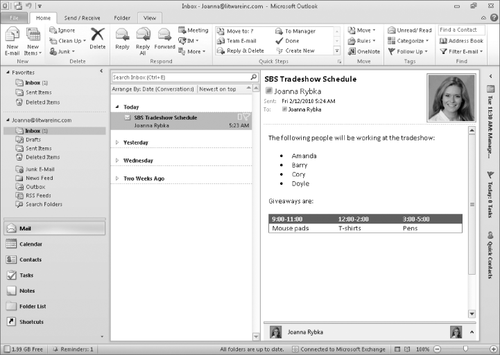
In the Navigation Pane, click the Inbox folder.
The received message is in this folder.
The formatted message content is shown in the Reading Pane.
Tip:
We're working with the To-Do Bar
closed, so you can see more of the message content. To close the To-Do
Bar in your Outlook program window, click the Minimize The To-Do Bar
button in its upper-left corner.
In the Navigation Pane, click the Sent Items folder.
The sent message is in this folder.
Note:
CLEAN UP Display your Inbox. Retain the SBS Tradeshow Schedule message in your Inbox and Sent Items folders for use in later exercises.
If you have configured Outlook to connect to multiple e-mail accounts, you need to ensure that the message is being sent from the correct account.
By default, Outlook assumes
that you intend to send a message from the account you're currently
working in. If you begin composing a message while viewing the Inbox of
your Work account, for example, Outlook selects the Work account as the
message-sending account. If you reply to a message received by your
Personal account, Outlook selects the Personal account as the
message-sending account.
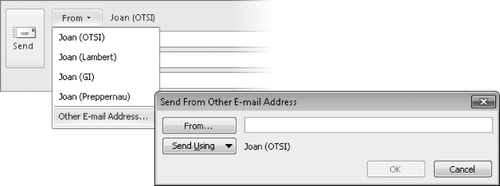
You can easily change the message-sending account. When Outlook is configured to use multiple accounts, a From button appears in the message header.
Tip:
If Outlook is configured to
connect to only one account, you can display the From button by clicking
From in the Show Fields group on the Options tab of a message
composition window.
Clicking the From button
displays a list of active accounts from which you can choose. If the
account from which you want to send the message doesn't appear in the
list, you can specify another account; however, you must have permission
to send messages from that account.