1. Bullets and the Slide Master
You can apply the bulleted list changes that you
learn about in the following sections to individual paragraphs, but your
best bet is to apply them to the slide master, or at least to
individual layout masters. That way, you ensure consistency throughout
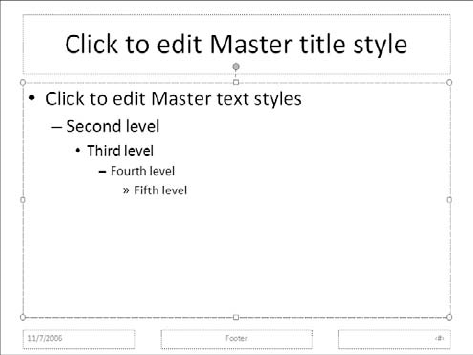
the presentation. On the slide master, five levels of bullets are
defined, as shown in Figure 1.
(You can add additional levels by pressing Enter and then Tab after the
last level.) You can customize any of these levels individually. Here's
a high-level overview of the process:
On the View tab, click Slide Master.
Click the top slide in the left pane, selecting the slide master itself (not one of its subordinate layouts).
Click on the slide, in the "Click to edit Master text styles" line.
Customize the bullet character, as in the following sections.
Click in the "Second level" line, and customize it.
Repeat
the preceding steps for other levels that you want to customize. (If
you do not plan to use all nine levels, you do not need to make changes
to them.)
On the Slide Master tab, click Close.
2. Using Bullet Presets
You can turn off the bullets for any paragraph(s) or
text placeholder by selecting them and clicking the Bullets button on
the Home tab to toggle the bullet(s) off. In that same way, you can
apply bullets to paragraphs or text placeholders that don't currently
have them.
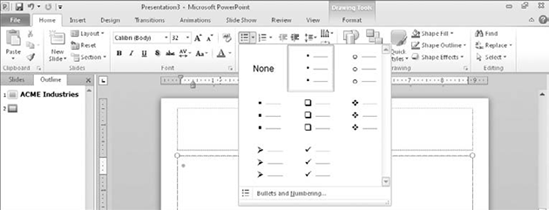
The default bullet character depends on the theme but is usually one of the presets on the Bullets button's menu, as shown in Figure 2.
To switch among the presets, select the paragraph(s) to affect, open
the button's menu, and click a different preset. The menu also has a
None command, an alternative for toggling bullets off.
NOTE
When you turn the bullet character off in
PowerPoint, the indentation of the paragraph does not change, so you're
left with a first line that hangs out to the left of any other lines in a
multiline paragraph.
Each of the seven presets in the Bullets button's
menu is a placeholder. By default, each placeholder is populated with a
certain symbol, but you can modify any or all of the placeholders to be
different sizes or colors, and you can even replace the characters with
your own choices of symbols or graphics. In the following sections you
learn how to select your own bullet characters.
3. Changing Bullet Size and Color
Each of the bullet presets (see Figure 2)
is actually a character from a symbol font. It is text — and as such,
you can format it like text. You can increase or decrease its size, and
you can change its color. To change a bullet's size and color, follow
these steps:
Select the paragraph(s) to affect. For best results, make the change on the slide master to ensure consistency.
Open
the Bullets button's menu and choose Bullets and Numbering. The Bullets
and Numbering dialog box appears with the Bulleted tab displayed.
In
the Size box, use the increment buttons to increase or decrease the
size. The size is in relation to the text size of the paragraph.
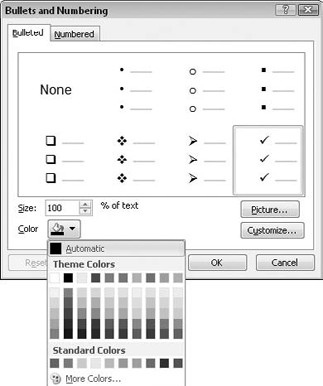
Click the Color button, and select a color from the Color Picker. See Figure 3.
Click OK to apply the changes.
NOTE
The color and size changes you make in the Bullets and Numbering dialog box affect all presets.
4. Changing the Bullet Symbol
If you do not like any of the preset bullets, you can
change that preset position to a different character. You can use any
character from any font installed on your system, including any letter
or number.
To select a different bullet symbol, follow these steps:
Select the paragraph(s) to affect. For best results, make the change on the slide master to ensure consistency.
Open
the Bullets button's menu and choose Bullets and Numbering. The Bullets
and Numbering dialog box appears with the Bulleted tab displayed, as
shown in Figure 3.
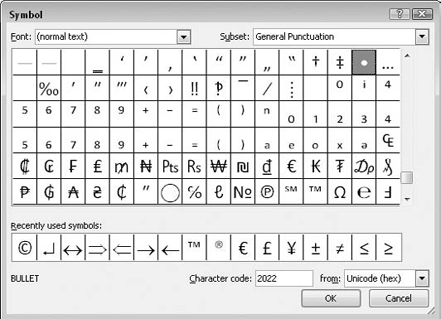
Click the preset that you want to replace, and then click Customize. The Symbol dialog box opens, as shown in Figure 4.
Select
the desired font from the Font list. Although all fonts are available,
most of the characters suitable for bullets are in the Wingdings fonts.
Click
the desired character. Notice the scroll bar to the right of the
characters; there are more characters than can be displayed at once.
Click OK. The new symbol appears on the Bulleted tab.
(Optional) Change the new symbol's size and color if desired, as in the preceding section.
Click OK to apply the new symbol to the selected paragraph(s).
5. Resetting a Bullet Preset
After you have customized a bullet preset, you might
decide you want to go back to its original setting. To reset it, follow
these steps:
Open
the Bullets button's menu and choose Bullets and Numbering. The Bullets
and Numbering dialog box appears with the Bulleted tab displayed, as
shown in Figure 3.
Click the preset that you want to reset.
Click the Reset button. The position is reset.
Click
OK to apply the reset character. Do not click Cancel or the reset will
be cancelled. If you don't actually want to apply the character, change
it afterward.
|
If the Reset button is unavailable, try clicking another preset, and then clicking back to the desired one again.
|
|
6. Using a Picture Bullet
The Clip Organizer contains many small graphics that
work well as bullets. Such graphics have a keyword of "bullet" assigned
to them. The Picture Bullet dialog box, which you can access by clicking
the Picture button in the Bullets and Numbering dialog box, is a
special simplified version of the Clip Organizer that shows only clips
that have "bullet" as one of their keywords.
To use a picture bullet from the Clip Organizer, follow these steps:
Select
the paragraph(s) to which you want to apply the picture bullet. For
best results, make the change on the slide master to ensure consistency.
Open
the Bullets button's menu and choose Bullets and Numbering. The Bullets
and Numbering dialog box appears with the Bulleted tab displayed.
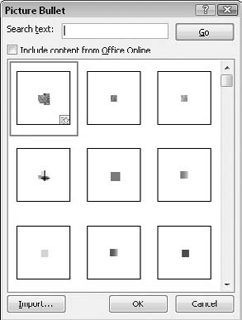
Click the preset that you want to replace, and then click Picture. The Picture Bullet dialog box opens, as shown in Figure 5.
Select the desired graphic.
Click OK. The graphic appears in the preset position that you chose in step 3.
Click OK to apply the graphic to the selected paragraphs as a bullet.
|
To see more bullet graphics, select the Include
Content from Office Online check box. Then close and reopen the Picture
Bullet dialog box. Be aware, however, that with a slow Internet
connection, this might dramatically decrease the performance of this
dialog box, making scrolling and picture preview very sluggish.
|
|
NOTE
The bullets with yellow stars in the bottom-right
corner have special animation effects when you display them in slide
show view. The top-left bullet in Figure 5 has a yellow star on it, for example. Bullets with a blue globe in the bottom-left corner are from the Web collection.
Most of the picture bullets are a fixed color; they
do not change color when you change the theme, and they are not affected
by the Color setting in the Bullets and Numbering dialog box.
You can also add your own pictures as bullets. For
best results, stick with very small, simple graphics. A detailed photo
might look great as a full-screen image, but as a bullet it will
probably look blurry and unrecognizable. To import your own picture,
follow these steps:
Select
the paragraph(s) to which you want to apply the picture bullet. For
best results, make the change on the slide master to ensure consistency.
Open
the Bullets button's menu and choose Bullets and Numbering. The Bullets
and Numbering dialog box appears with the Bulleted tab displayed.
Click the preset that you want to replace, and then click Picture. The Picture Bullet dialog box opens, as shown in Figure 5.
Click Import. The Add Clips to Organizer dialog box opens.
Select the graphic you want to use and click Add. The picture appears as a thumbnail in the Picture Bullet dialog box.
Select the newly imported picture and click OK to apply the graphic as a bullet to the selected paragraph(s).
|
If the picture bullet is too small or too
large, reopen the Bullets and Numbering dialog box and increase or
decrease the Size setting. |