INCLUDING A TABLE OF CONTENTS
(TOC) at the beginning of a long document provides a nice roadmap to
the document’s contents. The reader can identify a topic of interest and
go right to the page that discusses the topic. If the document includes
a title page or cover page, in most cases you should insert the table
of contents on the page directly after the title or cover page. In many
cases, you should also insert a hard page break after the table of
contents to separate it from the following text. This ensures that the
first page of information in the document starts at the top of a new
page.
Word offers both a gallery of
built-in table of contents styles and a dialog box where you can choose
more specific settings for your table of contents. No matter which of
these methods you use, you need to start by formatting the headings in
the document using the appropriate Quick Styles. The Table of Contents feature
in Word identifies which items to list based on the style applied. Text
formatted with the Heading 1 and Heading 2 Quick Styles become the
top-level and second-level entries in the table of contents.
Tip
Word actually offers nine
heading level styles, and three of them are used in a TOC by default.
To find the other styles, click the Dialog Box Launcher in the Styles
group of the Home tab. Then click the Manage Styles button at the
bottom.
After you have applied the
heading styles to the headings in your document and have created the
page where you want to insert the TOC, use one of these methods to
generate the TOC:
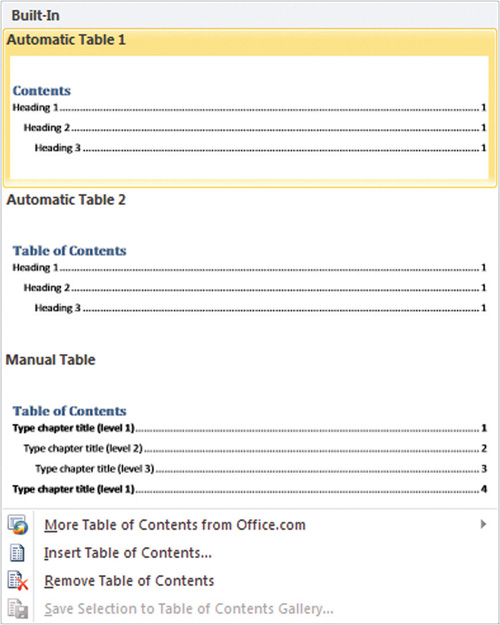
Choose References
> Table of Contents > Table of Contents. Then click one of the two
Automatic Table choices at the top of the gallery shown in Figure 1.
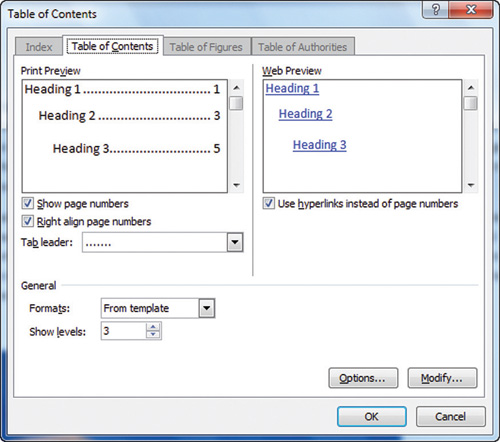
Choose
References > Table of Contents > Table of Contents > Insert
Table of Contents to display the Table of Contents dialog box shown in Figure 2.
Among the settings you can change here are whether or not to Show Page
Numbers or Right Align Page Numbers. If your document has more than
three heading levels that you’d like to include in the TOC, change the
Show Levels value. You can use the Formats drop-down list to choose an
alternate style for the TOC. If you plan to publish the document to the
Web, leaving a check in the Use Hyperlinks Instead of Page Numbers box
changes the TOC to a hyper-linked format in Web Layout view. Click OK to
finish adding the table of contents.
If the text of the document
changes, if you add or delete headings, or if you create a separate page
to hold the table of contents after creating it, you’ll need to update
the table of contents. You can update just the page numbers of the table
of contents, but the safest choice is usually updating the entire
table, which ensures that the TOC reflects any heading changes made
since you generated it.
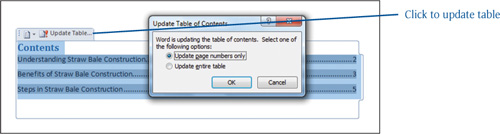
To update a table of contents, click within it. Then click Update Table in the tab above the table. As shown in Figure 3,
the Update Table of Contents dialog box appears. Choose either Update
Page Numbers Only or Update Entire Table, and then click OK.