IT tutorials
 
Office
 

Microsoft Word 2010 : Working with Styles (part 2) - Creating Customized Styles, Managing Styles

- Free product key for windows 10
- Free Product Key for Microsoft office 365
- Product Key Free : Microsoft Office 2019 – Serial Number
2/16/2013 5:16:14 PM

Creating Customized Styles

If your company has a standard format it likes to use for document areas, you can create your own Quick Style and quickly apply it whenever you need it. For example, suppose your company likes proposals to have a heading in a 24-point bold Harrington font with the Gradient Fill – Blue, Accent 1 text effect and a shadow.

You can save all that formatting in a style and save it for use in future documents. Follow these steps to save the formatting to a Quick Style.

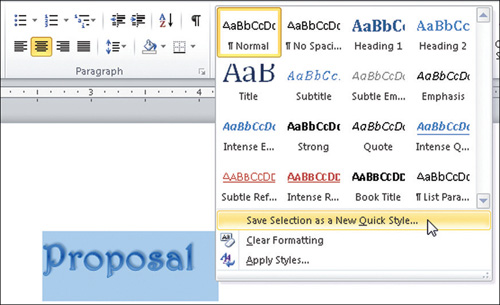
  1. Format and select some text the way you want it.

  2. Choose Home > Styles and click the More button.

  3. Choose Save Selection as a New Quick Style, as shown in Figure 4. The Create New Style from Formatting dialog box appears.

    Figure 4. Create your own quick style.

  4. Enter a name for your style, “Proposal,” for example.

  5. Click Modify. The dialog box expands. See Figure 5.

    Figure 5. The expanded Create New Style from Formatting dialog box.

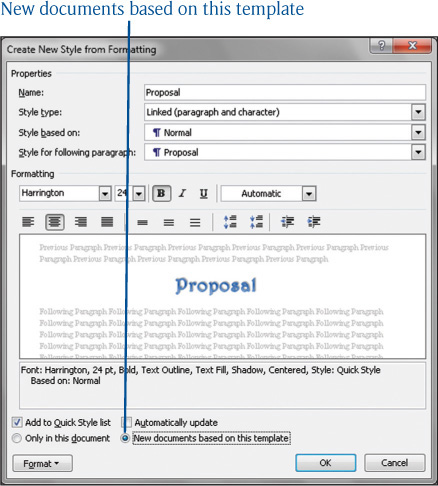
  6. Select New Documents Based on This Template.

  7. Click OK. The new Quick Style appears in the Quick Style box. See Figure 6.

Figure 6. The newly saved Quick Style.

Managing Styles

Sometimes the styles you already have, whether standard or custom styles, aren’t quite right for the current document. For example, say the Heading 1 style is a 14-point bold Veranda font, but for this document, you want it as an 18-point font.

You could select every occurrence of the Heading 1 style and change them individually to an 18-point size, or you can modify the style. When you modify a style, you decide if you want it changed for only the current document, or if you want to change it also for future documents based on the same template.

Fortunately, Word has a Manage Styles box you can use for quick, efficient style management. Just follow these steps:

  1. Display the Styles task pane by clicking the Home > Styles Dialog Box Launcher.

  2. Along the bottom of the Styles task pane are three small icons, the third of which is the Manage Styles icon.

  3. Click Manage Styles. The Manage Styles dialog box appears, as shown in Figure 7.

    Figure 7. The Manage Styles dialog box.
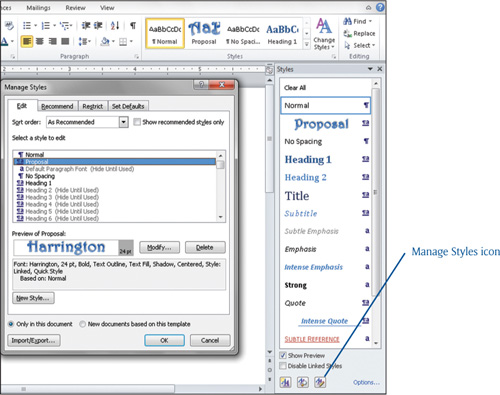
  4. From the Manage Styles dialog box, select the style you want to modify.

  5. Select whether the change you are planning should apply to the current document or to any new documents based on the template.

  6. Click the Modify button and make changes to the style.

  7. Click OK when you are finished.

 
Others
 
- Microsoft Word 2010 : Working with Styles (part 1) - Using Quick Styles, Working in the Styles Task Pane
- Microsoft Access 2010 : Viewing the Design of a Form, The AutoForm Feature
- Microsoft Access 2010 : Sorting Records, Filtering the Data Underlying a Form
- Microsoft OneNote 2010 : Taking Notes (part 2) - Creating More Writing Space in the Middle of a Page, Creating More Writing Space at the End of a Page
- Microsoft OneNote 2010 : Taking Notes (part 1)
- Microsoft Visio 2010 : Printing Scenarios (part 4) - Printing High-Quality Materials
- Microsoft Visio 2010 : Printing Scenarios (part 3) - Printing Multiple Drawings on a Single Sheet, Printing Scaled Drawings at Reduced Size
- Microsoft Visio 2010 : Printing Scenarios (part 2) - Printing Any Size Drawing on Any Size Paper
- Microsoft Visio 2010 : Printing Scenarios (part 1) - Printing Tiled Drawings
- Microsoft Visio 2010 : Understanding Printing
 
 
Top 10
 
- Microsoft Visio 2013 : Adding Structure to Your Diagrams - Finding containers and lists in Visio (part 2) - Wireframes,Legends
- Microsoft Visio 2013 : Adding Structure to Your Diagrams - Finding containers and lists in Visio (part 1) - Swimlanes
- Microsoft Visio 2013 : Adding Structure to Your Diagrams - Formatting and sizing lists
- Microsoft Visio 2013 : Adding Structure to Your Diagrams - Adding shapes to lists
- Microsoft Visio 2013 : Adding Structure to Your Diagrams - Sizing containers
- Microsoft Access 2010 : Control Properties and Why to Use Them (part 3) - The Other Properties of a Control
- Microsoft Access 2010 : Control Properties and Why to Use Them (part 2) - The Data Properties of a Control
- Microsoft Access 2010 : Control Properties and Why to Use Them (part 1) - The Format Properties of a Control
- Microsoft Access 2010 : Form Properties and Why Should You Use Them - Working with the Properties Window
- Microsoft Visio 2013 : Using the Organization Chart Wizard with new data
Technology FAQ
- Is possible to just to use a wireless router to extend wireless access to wireless access points?
- Ruby - Insert Struct to MySql
- how to find my Symantec pcAnywhere serial number
- About direct X / Open GL issue
- How to determine eclipse version?
- What SAN cert Exchange 2010 for UM, OA?
- How do I populate a SQL Express table from Excel file?
- code for express check out with Paypal.
- Problem with Templated User Control
- ShellExecute SW_HIDE
programming4us programming4us