In this section, I will demonstrate writing
a custom WCF service, deploying it in SharePoint as a solution and then
using it in Silverlight and JavaScript front ends. The WCF service has
access to the entire object model and it can expose custom business
objects, thereby allowing scenarios such as WCF RIA services.
Start Visual Studio 2010 and create a new project based on the empty SharePoint project template. Call this project CustomWCFService
and require it to be a farm solution. It has to be a farm solution
because we will deploy an .svc, and its .config file to the file
system. In the same solution, add a new project of template type WCF
service library and call it MyServiceLibrary.
By default, the WCF service library project type will add a Service1
service for you. Because we don't want the default service added, go
ahead and delete the IService1.cs and Service1.cs files. Also open the
app.config for your service library, and delete everything under the
system.serviceModel element.
Next, right-click the MyServiceLibrary project and add a new WCF service called ListService.
The intent of this service is to return the lists available in the
SharePoint site. In this example, I will only show querying, but you
have access to the entire object model, so you can easily extend it to
update data as well.
The purpose of ListService is to return all the
lists available within the site. Thus go ahead and modify the
IListService.cs interface to as shown here:
[ServiceContract(Namespace="Winsmarts")]
public interface IListService
{
  [OperationContract]
  List<BO.List> GetLists();
}
As you can see, the methods that take part in the
WCF operation are decorated with the [OperationContract] attribute. I'm
returning a custom business object of type BO.List. The definition of
BO.List is as follows:
[DataContract]
public class List
{
  [DataMember]
  public string Name { get; set; }
  [DataMember]
  public string Author { get; set; }
}
What I just did is declare the contract for the WCF
service and declare the data contract of my custom business objects
being sent across the wire. WCF works in an opt-out mechanism by
default. Unless I decorate something with an attribute to explicitly
opt in, be it a method or a property, WCF by default will choose to
exclude it in the WCF contract. This minimizes the attack surface for
security reasons. Also I'm returning a custom business object that has
nothing to do with SharePoint yet.
It is in the actual implementation of the service
that we actually talk with SharePoint. It is important to understand
that you could choose to swap the implementation to a non-SharePoint
implementation and develop the rest of the solution completely outside
of SharePoint.
However, in this scenario I will keep things to the
point, so add a reference to Microsoft.SharePoint.dll in your service
library project. Then modify the implementation of the service in the
ListService.cs file to as shown in Listing 1.
Example 1. Implementation for the Service
[AspNetCompatibilityRequirements(RequirementsMode=AspNetCompatibilityRequirementsMode
.Allowed)]
public class ListsService : IListsService
{
  public List<BO.List> GetLists()
  {
    List<BO.List> toReturn = new List<BO.List>();
    foreach (SPList list in SPContext.Current.Web.Lists)
    {
      toReturn.Add(
        new BO.List()
        { Name = list.Title, Author = list.Author.Name}
        );
    }
    return toReturn;
  }
}
|
The code for Listing 1
is quite simple. I'm simply querying for all the lists available in the
site, and stuffing them into my custom business object and returning
that to the caller. Of special mention here is the
AspNetCompatibilityRequirements mode. Because the service will run in
SharePoint 2010, by default it will run under the
AspNetCompatibilityRequirements mode enabled. This makes sense because
WCF is a lot bigger than just a web-based application, so for WCF to
get a handle to SPContext.Current, it needs to run under the ASP.NET
compatibility mode. Also what happens behind the scenes is that if you
examine the web.config of any SharePoint site, it is configured to send
the identity of the logged-in user to the server. It does so using the
following web.config element:
<identity impersonate="true"/>
Thus when running under the ASP.NET compatibility
mode, and with the end user's identity, the results that you query from
SharePoint API are automatically security trimmed.
My ListsService is now written. I next need to
deploy this into SharePoint using a solution package. In order to do
so, I will strongly name the MyServiceLibrary.dll so it can be put in
the GlobalAssemblyCache (GAC). Thus, go ahead and strongly name your
MyServiceLibrary.dll by going to the project properties \signing tab.
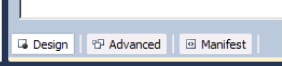
Back in your SharePoint project, double-click the
package node to open the package designer. Then at the bottom you will
see the links for Design, Advanced, and Manifest, as shown in Figure 1.
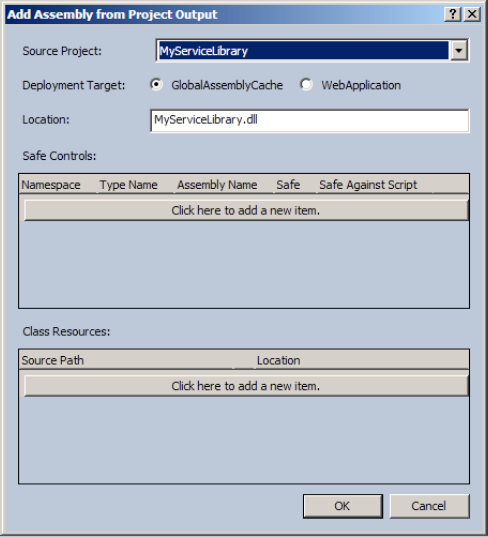
Click the advanced button, click the Add button, and
choose Add Assembly from Project Output to add the MyServiceLibrary.dll
into the solution. This can be seen in Figure 2.
At this point, your service library will get
deployed into the GAC. You still need to create an endpoint within
SharePoint to expose the services in the service library running inside
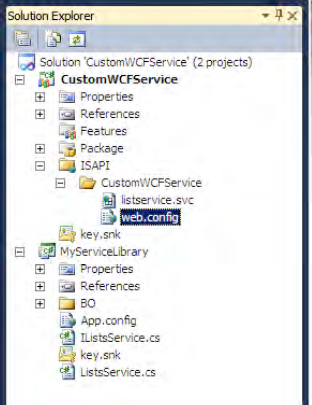
SharePoint. To do so, right-click the CustomWCFService and add a
SharePoint mapped folder. Choose to add the ISAPI mapped folder because
this folder is mapped to the _vti_bin virtual directory on any
SharePoint site. Adding the ISAPI mapped folder will also add a folder
under ISAPI specifically for your project. This is good practice
because your solution files will not accidentally overwrite some other
solution files or other Microsoft files. Inside this folder, add two
files called listservice.svc, and web.config. Your project structure at
this time should look like Figure 3.
Inside the ListService.svc file, enter the following code:
<%@ Assembly Name="MyServiceLibrary, Version=1.0.0.0, Culture=neutral,
PublicKeyToken=63237040b75dd29c"%>
<%@ ServiceHost Service="MyServiceLibrary.ListsService" %>
The ListService.svc file simply serves as an
endpoint from which the service will be accessible. The name attribute
in the assembly element is the assembly signature for the
MyServiceLibrary.dll.
Inside the web.config file, enter the code shown in Listing 2.
Example 2. Contents of web.config for ListService
<?xml version="1.0" encoding="utf-8" ?>
<configuration>
 <system.serviceModel>
  <serviceHostingEnvironment aspNetCompatibilityEnabled="true"/>
  <bindings>
   <basicHttpBinding>
    <binding name="customBasicHttpBinding">
     <security mode="TransportCredentialOnly">
      <transport clientCredentialType="Ntlm"/>
     </security>
    </binding>
   </basicHttpBinding>
  </bindings>
  <services>
   <service name="MyServiceLibrary.ListsService">
    <endpoint address="" binding="basicHttpBinding"
         contract="MyServiceLibrary.IListsService"
         bindingConfiguration="customBasicHttpBinding">
    </endpoint>
   </service>
  </services>
 </system.serviceModel>
</configuration>
|
The web.config file specified in Listing 2
contains the configuration information for the WCF service.
Specifically, we're exposing the service over basicHttpBinding, and in
order to call the service we are requiring that the NTLM credential be
sent along with the request. Note that if you're using Kerberos, you
will have to change the clientCredentialType to "Windows". Also we're
allowing the service to run under the ASP.NET compatibility mode. Build
and deploy the solution and then visit http://sp2010/_vti_bin/CustomWCFService/listservice.svc. You should see the service running, as shown in Figure 4.
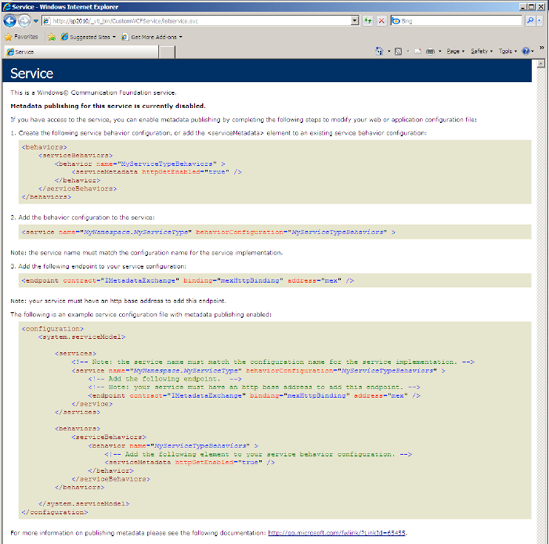
Good! Your service is now running, and you're ready
to consume it in various kinds of clients. These clients could be
anything; all they require is a little bit of tweaking to your
web.config file. I'm going to demonstrate the following clients: