1. Change or Remove a Column in a List or Document Library
Scenario/Problem:
You want to modify the settings of a column in a list or library. For
example, you want to change the default value for the column, change the
column’s title, or add or remove choices for a choice column.
Solution:
To change a column’s setting in a list or document library, you go into
the list or document library’s settings page by switching to the List
ribbon or Library ribbon and clicking the List Settings or Library
Settings button.
In the list or library settings page, you
scroll down to the Columns section of the page. Here, you see the list
of all the columns that have been added to the list or library. When you
click the title of the column you want to modify or remove from the
list or library, the settings page for that column
appears. In this page, you can either modify the column (rename it,
change its settings, or even change its type) or delete the column by
using the Delete button at the bottom of the page.
Note
Some columns cannot be deleted, and the Delete
button is not displayed for those columns. These built-in columns are
an integral part of SharePoint and cannot be removed from lists and
libraries.
Caution
Changing the type of a column can have
significant repercussions. You can lose data if you move from one column
type to another. For example, switching from any type of column to a
Choice column causes any value that doesn’t exist in the choice list to
be lost.
2. Change the Order of Columns in a List or Document Library
Scenario/Problem:
You want to change the order in which columns are displayed to users
when they’re either entering the values for the columns or viewing the
details for a list item or file. For example, in a contacts list, you
might want the users to enter the first name before entering the last
name.
Solution:
To change the order of columns in the data entry page for a list or
library (but not in the views), you go into the list’s or document
library’s settings screen by switching to the List ribbon or Library
ribbon and clicking the List Settings or Library Settings button.
In the list or library settings page, you
scroll down to the Columns section. Here, you see the list of all the
columns that have been added to the list or library. If the list does
not use more than one content type, a Column Ordering link is available
under the list of columns. If there is more than one content type, you
have to change the column order for each content type separately by
clicking on the content type name under the Content Types section above
the Columns section. This opens the content type settings page, which
also has the columns list and a Column Order link beneath it.
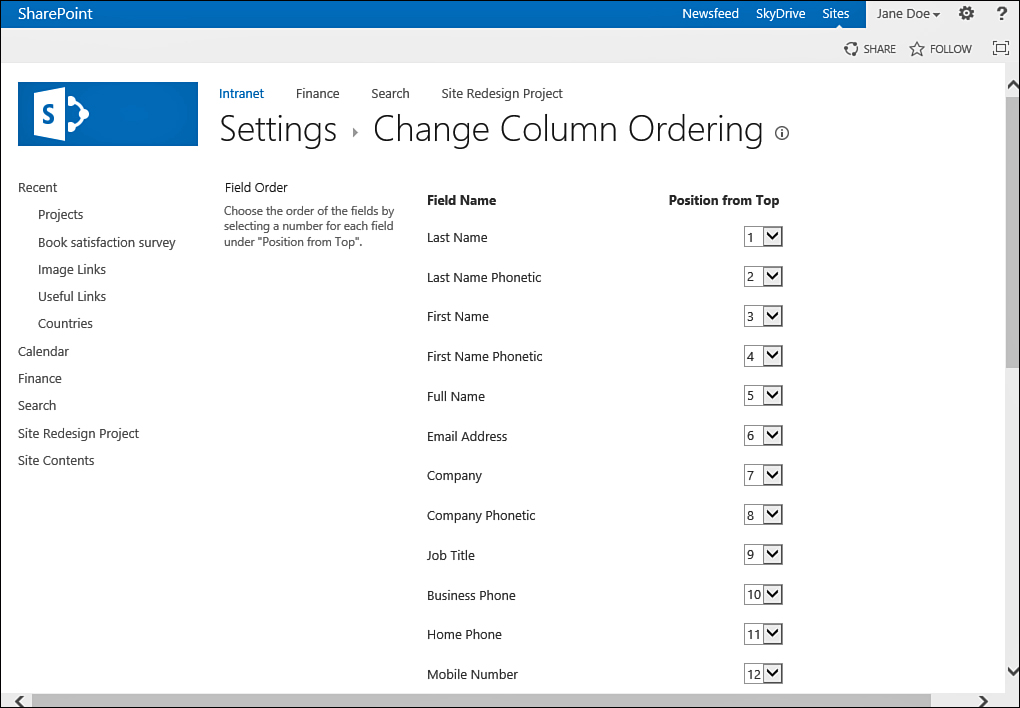
Clicking on the Column Order link opens a page that allows you to reorder the columns (see Figure 1).

FIGURE 1 Reordering the columns in a list or library.
In the Column Order page you can specify the
order for each column by using the drop-down boxes to the right of the
column names. If you change the order for one column—for example, change
mobile phone to be the third column—the column automatically moves to
the place you have selected, pushing the other columns down as
necessary.
When you are finished ordering the columns to your liking, you click OK at the bottom of the page.