Scenario/Problem:
You want to configure more complex validation for columns to prevent
users from entering conflicting information in two different fields. For
example, if you have two date columns, Starting Time and Due Date, you
want to make sure users enter a bigger value in the Due Date column.
Solution:
To configure validation at a list or library level, you open the list
or library settings page by switching to the List ribbon or Library
ribbon and clicking the List Settings or Library Settings button. In the
list or library settings page, you click the Validation Settings link
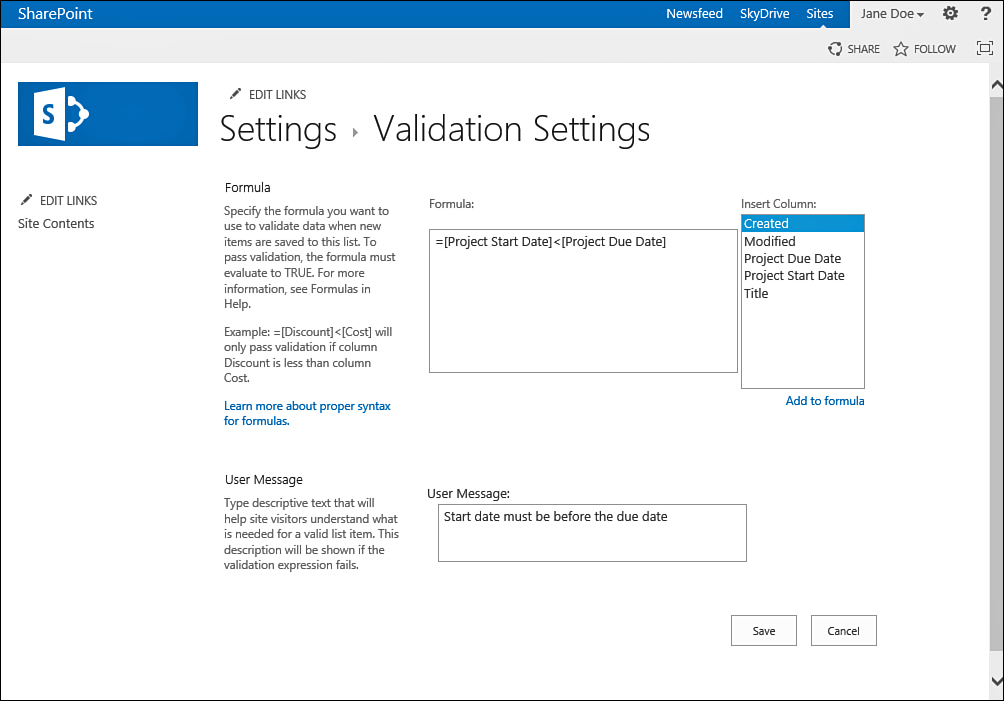
to open the Validation Settings page shown in Figure 1.

FIGURE 1 The list Validation Settings page.
Here you can define a formula that will be
evaluated when the user tries to save a new item in the list or library.
The formula must evaluate to TRUE for the save to be successful.
For example, if you have two date fields, you
select the Due Date column from the Insert Column box on the right and
click the Add to Formula link to add it to the box, and you then do the
same with the Starting Time column. In this way, you add the column
names (surrounded by square brackets) to the formula. You add a >
(greater than) sign between them, as shown in Figure 1, and click Save.
Another option in this page is to set the message the user sees if the formula fails to evaluate to TRUE. For example, Figure 1 is set to display a message to the users that the Due Date must be after the Starting Time.
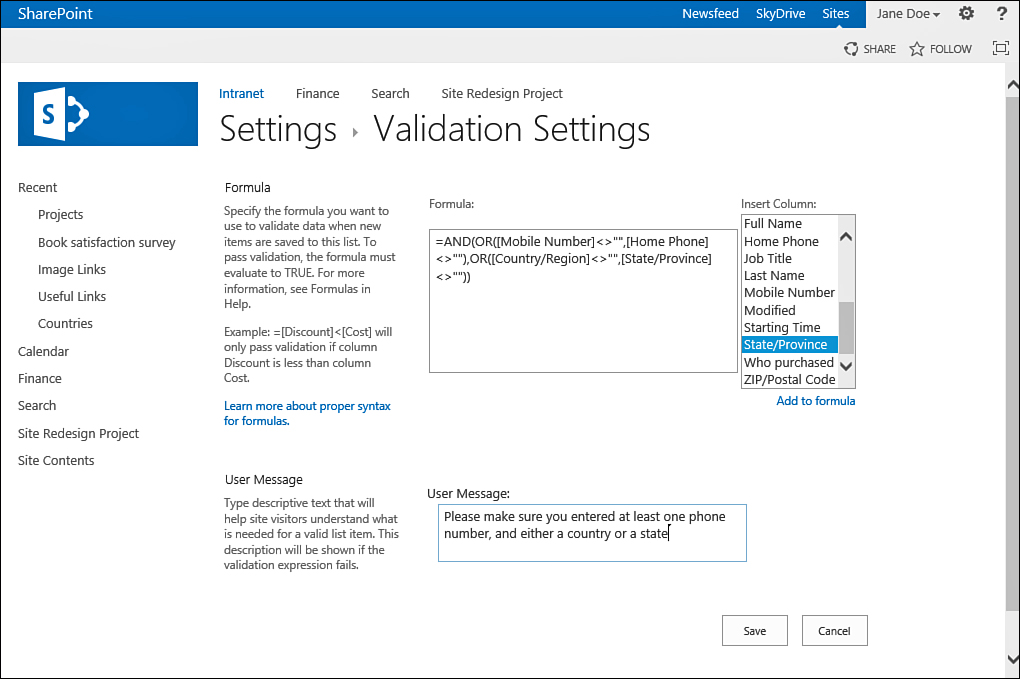
You can use AND and OR
operators to chain validation conditions in the formula. For example,
you can have the formula check that either the State/Province column or
the Country/Region column has a value and that either Home Phone or
Mobile Phone has a value, as shown in Figure 2.

FIGURE 2 Chaining conditions by using the AND and OR operators for a complex validation rule.