A scanner is a device similar to a copy
machine. You put a piece of paper in the scanner according to the
instructions that came with your scanner. Then you scan the document.
But unlike a copier, a scanner doesn't give a copy of the document on
paper. Instead it stores a copy of the printed document as a file in
your computer.
You use a scanner to get copies of things that exist
only on paper into your computer. The scanned image is like a photocopy
of the original. This means that even if the scanned document contains
words, you won't be able to edit it in a program like WordPad,
WordPerfect, or Microsoft Word.
If you want to edit a scanned document, you first
need to use OCR (Optical Character Recognition) software to convert the
scanned document to an editable form. Windows 7 doesn't come with OCR
software built in. However, many programs that work with Windows do
have built-in OCR capabilities. Chances are, when you bought your
scanner, you got OCR software with it. To find out, check the
documentation that came with your scanner.
If you have a scanner, you can use it to scan in three ways:
You can use the scanning software that came
with the scanner to scan any document. Use that method if neither of
the following methods work with your scanner.
If
the item you want to scan is a picture or photograph, and Windows 7
recognizes your scanner, use Windows Live Photo Gallery to scan.
If
the item you want to scan is not a picture or photo, and Windows 7
recognizes your scanner, you can use the techniques described in this
section to scan the document.
1. Scanning with Windows Fax and Scan
To scan a document using Windows Fax and Scan, first
open that program . At the bottom
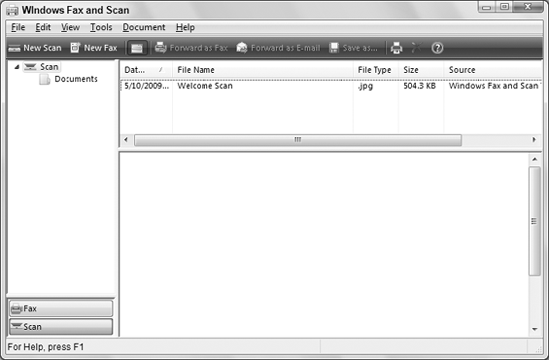
of the left pane, click Scan. Clicking Documents in the left pane lists
all documents you've scanned with that program. If you haven't scanned
yet, the list will be empty except for a sample scan, as in Figure 1.
To scan a document, load it into your scanner
according to the scanner manufacturer's instructions. For example, if
it's a flatbed scanner, place the document face down on the glass and
close the cover. If it's the kind of scanner where you load pages into
a document feeder, load them accordingly. Then follow these steps:
In Windows Fax and Scan, click New Scan in the toolbar or choose File => New => Scan from the menu bar.
In the New Scan dialog box (see Figure 2), you can choose a scan profile if you created one earlier.
Optionally, click the Preview button to see how the scanned image will look.
Optionally, use sizing handles in the preview area to crop out the portion of the document you want to scan.
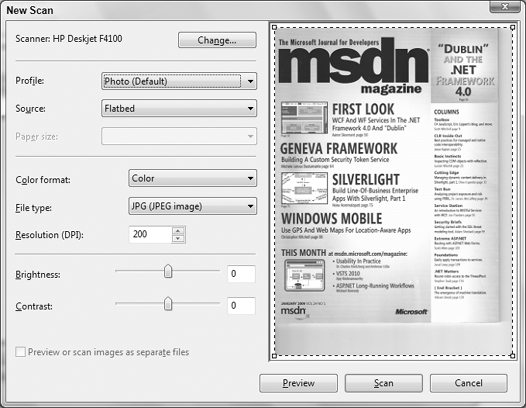
If there's anything you don't like about the preview image, use any combination of the following options to make adjustments:
Source: If your scanner offers multiple paper sources, choose the one that contains the document you're about to scan.
Paper Size: If you're using a non-standard paper size with an automatic document feeder, use this option to specify that size.
Color Format: Choose Color, Grayscale, or Black & White according to your preferences.
|
Use Black & White for text documents and forms
that contain no shades of gray. Use Grayscale for photos and documents
that do contain some shades of gray.
|
|
File Type: Choose your preferred file format. Bitmap Image is fine if you don't have a preference.
Resolution:
Set this to 150 for clean standard printing. You can set it higher for
more detailed scans. For example, if the preview of a scan looks like
it's missing some text, try using a higher resolution.
Exposure Settings: Use these options to adjust brightness and contrast if the preview image looks too dark or too flat.
If
you changed any of these options, you can click Preview again to see
how things will look. You can keep changing settings and clicking
Preview until the scan looks the way you want.
|
If you want to save a profile with specific
settings, choose Add Profile from the Profile drop-down list.
Alternatively, adjust settings and preview the document until you get
the results you want. Then you can click Save Profile to make it easy
to reuse those same settings when scanning similar documents in the
future.
|
|
Click Scan to scan the document. Wait for the scanner to scan the document.
By default, Windows Fax and Scan places newly
scanned documents in the Scanned Documents folder, represented by the
word Scan in the left pane. You'll see a header in that folder for
every document you've scanned. To change the name of a scanned
document, click its current name and type in a new name.
|
You can create additional folders under Scanned
Documents to organize your scans. Right-click Scan in the left pane and
choose New Folder to create a new folder. Then, to move a scanned
document, right-click its header and choose Move to Folder, click a
folder, and click OK.
|
|
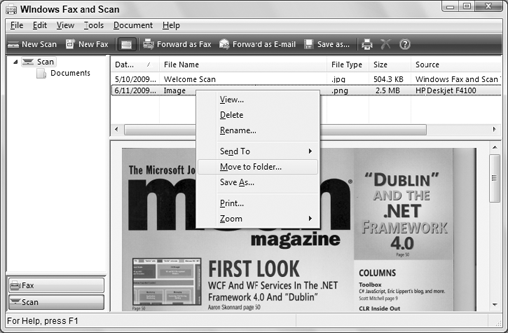
2. Using scanned documents
Each document you scan is saved in the Scanned
Documents folder in your My Documents folder. Clicking Documents at the
left side of Windows Fax and Scan shows the names of those same
documents. To print, e-mail, fax, delete, or do something else with a
scanned document, right-click its header in the top main pane, as in Figure 3.
You'll find the same scanned documents in the
Scanned Documents folder of you user account. Click the Start button
and choose Documents => Scanned Documents.
3. Forwarding scanned documents automatically
If you use a scanner in a local network, you can
automatically send a copy of all scanned documents to another computer
on the network. Choose Tools => Automatically Forward Scans from the Windows Fax and Scan menu (while you're in the scan mode).
To forward all scans to an e-mail address,
choose the first option and specify the e-mail address. Or, choose the
second option and specify the folder or UNC name of the folder to which
you want to forward scanned documents.