1. Consuming the Service in a .NET Application
Start Visual Studio and create a new console application targeting the .NET 3.5 framework. Call it TestWCFConsoleApp. They are two main ways to consume a WCF service in a .NET app.
In the first approach, you add a service reference
and generate a proxy. This requires the service to either support
mexHttpBinding or publish previously generated metadata statically. But
somehow the client application needs to access the metadata. Metadata
in basicHttpBinding is simply the WSDL of the service. It is
recommended that you publish previously generated metadata statically.
In this approach, because the proxy is generated from the metadata, you
do not need to send a DLL. This means that the consuming client can be
something as different as Java and it can be on the other side of the
globe on a machine over which you have no influence. But the downside
of this approach is that all the validations that are embedded inside
your business objects will not work on the client side.
In the second approach, the client has direct access
to DLLs that hold your business objects. The disadvantage is that you
have to ship the DLL in advance, but you are working with your own
business objects, with your own custom validations.
If you are interested, you should also check out WCF
RIA Services, in which a portion of the business objects is copied over
to the front end such as Silverlight, thereby allowing you full access
to business objects logic both in back ends and front ends.
Let's look at both these approaches one by one.
1.1. Approach #1: Adding a Service Reference
Because the service running inside of SharePoint
does not expose the mex endpoint, you need an alternate location where
the proxy can be generated. The easiest way to do this is to set the
MyServiceLibrary as your startup project and add a service reference to
the service running from the MyServiceLibrary. To achieve this, simply
right-click the MyServicelibrary project and choose it to be the
startup project. Press F5, and the service will be hosted in the system
tray web server.
Examine the URL on which the service is running and
add a service reference to that URL. In this case, the service was
running at http://localhost:8732/Design_Time_Addresses/MyServiceLibrary/ListsService.
Call the service reference generated proxy ServiceReference1. Adding a
service reference through Visual Studio makes some inferences about the
service and generates a client-side configuration file for you. Now you
need to edit this file because we generated the proxy from a location
different from the actual service address. Also, the proxy location was
running the service under wsHttpBinding under anonymous security,
whereas the real service is running inside SharePoint under NTLM
security. Thus, you need to edit the app.config file of the
TestWCFConsoleApp as shown in Listing 3.
Example 3. The app.config File for the WCF Test Console App
<?xml version="1.0" encoding="utf-8" ?>
<configuration>
 <system.serviceModel>
  <bindings>
   <basicHttpBinding>
    <binding name="authenticatedBasicHttpBinding">
     <security mode="TransportCredentialOnly">
      <transport clientCredentialType="Ntlm" proxyCredentialType="Ntlm"/>
      <message clientCredentialType="UserName"/>
     </security>
    </binding>
   </basicHttpBinding>
  </bindings>
  <client>
   <endpoint
    address="http://sp2010/_vti_bin/CustomWCFService/listservice.svc"
     binding="basicHttpBinding"
     bindingConfiguration="authenticatedBasicHttpBinding"
     contract="ServiceReference1.IListsService">
   </endpoint>
  </client>
 </system.serviceModel>
</configuration>
|
The edits to the app.config file simply specify that
I will use basicHttpBinding and that I have to send the NTLM identity
to a specific URL (SharePoint service) with my requests!
Your service reference is all set! You can now go ahead and write code as shown in Listing 4 in your static void main of your console application.
Example 4. Code to Call a WCF Service from a Console Application
ServiceReference1.ListsServiceClient client =
  new ServiceReference1.ListsServiceClient();

client.ClientCredentials.Windows.AllowedImpersonationLevel =
  TokenImpersonationLevel.Impersonation;

ServiceReference1.List[] lists = client.GetLists() ;

foreach (var list in lists)
{
              Console.WriteLine(list.Name);
}

client.Close();
|
Build and compile your application. You should see the results as shown in Figure 5.
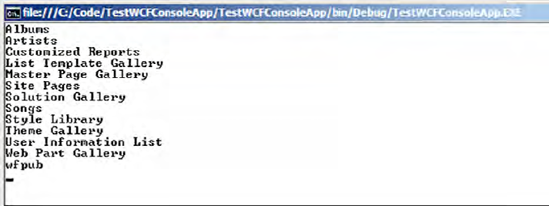
Your console application, which might as well be a
.NET 4.0 or even a Java app, can query the WCF service and show
security trimmed SharePoint data.
1.2. Approach #2: Adding a DLL Reference
Create a new console application, again targeting the .NET 3.5 framework, and call it TestWCFConsoleApp2.
In this application, add a reference to the MyServicelibrary project,
which will give the console application visibility into the business
objects and interfaces necessary to consume the WCF service. Also go
ahead and add a reference to System.ServiceModel.
Then write code as shown in Listing 5 in your static void main.
Example 5. Calling a WCF Service from a Console Application Without a Reference
BasicHttpBinding myBinding = new BasicHttpBinding();
myBinding.Security.Mode = BasicHttpSecurityMode.TransportCredentialOnly;
myBinding.Security.Transport.ClientCredentialType = HttpClientCredentialType.Ntlm;
myBinding.Security.Transport.ProxyCredentialType = HttpProxyCredentialType.Ntlm;
myBinding.Security.Message.ClientCredentialType = BasicHttpMessageCredentialType.UserName;

ChannelFactory<IListsService> channelFactory = new ChannelFactory<IListsService>(
  myBinding,
  new EndpointAddress("http://sp2010/_vti_bin/CustomWCFService/listservice.svc")
  );
channelFactory.Credentials.Windows.AllowedImpersonationLevel =
  System.Security.Principal.TokenImpersonationLevel.Impersonation;
IListsService listService = channelFactory.CreateChannel();

var lists = listService.GetLists();

foreach (var list in lists)
{
  Console.WriteLine(list.Name);
}
|
Execute this application and you should see the lists being written out on console just like before.
If you look at the code in Listing 4
and Listing 5 closely, you should notice some similarities. In both
instances, we are getting an instance to basic HTTP binding and are
configuring it to work under the NTLM authentication. We're setting the
client impersonation level. The only difference is how we're getting a
handle to a proxy. In one instance, the proxy is generated based on the
published metadata. In the second instance, the proxy is generated
using the channel factory and strongly typed to the actual business
object.