2. Consuming the Service in a Silverlight application
In your CustomWCFService SharePoint project, add a Silverlight application called SLLists.
When prompted to host the Silverlight application in a new web site,
choose to not create that web site. As a mentioned earlier, WCF allows
you to swap both the front end and back end as long as the contract
remains the same. Thus sometimes it is helpful to add this external web
application, not debug in SharePoint, and send dummy objects. These
dummy objects can then be used for TDD purposes or to build UI inside
Expression Blend or such!
Back in your Silverlight application, choose to add
a service reference. When prompted, click the Discover button to add
the service reference being generated directly from MyServiceLibrary.
You can also use a utility called SLSVCUtil.exe to generate proxies and
add them manually to your Silverlight project. Just like the console
application, in order to generate a ServiceReference in Silverlight,
the service needs to publish metadata. Because the SharePoint service
is not publishing metadata, we can choose to generate the service proxy
from MyServiceLibrary instead. However before you can successfully
generate such a ServiceReference in Silverlight, you need to edit the
app.config file of your MyServicelibrary to use basicHttpBinding
instead of wsHttpBinding. To do this, look for the following line of
code in the App.config of MyServiceLibrary:
<endpoint address="" binding="wsHttpBinding" contract="MyServiceLibrary.IListsService">
Change it to this:
<endpoint address="" binding="basicHttpBinding" contract="MyServiceLibrary.IListsService">
You have to make this change because Silverlight can
talk only to basicHttpBinding endpoints or REST -based APIs. Call the
proxy ServiceReference1.
With the ServiceReference added, now you can start
writing some Silverlight Code. Go ahead and edit the MainPage.xaml file
to look like Listing 6.
Example 6. Code for MainPage.xaml
<Grid x:Name="LayoutRoot" Background="White">
  <ListBox x:Name="lists">
    <ListBox.ItemTemplate>
      <DataTemplate>
        <StackPanel Orientation="Horizontal">
          <TextBlock Text="{Binding Path=Name}" Margin="10 0 10 0"/>
          <TextBlock Text="{Binding Path=Author}" Margin="10 0 10 0"/>
        </StackPanel>
      </DataTemplate>
    </ListBox.ItemTemplate>
  </ListBox>
</Grid>
|
I've declared a simple listbox, in which I intend to
databind my custom business object. Back in MainPage.xaml.cs, add the
code shown in Listing 7.
Example 7. Code for MainPage.xaml.cs
public MainPage()
{
  InitializeComponent();
  this.Loaded += new RoutedEventHandler(MainPage_Loaded);
}

void MainPage_Loaded(object sender, RoutedEventArgs e)
{
  ServiceReference1.ListsServiceClient client = new ServiceReference1.ListsServiceClient(
    new BasicHttpBinding(),
    new EndpointAddress("http://sp2010/_vti_bin/CustomWCFService/listservice.svc"));

  client.GetListsCompleted += (sender1, e1) =>
    {
      lists.ItemsSource = e1.Result;
    };

  client.GetListsAsync();
}
|
The code is quite similar to what you have seen
before. I'm making an asynchronous called to the WCF endpoint and data
binding the results to the list box I had declared in Listing 6.
You would also note that for simplicity I hardcoded the endpoint
address.
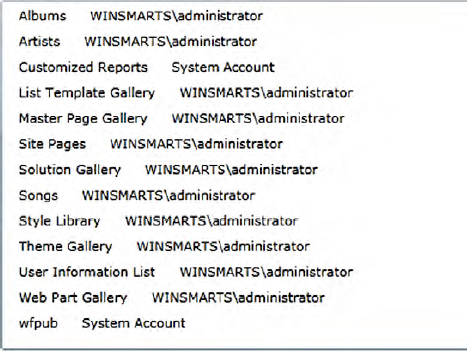
Deploy the XAP output of SLlists as a module in the
custom WCF service SharePoint project. Build and deploy the solution
and use the out-of-the-box Silverlight viewer WebPart in SharePoint to
view the Silverlight application running inside SharePoint. You should
see the lists and the author of the lists retrieved, as shown in Figure 6.