2. Deploying Updates
Most updates are automatically accepted and deployed by the
built-in rules of SBS Software Updates, but some updates are
considered optional or require explicit acceptance of a separate End
User License Agreement (EULA), and these will require intervention by an SBS
administrator to either deploy or decline the update.
The main Updates page, shown in Figure 6, includes the
overall status of updates on your SBS network and also the specific
details of any selected update. In the details pane of the Updates
page, you can find more information on the specifics of the update,
what applications or versions of Windows it applies to, and whether
it will require a reboot. The details also include a link to the
appropriate Knowledge Base article or download page for the
update.

To deploy or decline an update, follow these steps:
Open the Windows SBS Console if it isn’t already
open.
Click Security on the navigation bar.
Click on the Updates tab, if it isn’t on top, to display
the Updates page.
Select the update you want to deploy or decline in the
main pane of the Updates page, and read the description of the
update in the details pane.
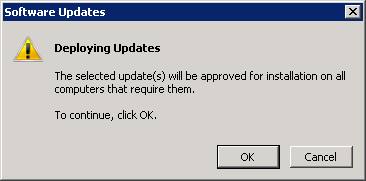
Click Deploy (or Decline) in the Tasks pane to open the
Software Updates dialog box shown in Figure 7. (The
Decline dialog box is essentially the same, except that it says
Declining instead of Deploying.)

Click OK to deploy (or decline) the update. If the update requires a
separate EULA acknowledgment, you’ll be prompted to accept the
Software License Terms, as shown in Figure 8.

Click I Accept and the update is deployed. You’ll see a
final acknowledgment message that the update is scheduled for
deployment in the next 4 to 24 hours.
Click OK and the update will be added to the Updates In
Progress section.
|
When you decline an update, it disappears from the SBS
Updates page completely. There’s really no way to change your mind
and decide to deploy it from within the Windows SBS Console. To
approve an update that has been previously declined, you’ll need to use the native WSUS
console. Use the following steps to approve an update that has
either been automatically declined by SBS Software Updates or that
you’ve manually declined:
Open the Update Services console by selecting Microsoft
Windows Server Update Services in the Administrative Tools
folder of the Start menu. In the left pane of the Update Services console,
navigate to Updates and then to All Updates. Then select
Declined from the Approval drop-down list in the All Updates
center pane. Click Refresh to update the view. Select the update you want to approve from the list of
declined updates, and click Approve on the Actions
pane. In the Approve Updates dialog box, select the groups of
computers to approve the update for and select Approved from
the drop-down list of options. Click OK to approve the update, and click Close to close
the progress dialog box. Close the Update Services console.
Using the native Update Services console is not something
you should ordinarily do because it can interfere with the normal
operation of the SBS Software Updates. But sometimes it’s just the
only way to do something, as in this case.
|
2.1. Viewing Update Deployment Reports
When updates are showing in the Updates In Progress section
of the Updates page, it often means that some computers have had
the update deployed but others are still pending for one reason
or another (usually because the affected computer
has been offline). To see what the status is for all the computers
affected, follow these steps:
Open the Windows SBS Console if it isn’t already
open.
Click Security on the navigation bar.
Click on the Updates tab, if it isn’t on top, to display
the Updates page.
Select the update you want to see the deployment report for, and click View The Update
Deployment Report on the Tasks menu to open the Deployment
Report for the update, as shown in Figure 9.

After you’ve identified which computers are
causing the update to not complete, you can take the
appropriate steps to correct the situation.
2.2. Synchronization
SBS synchronizes with the Microsoft servers once a day, at
10:00 P.M. local time. Normally, this is a sufficiently frequent
and timely synchronization that you shouldn’t need to do anything
special to synchronize. In the event of an active outbreak of a
critical exploit that affects your network, however, or for any
other reason you need to manually synchronize the SBS Software
Updates, you can manually trigger an update at any point in time.
To initiate an update, follow these steps:
Open the Windows SBS Console if it isn’t already
open.
Click Security on the navigation bar.
Click on the Updates tab, if it isn’t on top, to display
the Updates page.
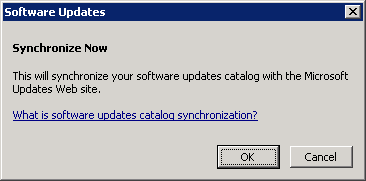
Click Synchronize Now on the Tasks pane to open the
Software Updates Synchronize Now confirmation dialog box,
shown in Figure 10.

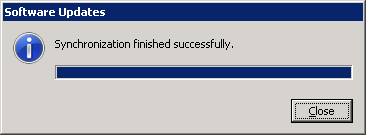
Click OK and the synchronization will begin, and the
Software Updates dialog box will change to a progress dialog
box. When the synchronization completes, you’ll see the dialog
box shown in Figure 11.

Click Close to return to the Windows SBS Console.