Running Setup
To install a primary site server, follow these steps:
1. | Insert the SMS 2003 CD and choose SMS 2003 from the autorun menu (shown in Figure 1),
or in Windows Explorer navigate to the SMS 2003 source files and
execute Autorun.exe to display the autorun menu or execute Setup.exe
from a command prompt.
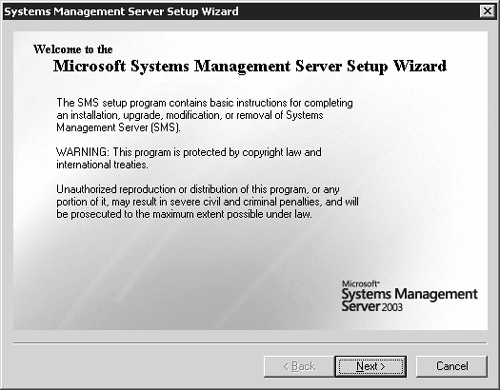
| 2. | The Welcome page appears, as shown in Figure 2.
| 3. | Click Next to display the System Configuration page, as shown in Figure 3.
At this time, Setup checks to see whether you have any earlier versions
of SMS installed or if the server is already functioning as an SMS site
system.

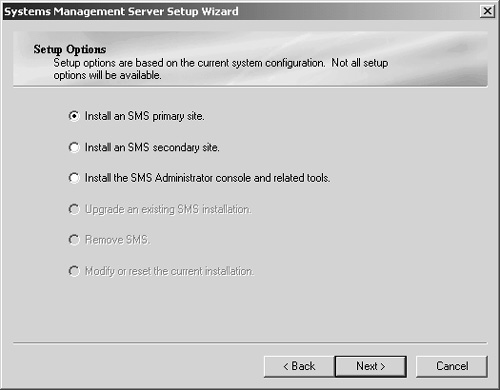
| 4. | Click Next to display the Setup Options page, as shown in Figure 4.
If no current installation of an SMS site server or site system is
detected, the first three options will be enabled. You can install a
primary site, a secondary site, or just the SMS Administrator Console
and related tools. If an existing SMS 2003 site server is detected, the
last three options will be enabled. In this case, you can upgrade the
existing installation by adding additional SMS components, remove SMS
2003, or modify or reset the installation—for example, by changing
service account names and passwords or rebuilding a site control file.
If the Setup Wizard detects a site server installation for an earlier
version of SMS, only the Upgrade An Existing SMS Installation option
will be enabled. For this example, select Install An SMS Primary Site.
Note If
the Setup Wizard detects an existing installation of an SMS site system
such as a CAP or a server locator point, you will not be able to
continue the installation until you remove that site system from the SMS
site it is a member of. |
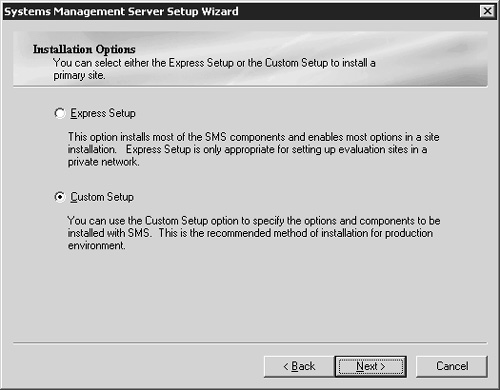
| 5. | Click Next to display the Installation Options page, as shown in Figure 5. Choose Express Setup or Custom Setup.
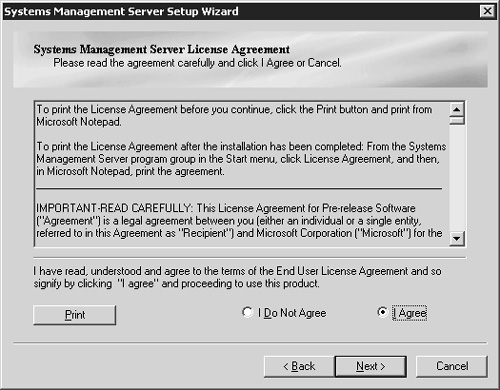
| 6. | Click Next to display the License Agreement page, as shown in Figure 6. Read this agreement carefully and signify your acceptance by selecting I Agree.
| 7. | Click Next to display the Product Registration page, as shown in Figure 7, and enter the Name, Organization Name, and the CD Key located on the back of your SMS 2003 CD case.

| 8. | Click Next to display the SMS Site Information page, as shown in Figure 8,
which asks you to supply the three-character site code you want to
assign to this site, a descriptive site name, and the Windows domain in
which you’re installing the site.
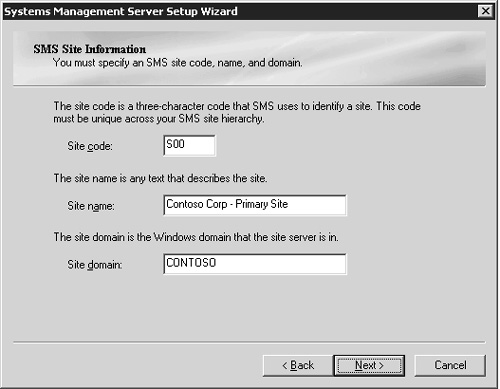
The site code is limited to three characters and must be unique
across your SMS hierarchy. The site name is descriptive, limited to 50
characters (including spaces) and should reflect the site’s location or
function, such as Contoso Corp Central Site or Finance Primary Site.
It’s usually a good idea to specify whether the site is central,
primary, or secondary. Once this information is entered, it sticks.
Caution Do
not use the same site code name for more than one site in your
enterprise. If you’re sharing or replicating WINS between two Active
Directory forests and you use the same site code in your production SMS
site as the site code of a pilot SMS site in a different forest, the
WINS registrations for the sites might overwrite each other. This can
cause the Advanced Client to use the wrong WINS database and therefore
the wrong management point, causing the Advanced Client policy to be
reset in the wrong SMS site. The Advanced Client is no longer a member
of the pilot site and can’t participate in the pilot project. |
Caution If
you need to change the site code, site name, or domain name later,
you’ll need to remove this installation of SMS and reinstall it. |
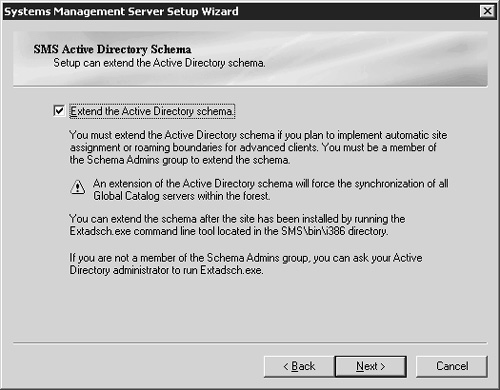
| 9. | Click Next to display the SMS Active Directory Schema page, as shown in Figure 9.
Here you have the option to extend the Active Directory schema to
support the use of automatic site assignment or roaming boundaries for
advanced security. As the page implies, the account that you’re
performing the installation under must be a member of the Schema Admins
group for your forest. In addition, if you’re installing SMS 2003 on a
domain controller, you’ll need to use the Windows 2000 Active Directory
Schema administration MMC snap-in to allow schema modifications to take
place through that domain controller. If you have met these
requirements, select the Extend The Active Directory Schema checkbox and
then click next. If you’re unable to update the schema, you can update
it after installation. In this case, don’t select this option; just
click Next.
Tip You
can extend the Active Directory Schema later by running the Extadsch.
exe command line tool from the SMS\bin\i386 folder on the site server
after you have met the requirements specified in step 9. |
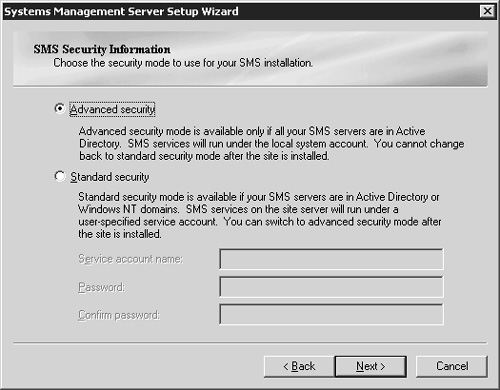
| 10. | On the SMS Security Information page, shown in Figure 10,
select the security mode that you plan to implement. If you choose
Advanced, go on to step 11; advanced security mode doesn’t require that
a service account be created. If you choose Standard, enter the name of
the account you’d like SMS to create, for example, SMSService. SMS will
automatically assign it the appropriate group memberships and user
rights. If you have already created this account using Active Directory
Users And Computers, specify it here. Be sure you have already assigned
the account the appropriate group memberships in the SMS site domain
(Domain Admins, Domain Users, Administrators) and have given the account
the Log On As A Service user right using the local group policy editor.
Enter and confirm a password (preferably something other than password).
Tip Always enter account information in SMS using the format domain/ account. |
Note The
SMS service account must be a member of the local Administrators group
on the site server, the Domain Admins group, and be given the Log On As A
Service User Right. |
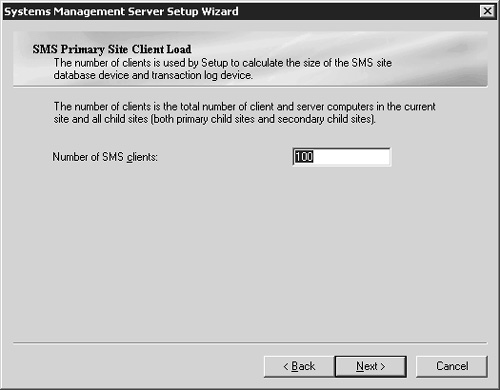
| 11. | Click Next to display the SMS Primary Site Client Load page, as shown in Figure 11.
Enter the number of SMS clients that this site will manage, as you
determined in your deployment strategy. The number that you enter here
ultimately affects the size of the SQL database that SMS will create or
that you have created ahead of time. An incorrect database device or
file size will cause the installation to fail.
At
this point, the installation process will vary depending on whether you
chose Express Setup or Custom Setup in step 5 above. Let’s continue
first with the Express installation options and then look at the Custom
installation options.
|
Express Installation Options
Follow these steps to perform an express installation of SMS:
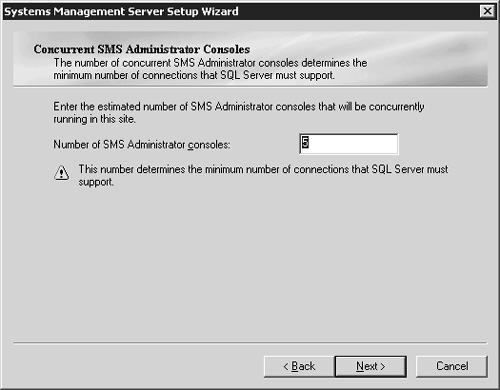
1. | Click Next to display the Concurrent SMS Administrator Consoles page, as shown in Figure 12,
and enter the number of concurrent SMS Administrator Consoles you
expect to be running in the site. SQL Server will allocate five user
connections for each instance of the SMS Administrator Console in
addition to the 50 required by the SMS site server and its components.
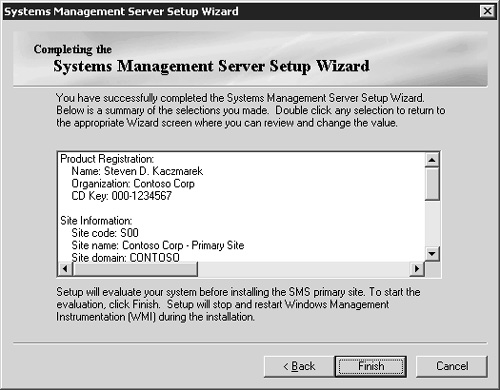
| 2. | Click Next to display the Completing The Systems Management Server Setup Wizard page, as shown in Figure 13.
Confirm your settings, and then click Finish. You can click the Back
button from this and any previous pages to go back and modify your
entries—and even to switch from Express to Custom installation. You can
also doubleclick any entry in the text box on this page.
| 3. | If
you chose Standard Security in step 10, the Setup Wizard will ask
whether it is to create the SMS Service Account for you, if you haven’t
already created it. Choose Yes. Setup will then proceed with the SMS
installation.
|
Custom Installation Options
Follow these steps to perform a custom installation of SMS:
1. | If
you’re performing a Custom installation, the next page you’ll see after
the SMS Primary Site Client Load page will be the Setup Installation
Options page, as shown in Figure 14.
You can select which SMS components you want to install at this time.
As you check each option, a brief description is displayed in the
Description box.

The Setup Wizard will automatically select the NTFS partition
with the most free disk space as the installation directory. Click the
Browse button to select a different location.
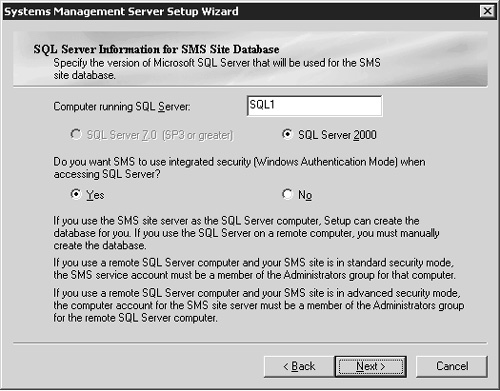
| 2. | Click Next. The SQL Server Information For SMS Site Database page is displayed, as shown in Figure 15.
This page requires that you identify the name of the computer running
SQL Server, the version (7.0 or 2000) that’s installed, and whether to
use Windows Authentication to access the SMS site database. You may
choose either Yes, the default, or No. Make your selections as
appropriate on this page and click Next. Depending on your selections,
one or more of the following steps will follow.
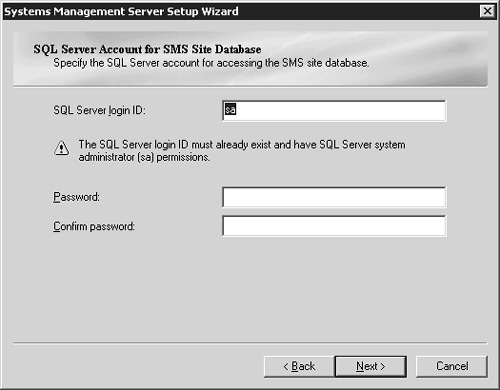
| 3. | If
you chose No for the Windows Authentication option, you need to specify
the SQL Server Login ID or accept the default sa account and supply the
password for SMS to use. In this case the SQL Server Account for SMS
Site Database page is displayed, as shown in Figure 16. Supply the appropriate information and then click Next.
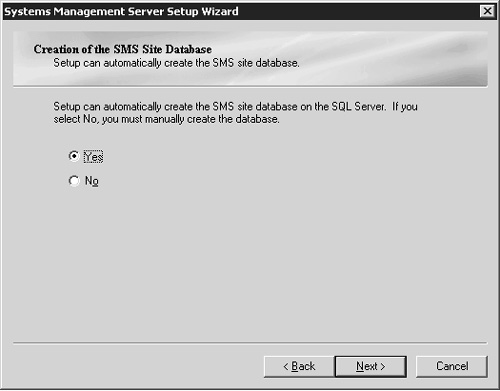
| 4. | If you choose to create the SMS site database, select Yes in the Creation of SMS Site Database page, as shown in Figure 17. Enter the name you’d like to use for the SMS site database or accept the defaults and then click Next.
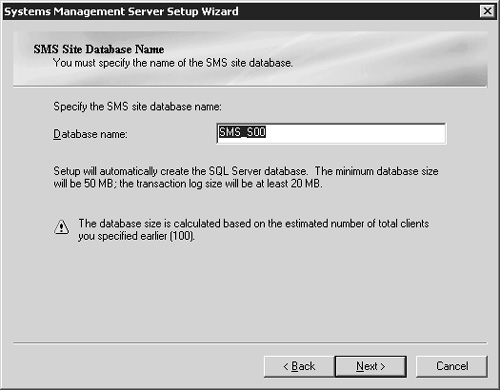
| 5. | The SMS Site Database Name page is displayed, as shown in Figure 18. Enter the name you’d like to use for the SMS site database and then click Next.
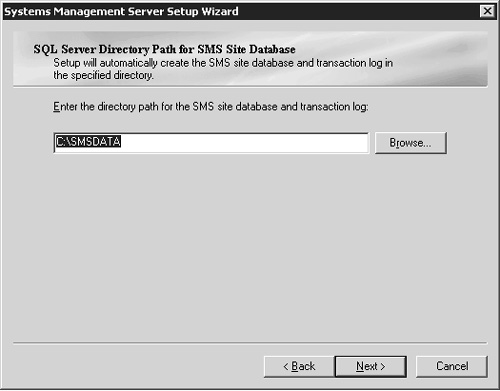
| 6. | Clicking Yes in step 4 triggers the display of the SQL Server Directory Path For SMS Site Database page, as shown in Figure 19.
Enter the location and path to the directory in which you intend to
store the database. Again, the Setup Wizard defaults to the partition
with the most free disk space.
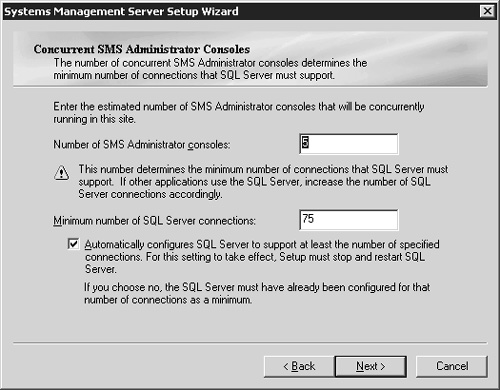
| 7. | Click Next to display the Concurrent SMS Administrator Consoles page, as shown in Figure 20,
and enter the number of concurrent SMS Administrator Consoles you
expect to be running in the site. SMS will add five user connections for
each instance of the SMS Administrator Console to its default of 50
when configuring this parameter in SQL Server. If you leave the check
box selected that allows the Setup Wizard to automatically configure SQL
Server for the correct number of user connections, SMS will dynamically
fill in the correct number in the Minimum Number Of SQL Server
Connections text box. If you clear the check box, be sure to enter an
appropriate number of user connections or your site server might not be
able to access the SMS database.
| 8. | If
the SMS site database has been installed on a different server,
clicking Next will take you to the SMS Provider Information page, as
shown in Figure 21. If the SMS site database is installed on the same computer, go on to step 9.
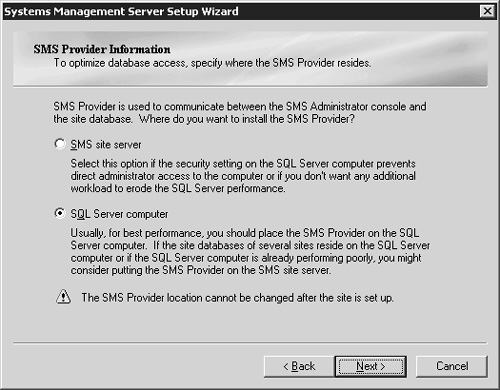
The SMS Provider effects access to the SMS database through the
WMI Common Information Model (CIM) repository for the SMS Administrator
Console. In this page, you specify whether to install the SMS Provider
on the site server or the server running SQL. In general, optimum
performance access is achieved when the SMS Provider is installed on the
server running SQL. However, if doing so would result in poorer
performance, if the server running SQL is home to other SMS site
databases, or if security on the server running SQL prevents the
administrator from directly accessing that computer, you should place
the SMS Provider on the site server.
| 9. | Click Next to display the Completing The Systems Management Server Setup Wizard page, as shown in Figure 2-13,
and confirm your choices. You can click the Back button in any of these
pages or doubleclick any entry in the list box to return to a previous
page and modify your entries. Click Finish to complete the installation.
|
Note If
you chose standard security mode during setup, the Setup Wizard will
ask whether it is to create the SMS Service Account for you, if you
haven’t already created it. Choose Yes. Setup will then proceed with the
SMS installation. |
If you have followed
these steps closely, you have now successfully installed an SMS 2003
primary site server! If you performed a custom installation, you made
choices as to which SMS components you wanted to install. The next
section discusses what to do when you need to add components to your
site server.
|