Exploring the Marks and Bleed Print Panel
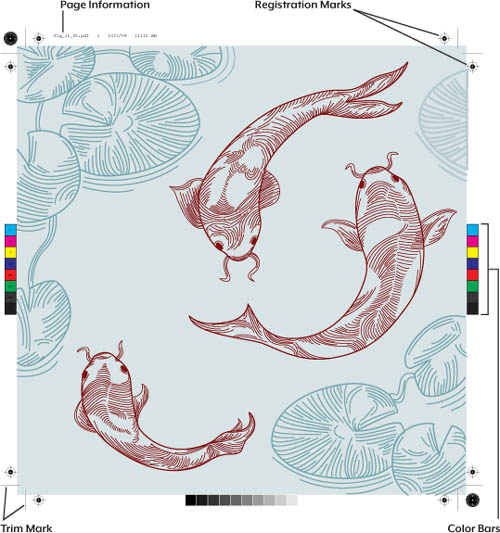
When printing a page for final output, you need to add page marks and bleeds to help printers print the job correctly on press. Trim marks tell a printer where to cut the paper, registration marks help a printer align each separated plate correctly, color bars help a printer calibrate color correctly on press, and page information makes it possible for printers to easily identify each separated plate (Figure 5).

Note
Page
marks print outside the margins of the artboard (or wherever you’ve
defined a crop area), so you need to make sure the media size you’ve
chosen in the General panel of the Print dialog box is large enough to
include the page marks. If you select the Fit to Page option,
Illustrator scales the entire document to ensure that the trim marks
print on the chosen page. |
Of course, you don’t always
need all this information on each printout, so you choose them
individually (for example, on a one-color job, registration marks aren’t
necessary). Additionally, you can choose between Roman- and
Japanese-style trim marks. The trim mark weight determines the width of
the strokes used to create trim marks, and the offset determines how far
from the page the trim marks will appear.
When you have artwork that
extends beyond the boundary of a page, you can specify a bleed setting
to ensure that the printable area of the page includes
the extra bleed area. When the bleed settings are set to zero, even if
you’ve extended artwork beyond the boundary of the artboard, the art
clips to the edge of the artboard. Additionally, if you specify a bleed
setting, you’ll need to print to a paper size large enough to display
the page size and the bleed as well.
Exploring the Output Print Panel
The Output panel in the Print
dialog box is a prepress operator’s dream come true. With the ability
to specify color separations and control the behavior of inks, a print
service provider can output Illustrator files with confidence.
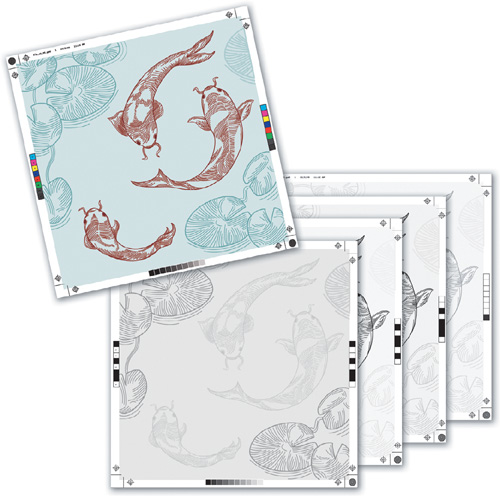
Illustrator supports three printing modes, each of which is used for a different workflow (Figure 6):
Note
A raster
image processor is the software in a printer, imagesetter, or
platesetter that converts all art into dots so that it can be printed. |
Composite.
When you choose the Composite setting, Illustrator sends a single
composite of the artwork, with all colors appearing on the same page, to
the printer or raster image processor (RIP). This is the setting you
would use to create any kind of black-and-white or grayscale printout,
as well as any color proof printout.
Separations (Host-Based).
When you choose the Separations (Host-Based) setting, Illustrator (the
host) separates the artwork into the required number of plates
(specified in the Document Ink Options settings mentioned shortly) and
sends each plate to the printer or RIP as a separate page. This is the
setting you use if you want to proof color-separated artwork. A prepress
operator or printer also uses this setting to create final film or
plates from your artwork.
In-RIP Separations.
When you choose the In-RIP Separations setting, Illustrator sends a
single composite of the artwork to the RIP so that the RIP can perform
the color separation instead of Illustrator. All the Document Ink
Options and separation-specific settings become available so you can
still control the inks that will print on the composite. This is the
setting you use to take advantage of proprietary trapping, screening,
and separations software present in your RIP.
