Exporting the rollover graphic
To use the rollover in a Web
page, you must export it as an HTML or Flash object. Note that HTML has
greater compatibility, since Flash objects only work if the person has
the Flash plug-in installed for his or her browser.
To publish a rollover as an HTML object:
1. |
Select the rollover graphic and choose File > Publish To The Web > HTML.
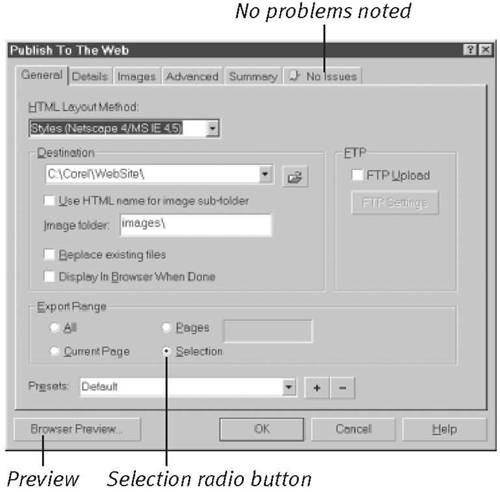
The Publish To The Web dialog box appears (Figure 4). No Issues should be listed.

|
2. |
In the Export Range section, click the Selection radio button.
|
3. |
Optional:
To make sure that the rollover works properly, click the Browser Preview button to test the button in your browser.
|
4. |
In the Destination box, select a folder in which to store the
HTML/JavaScript file. (The three button state images will be stored in
an Images subfolder.)
|
5. |
Click OK to export the rollover as HTML.
|
To publish a rollover as a Flash object:
1. |
Choose File > Publish To The Web > Flash embedded in HTML.
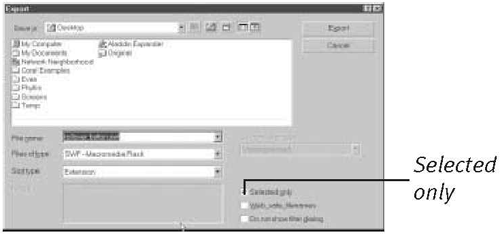
The Export dialog box appears (Figure 5).

|
2. |
Name the object file, click the Selected only check box, and click Export.
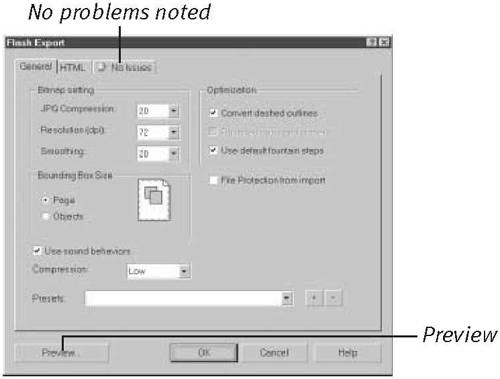
The Flash Export dialog box appears (Figure 6).

|
3. |
No Issues should be noted on the right-most tab. If you want to
make sure that the rollover works properly, click the Preview button.
The button is loaded into your browser.
|
4. |
Click OK to complete the export process.
Two files are generated: an HTML (.htm) file and a Flash (.swf) file of the same name. |