Establishing a deployment server
is the first step to building and deploying images. The term deployment
server is used to refer to the computer you will be using to build,
customize, and deploy your deployment images. Some technicians use their
personal workstation or lab computers for this process. However, this
is not always best because workstations and lab computers tend to be
used for several purposes and may need to be reloaded on a regular
basis. Consider the fact that you will probably deploy images after your
migration as a weekly (or even daily) management task to correct
problem workstations. If you have established a Windows Deployment
Services (WDS) server, or are using the Microsoft Deployment Toolkit
(a.k.a. BDD), a distribution share is established as part of their
configuration and makes the most logical location for a deployment
server. Consider this when selecting a system for this purpose; you can
save a considerable amount of time if you don't have to reinstall the
deployment tools and utilities on a regular basis.
When selecting a
deployment server, you must keep a few things in mind. First, you want
to make sure that the server has sufficient RAM. You will be loading
several tools and Windows components on the server, and running low on
RAM can slow down the process. Because this server will most likely also
be used to distribute your images, larger amounts of RAM will provide
for more file caching and thus faster imaging to multiple clients. It is
recommended that you select a system with at least 1GB of RAM for
testing and smaller deployments, while medium to large deployments are
better suited for computers with at least 2GB of RAM. It is also
important to plan for sufficient disk space. We recommend that the
system have at least 60GB of free disk space dedicated to image testing
and deployment. Again, larger deployments or those organizations
supporting a large number of thick images may definitely require more
space — so plan accordingly.
The deployment server may
not be a server at all. It may be a workstation, especially during the
testing phases or if your organization already has a deployment server
and you are not allowed local access.
Keep in mind that if you use
a client operating system, such as Windows XP or Vista, you may run
into issues when you deploy multiple machines at one time. Systems
without a Windows server operating system installed are limited to ten
inbound network connections.
Another recommendation is to use a virtual machine
as a deployment server. A benefit is that the virtual machine can be
configured with the proper tools and utilities and not interfere with
the normal operations of your existing software. Equally important, your
existing software won't interfere with your deployment tools. By
storing the created image on a network share, you have the added benefit
of shutting down the virtual machine until you need to update the
image. In addition, when the machine is reloaded (which we all must do
from time to time), you can save or move your deployment server without
having to completely rebuild it.
Virtual machines
are suitable for many consulting tasks, including image building and
testing. If you haven't used them before, you've certainly heard of
popular tools such as VMware and Microsoft's Virtual PC, both of which
offer free products. If your company has a standard virtual machine
application, follow that standard. Otherwise, you should consider the
free VMware Server product as a feature-rich and capable solution. One of the key
strengths of virtual machines is their portability. To move the virtual
machine from one host computer to another, you typically need to move
only a single file or folder. You can use this to your advantage and
begin building your deployment server now, on your workstation. As the
deployment process proceeds you can then move the deployment server to a
more powerful and secure host server.
If you do not already have a virtualization product installed, download and install VMware Server from the VMware Web site at www.vmware.com/products/server/.
The recommendation is to
install on a Windows Server operating system, but most functions will
run on XP/Vista as well. The reason is that it has a dependency on IIS,
which is included in workstation editions of Windows, so as long as you
have it installed, there should be no problems. While the software is
free, it is necessary to register in order to receive a serial number
via e-mail.
To build and prepare a virtual machine—based deployment server with VMWare Server, perform the following steps:
Launch the VMware Server Console.
NOTE
You can only have
one default Web site running at a time, so if you have a default Web
site running already, it may be necessary to stop it in order to start
the VMware Management Interface Web or configure support for multiple
Web sites.
Click New Virtual Machine to launch the New Virtual Machine Wizard.
Click Next when the Welcome screen is displayed to begin.
Accept the default configuration as "Typical" and click Next to continue.
Next
choose the operating system you will be installing on this Virtual
Machine, such as Windows Server 2008, and click Next to continue.
Depending on how current the version of Virtual Server is, you may not
see your operating system of choice listed. If this is the case, just
choose something close, and you can always update the default settings
such as allocated RAM after the virtual machine is created.
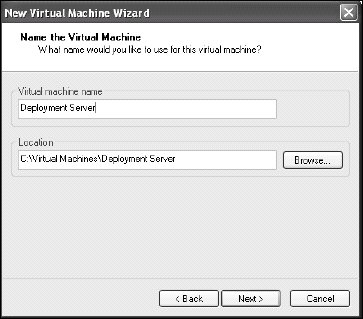
Update the default name to Deployment Server and specify the location where you want the virtual machine files to be stored (see Figure 1).
By default, this path is in the current user profile. In an environment
with roaming profiles in use, you must change this to a folder outside
the user profile, such as a fixed local folder or a shared network
location. When complete, click Next to continue.
Select the desired network connection option and click Next to continue.
In most cases the default option to Use bridged networking is
desirable, which causes the virtual machine to establish its own IP on
the external network of the host computer.
Specify the disk size.
Start
with a 30GB drive and select the option to allocate all disk space now
(this will greatly improve performance of the drive).
Click
Finish to complete the wizard. It is recommended that you create two
drives, one for your images and one for the operating system.
To
add the second hard drive, click Edit virtual machine settings from the
Command pane. When the Virtual Machine Settings window appears, click
the Add button.
On the Welcome screen for the Add Hardware Wizard, click Next to continue.
Select Hard Disk as the hardware type and click Next to continue.
Accept the default option Create a new virtual disk and click Next to continue.
Accept SCSI as the default virtual disk type and click Next to continue.
For
the disk size, enter 100GB and check the option to have the drive split
into 2GB files (Windows does not support a single 100GB file) and click
Next to continue.
For the disk filename, accept the default or enter something more descriptive, such as DeploymentServerDataDrive.vmdk. Click Finish to complete the Add Hardware Wizard.
If
you have a Windows Server 2008 DVD, you can insert it; if you have an
ISO file, you can specify it as source for the virtual CD-ROM drive. To
do so, click Edit virtual machine again from the Commands pane and
select the CD-ROM device from the list. In the Connection area, select
Use ISO image and browse to the path of your image file. Click OK to
close the dialog when complete.
Start
the virtual machine, and the bootable installation media should
automatically begin the installation of Windows Server 2008.
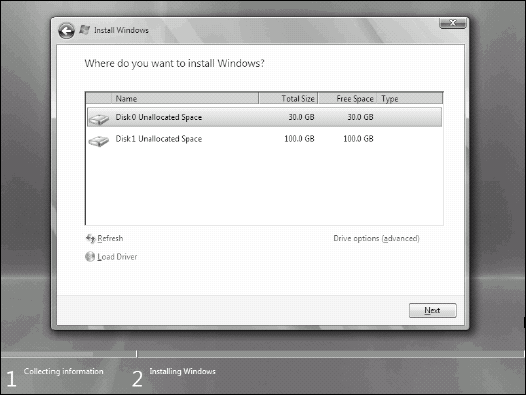
Complete the installation of Windows Server 2008 as you normally would,
specifying the target drive as the 30GB disk created in Step 9 (as
shown in Figure 2).
When installation is complete, ensure the latest service packs and security patches have been applied via Windows Update.
Install your corporate antivirus solution and ensure the latest virus definitions are applied.
Join the domain. Although not required, joining the domain can make the deployment process go much more smoothly.
In Server Manager, choose to Storage =>
Disk Management. Right-click on the 100GB drive marked Unallocated and then choose New Simple Volume.
Allow for the maximum amount of space and assign it drive letter W.
Have the wizard format the drive as NTFS with a default allocation unit
size. A summary screen is provided at the end of the wizard.
Click Finish to begin configuring this drive.
After you have a
functioning virtual machine and operating system, deployment tools may
be installed and configured. The first toolset to use is the Windows
Automated Installation Kit (WAIK).