Turning Linked Notes Thumbnails On or Off
Whenever you work in Linked Notes mode ,
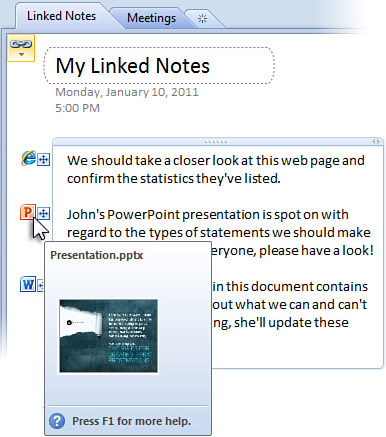
OneNote keeps track of any documents, presentations, or websites you
look at and it automatically links to this information from your notes.
To help you quickly distinguish between multiple types of information,
it includes a small thumbnail image for each link so you can recognize
its content (see Figure 11).

Though generally useful,
these thumbnail images can sometimes prove distracting—for example, when
you’re going through your linked notes to format them and the pop-ups
get in the way of your text.
To suppress the thumbnail images that may repeatedly appear, do the following:
1. | Click the File tab and then click Options.
|
2. | In the OneNote Options dialog box, click the Advanced category on the left side.
|
3. | On
the right side, scroll down to the Linked Notes heading, and then
uncheck the Save Document Snippets and Page Thumbnail for Better Linking
to the Right Place in the Document check box.
|
4. | Click OK to save your changes.
|
|
Changing the thumbnail display
option will apply to your next new Linked Notes session that you
initiate in OneNote 2010. If you turn this option off, then create a new
set of Linked Notes, and then turn this option back on again, you will
not see any thumbnail images for the linked notes you previously created
in that session. To ensure that you’ll always have page previews
available from your Linked Notes, remember to turn this option back on
before you start your next Linked Notes session.
|
Customizing or Hiding the OneNote E-mail Signature
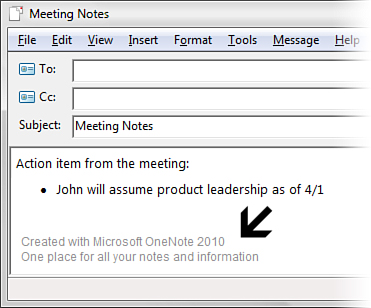
Whenever you send a notes page in e-mail, OneNote appends a signature at the bottom of the last page (see Figure 12). If you don’t like the default text or you want to disable the signature altogether, do the following:
1. | Click the File tab and then click Options.
|
2. | In the OneNote Options dialog box, click the Advanced category on the left side.
|
3. | On the right side, under the E-mail Sent from OneNote heading, do one of the following:
To change the signature text, type over the existing text with new text that you want to use for your signature. To
turn off the signature, uncheck the Add the Following Signature to
E-mail Messages and Web Pages Created in OneNote check box.
|
4. | Click OK to save your changes.
|

|
If
you frequently distribute your notes to other people in e-mail,
consider changing your e-mail signature text to something useful, such
as reminding people of the time and location for your recurring
meetings, or providing contact information for follow-up questions.
Similarly, if you want to mark all notes you send out with a copyright
notice or a disclaimer of some sort, setting your OneNote signature text
will ensure that you’ll never forget to mark your notes accordingly.
|
Changing How Tagged Notes Are Displayed on a Tags Summary Page
When you tag notes to
categorize them or to mark them for follow-up, they will typically
appear in your notes and in your tag search results the same way they
appeared when you created them.
If you frequently tag notes
for follow-up and you use the Create Summary Page option in the Tags
Summary task pane, you can effectively mark tags as read by making them
appear dimmed once you’ve collected them on a summary page.
To do this, follow these steps:
1. | Click the File tab and then click Options.
|
2. | In the OneNote Options dialog box, click the Advanced category on the left side.
|
3. | On the right side, scroll down to the Tags heading and then do the following:
To show note tags as
dimmed after you’ve collected them in a summary page, click the option
labeled Show Original Tags as Dimmed. Unless you check the next option
as well, the dimmed original versions of the tags will not appear in
subsequent tag searches in order to avoid duplicate search results. Additionally,
you can select the check box labeled Show Dimmed Tagged Notes in the
Tags Summary Task Pane. This will include any previously searched (and
now dimmed) note tags in your next search. With this option, their
dimmed state will be your only reminder that you’ve already searched for
these tags previously and that your Tags Summary search results list
may contain duplicates.
|
4. | Click OK to save your changes. |