Curves rocks. I heart Curves. The Curves control is particularly useful for gamma correction.
Curves lets you fully (and visually) control how adjustments are weighted and roll off.
You
can introduce multiple gamma adjustments to a single image or restrict
the gamma adjustment to just one part of the image’s dynamic range.
Some
adjustments can be nailed with a single well-placed point in Curves, in
cases where the equivalent adjustment with Levels might require
coordination of three separate controls.
It’s also worth
understanding Curves controls because they are a common shorthand for
how digital color adjustments are depicted; the Curves interface recurs
in most color correction toolsets.
Curves does, however, have drawbacks, compared with Levels:
It’s not immediately
intuitive and can easily yield hideous results if you don’t know what
you’re doing. There are plenty of artists who aren’t comfortable with
it.
Unlike
Photoshop, After Effects doesn’t offer numerical values corresponding
to curve points, making it a purely visual control that can be hard to
standardize.
In the absence of a histogram, you may miss obvious clues about the image (making Levels more suitable for learners).
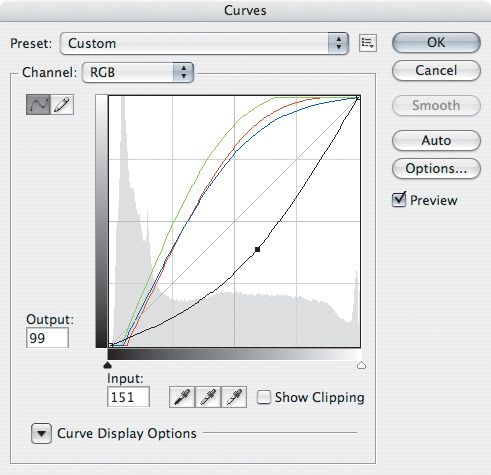
The most daunting thing
about Curves may be its interface, a simple grid with a diagonal line
extending from lower left to upper right. There is a Channel selector at
the top, set by default to RGB as in Levels, and there are some
optional extra controls on the right to help you draw, save, and
retrieve custom curves. To the novice, the arbitrary map is an
unintuitive abstraction that you can easily use to make a complete mess
of your image. Once you understand it, however, you can see it as an
elegantly simple description of how image adjustment works.
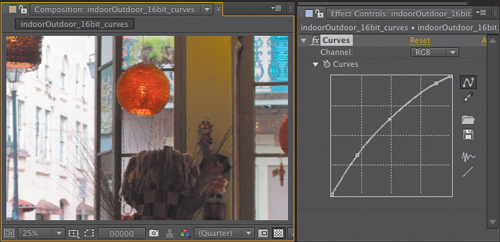
Figure 1 shows the more fully featured Photoshop Curves, which better illustrates how the controls work.
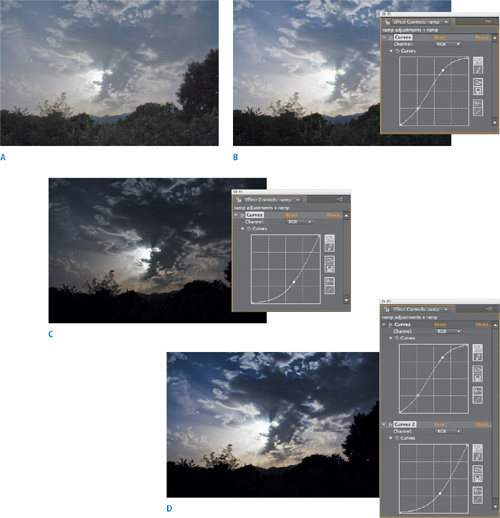
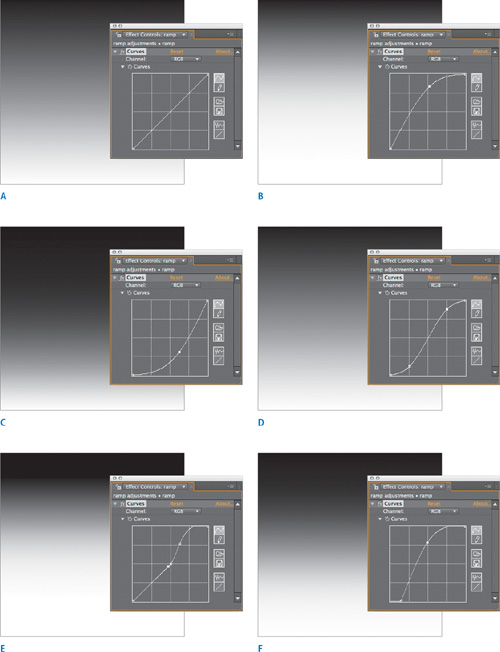
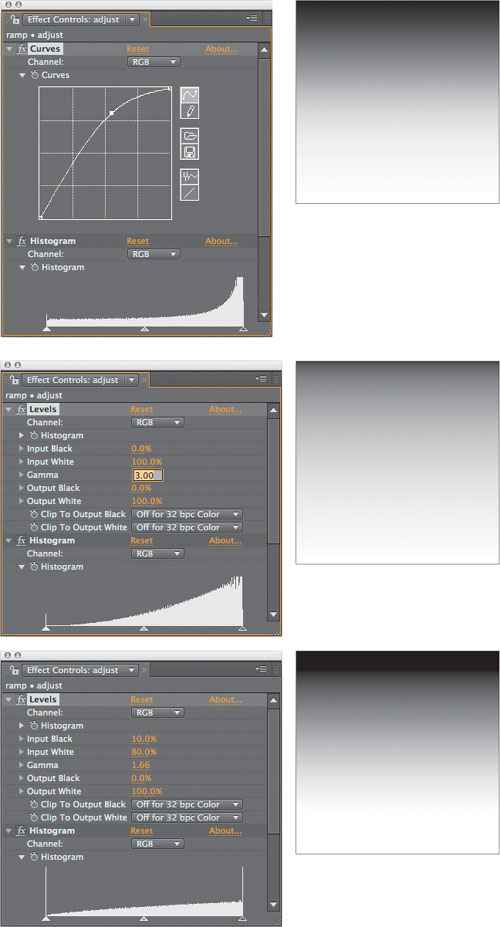
Figures 2 shows some basic Curves adjustments and their effect on an image. Figure 3 uses linear gradients to illustrate what some common Curves settings do. I encourage you to try these on your own.
Most
interesting are the types of adjustments that only Curves allows you to
do—or at least do easily. I came to realize that most of the
adjustments I make with Curves fall into a few distinct types that I use
over and over.
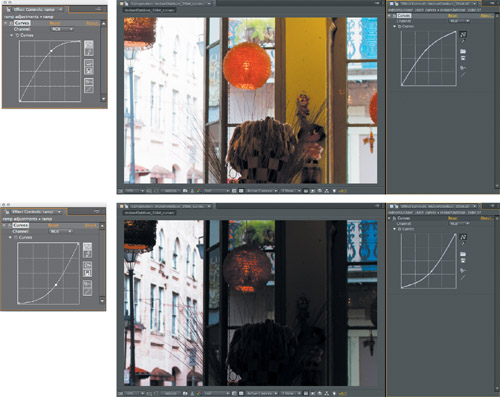
The most common
adjustment is to simply raise or lower the gamma with Curves, by adding a
point at or near the middle of the RGB curve and then moving it upward
or downward. Figure 4
shows the result of each. This produces a subtly different result from
raising or lowering the Gamma control in Levels because of how you
control the roll-off (Figure 5).
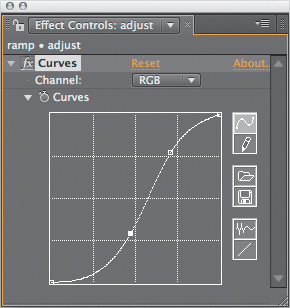
The
classic S-curve adjustment, which enhances brightness and contrast and
introduces roll-offs into the highlights and shadows (Figure 6), is an alternative method to get the result of the double curves in the image labeled D in Figure 2.
Some images need a
gamma adjustment only to one end of the range—for example, a boost to
the darker pixels, below the midpoint, that doesn’t alter the black
point and doesn’t brighten the white values. Such an adjustment requires
three points (Figure 7):
A typical method for
working in Curves is to begin with a single-point adjustment to adjust
gamma or contrast, then to modulate it with one or two added points.
More points quickly become unmanageable, as each adjustment changes the
weighting of the surrounding points. Typically, I will add a single
point, then a second one to restrict its range, and a third as needed to
bring the shape of one section back where I want it.