When you convert an existing
document into a template via the Save As Template command, the entire
document is initially locked. If you attempt to create a document from a
template at this stage, Dreamweaver alerts you that the template
doesn't have any editable regions, and you cannot change anything on the
page. Editable regions are a key element in templates.
1. Marking existing content as editable
Editable regions can
either surround existing content or stand alone without any content. As
noted earlier, in both cases you must give the region a unique name.
Dreamweaver uses the unique name to identify the editable region when
entering new content, applying the template, and exporting or importing
XML.
NOTE
As I noted
previously, each editable region must have a unique name, but the name
need only be different from any other editable region on the same page.
The same name could be used for objects, JavaScript functions, or
editable regions on a different template.
To mark an existing area as an editable region, follow these steps:
Select the text, object, or area on the page that you want to convert to an editable region.
|
The general rule with editable regions is that you need to select a complete tag pair, such as <table>...</table>.
This strategy has several implications. For instance, although you can
mark an entire table, one or more contiguous rows, or a single cell as
editable, you can't mark multiple cells, separated rows, or a column.
Attempting to do so marks a multiple row region. You have to select each
cell individually (<td>...</td>).
In addition, you can select the content of an AP element to be editable
and keep the AP element itself locked (so that its position and other
properties cannot be altered). However, if you select the AP element to
be editable, you can't lock the content.
|
|
Choose Insert => Template Objects =>
Editable Region. You can also use the keyboard shortcut Ctrl+Alt+V
(Command+Option+V), or right-click (Control+click) the selection and
choose Templates =>
New Editable Region from the context menu. Whichever method you choose,
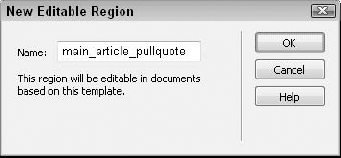
Dreamweaver displays the New Editable Region dialog box shown in Figure 1.
Now,
editable template regions — as well as the other region types — are
just a mouse click away. From the Common category of the Insert panel,
choose the Templates group and click once on the Editable Region icon.
You can also drag the icon over the selected text. Either action brings
up the New Editable Region dialog box.
Enter a unique name for the selected area. Click OK if you're finished, or click Cancel to abort the operation.
|
Although you can use spaces
in editable region names, some characters are not permitted. The illegal
characters are the ampersand (&), double quote ("), single quote ('), and left and right angle brackets (< and >).
|
|
Dreamweaver outlines the selection with the color picked in Preferences on the Highlighting panel, shown if View  Visual Aids
Invisible Elements is enabled. The name for your newly designated
region is displayed on a tab marking the area; the region is also listed
in the Modify
Templates submenu. If still selected, the region name has a checkmark
next to it in the Templates submenu. You can jump to any other editable
region by selecting its name from this dynamic list.
Visual Aids
Invisible Elements is enabled. The name for your newly designated
region is displayed on a tab marking the area; the region is also listed
in the Modify
Templates submenu. If still selected, the region name has a checkmark
next to it in the Templates submenu. You can jump to any other editable
region by selecting its name from this dynamic list.
|
Make sure that you apply any
formatting to your text — either by using HTML codes or by using CSS
styles — before you select it to be an editable region. Generally, you
want to keep the defined look of the content, altering just the text; so
make sure that only the text is within the editable region and exclude
the formatting tags. It's often helpful to have both the Code and Design
views open for this detailed work.
|
|
2. Inserting a new editable region
Sometimes it's helpful to
create a new editable region in which no content currently exists. In
these situations, the editable region name doubles as a label
identifying the type of content expected, such as CatalogPrice. Dreamweaver always highlights the entry in the template in a small tab above the region.
To insert a new editable region, follow these steps:
Place your cursor anywhere on the template page without selecting any item in particular.
Choose Insert => Template Objects => Editable Region. Alternatively, click the Editable Region icon on the Templates menu of the Insert panel.
Enter a unique name for the new region. Click OK when you're finished, or click Cancel to abort the operation.
Dreamweaver inserts the new
region name in the document, marks it with a named tab, and adds the
name to the dynamic region list (which you can display by choosing
Modify => Templates).
Two editable regions, one for the Web page's title and one for other <head>
content, are automatically created when you save a document as a
template. The title is stored in a special editable region called doctitle, and the <head> content region is named head.
To change the title (which initially takes the same title as the
template), enter the new text in the Title field of the Document
toolbar. You can also use the keyboard shortcut Ctrl+J (Command+J) to
open the Page Properties dialog box. Finally, you can select View => Head Elements and click the Title icon — with the visible region outline — to enter the new text in the Property inspector.
The head
editable region may not appear very useful during the template creation
phase, but when you begin creating documents based on a template it
really shines. New <meta> tags, CSS style links and rules, and behavior-added JavaScript all take advantage of the head editable region.
3. Creating links in templates
A common problem
that designers encounter with Dreamweaver templates centers on links.
People often add links to their templates and discover that these links
do not work when new pages are derived from the templates. The main
cause of this error is linking to a non-existent page or element by hand
— that is, typing in the link, rather than using the Select File dialog
box to choose it. Designers tend to set the links according to their
final site structures, without taking into account how templates are
stored in Dreamweaver.
3.1. Recommended linking technique
There's an easy way to make
sure the links in your template pages are correct. For example, when
creating a template, suppose you have links to three pages — products.htm, services.htm, and about.htm — all in the root of your site. Both products.htm and services.htm
have been created, so you click the Folder icon in the Property
inspector and select those files. Dreamweaver inserts those links as
follows: ../products.htm and ../services.htm. The ../
indicates the directory above the current directory — which makes sense
only when you remember that all templates are stored in a subfolder of
the site root called Templates. These links are correctly resolved when a
document is derived from this template to reflect the stored location
of the new file.
Let's assume that the third file, about.htm,
has not yet been created, and so you enter that link by hand. The
common mistake is entering the pathname as it should appear when it's
used: about.htm. However, because the page is saved in the Templates folder, Dreamweaver converts that link to /Templates/about.htm
for any page derived from the template — and the link will fail. This
type of error also applies to dependent files, such as graphics or other
media.
The best solution is to always
use the Folder or the Point-to-File icon to link to an existing file
when building your templates. If the file does not exist, and if you
don't want to create a placeholder page for it, link to another existing
file in the same folder and modify the link manually.
3.2. Handling special template workflows
There is one
special circumstance in which you would not use the Folder or
Point-to-File icon to do your linking for you. Let's suppose your site
design calls for each page to link to a CSS file in the same folder as
the file itself; a technique like this is used when you want to vary
pages by departments and each department has its own folder. In this
circumstance, linking in the standard template manner wouldn't work
because you're effectively linking to a number of files and not just
one. To accomplish this goal, you'll need to use a special syntax in
your href attribute, like this:
<link href="@@('departmentStyles.css')@@" rel="stylesheet" type="text/css" />
The double @ signs and parentheses characters are generally
used to designate template expressions. Here, they're used to tell
Dreamweaver not to alter the href value. These types of links will obviously need to be coded by hand.
Another variation of the more
typical template workflow is to store your dependent files — such as
images, includes, and CSS style sheets — in the Templates folder.
Dreamweaver novices often take this approach because it makes sense to
them to group all their assets in subfolders immediately below the
current page. Although this is generally a solid practice when creating
sites, it's not the way Templates are intended to work. However,
Dreamweaver is flexible enough to be used this way, but only if you make
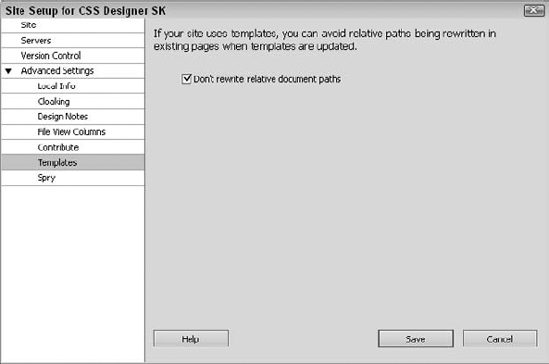
a change to your Site Setup settings. In the Site Setup dialog box,
switch to the Advanced Settings => Templates category (see Figure 2)
and clear the Template Updating checkbox. This action changes this
option from its default state, Don't Rewrite Document Relative Paths, to
one that will rewrite such paths in the Templates folder. Failure to
turn off the Template Updating option will result in broken links to any
dependent files in your Templates folder for any child page.
|
Just to be absolutely
clear: although the Template Updating option makes it possible to store
your dependent files in the Templates folder, it's a bad idea and
strongly discouraged. It is a far better practice to maintain such
assets in a folder off the site root. Items in the Templates folder are
generally not published to the Web and if your images or includes are
stored there, they're likely to be forgotten.
|
|
4. Locking an editable region
Inevitably, you'll sometimes
mark as editable a region that you'd prefer to keep locked. Similarly,
you may discover that every page constructed to date has required
inputting the same content, so it should be entered on the template and
locked. In either event, converting an editable region to a locked one
is a simple operation.
To lock an editable region, follow these steps:
Place your cursor in the editable region you want to lock.
Choose Modify => Templates => Remove Template Markup. The same menu selection is available from the context menu.
|
If you are removing a newly
inserted editable region that contains only the region name — which
happens when an empty editable region is added — the content is not
removed and must be deleted by hand on the template. Otherwise, it
appears as part of the document created from a template and won't be
accessible. |