A Smart Object
is a container in which you can embed raster (e.g., PSD, JPEG, TIFF) or
vector (e.g., AI, PDF, EPS) image data from another Photoshop or Adobe
Illustrator file that retains all its original characteristics and
remains fully editable. A Smart Object can be scaled, rotated, and
warped nondestructively without losing original image data. Smart
Objects store source data with the original object, so you can work on a
representation of the image without changing the original—resulting in
one file embedded within another. For example, when an Illustrator Smart
Object is double-clicked in the Layers panel, Photoshop starts
Illustrator and opens a working copy of the artwork. When you make
changes in Illustrator and then save the file, Photoshop automatically
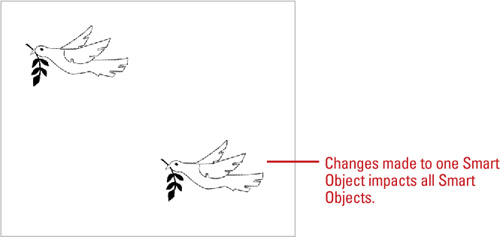
re-rasterizes the file. If you duplicate a Smart Object, Photoshop
stores only one copy of the source data while creating a second instance
of the composite data, thus saving valuable disk space. When you edit
one Smart Object, Photoshop updates all the copies. In addition, you can
link Smart Objects to their layer mask so they can be moved together.
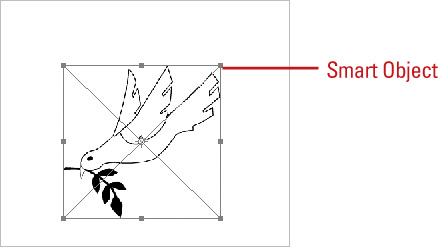
You can create Smart Objects by converting selected layers, pasting
Illustrator data from the clipboard, using the Place command to insert a
file, or using the Open As Smart Object command.
Work with Smart Objects
 Use one of the following to create a Smart Object:
- Click the File menu, click Open As Smart Object, select a file, and then click Open.
- Click the File menu, and then click Place to import into an open Photoshop document.
- Select a layer, click the Layer menu, point to Smart Objects, and then click Convert To Smart Object.
|
 If you use Place to import a Smart Object, use the bounding box to modify the image to the shape you want.
|
 Press Enter (Win) or Return (Mac) to convert the image to a Smart Object (in the Layers panel).
|
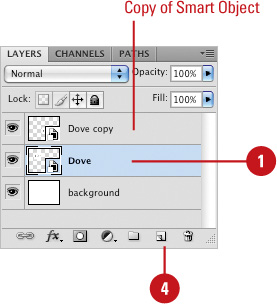
 To make a copy, drag the Smart Object layer to the New Layer button.
|
 Double-click the thumbnail of the original or copy to open the editor for the Smart Object.
|  Make the desired changes to the image, save, and then close the editor window.
|
 When you’re done working with a Smart Object, use any of the following:
You can’t alter pixel data. If you want to use painting, dodging, burning, or cloning tools, you need to convert the Smart Object layer to a normal layer.
You can apply a filter to a Smart Object.
When you apply a filter to a Smart Object, the filter becomes a Smart
Filter. Smart Filters appear in the Layers panel below the Smart Object
layer, where you can show or hide them independently; they are
nondestructive. You can apply any filter, except Liquify and Vanishing
Point.
You can convert a 3D layer to a Smart Object (Extended).
Select the 3D layer in the Layers panel, click the Options menu, and
then click Convert To Smart Object. To re-edit the 3D content,
double-click the Smart Object layer.
|
In Photoshop, nondestructive
editing allows you to make changes to images while keeping the original
image data intact. This flexibility allows you to experiment with
different effects without worrying about harming your original image.
You can perform nondestructive editing in many different areas of
Photoshop. These include: (1) Transforming with Smart Objects, (2)
Filtering with Smart Filters, (3) Adjusting variations, shadows, and
highlights with Smart Objects, (4) Editing in Camera Raw, (5) Opening
Camera Raw files as Smart Objects, (6) Cropping nondestructively, (7)
Masking with layers and vectors, (8) Retouching on a separate layer
using Clone Stamp, Healing Brush, and Spot Healing Brush tools, and (9)
Working with adjustment layers.
|